Gummy Bear Jello Recipe
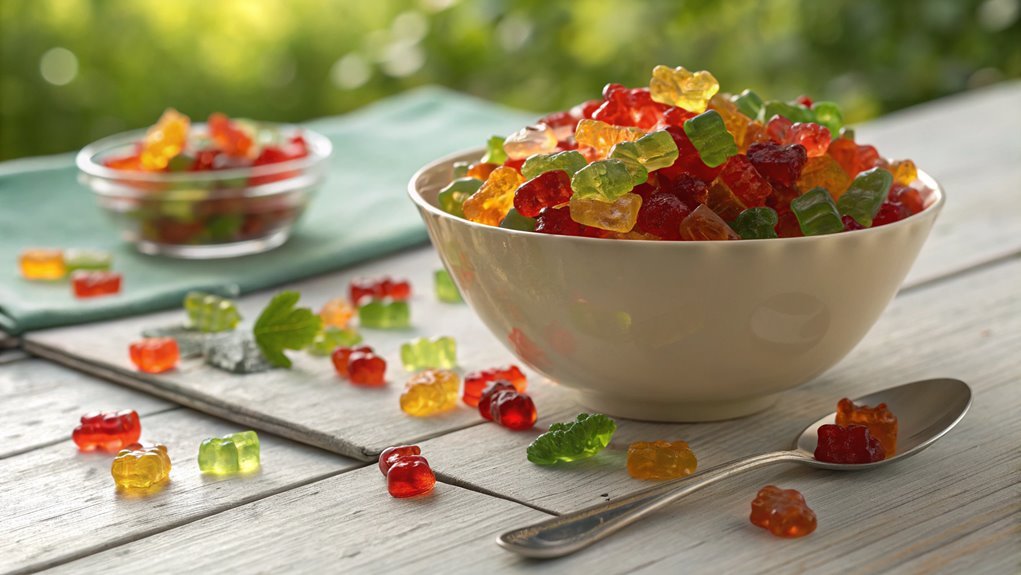
Looking for an easy yet eye-catching dessert? The Gummy Bear Jello combines flavored jello and gummy bears, creating a vibrant treat perfect for any gathering.
It’s not just tasty; the presentation enhances its appeal on the table. Stay tuned for the simple steps and creative serving ideas for this delightful dessert.
Recipe
Gummy Bear Jello is a fun and colorful treat that brings a delightful twist to traditional jello. Perfect for parties, kids’ gatherings, or just as a creative dessert at home, this recipe combines the classic wobbly texture of jello with the chewy goodness of gummy bears.
It’s an easy-to-make dessert that will surely impress guests of all ages and spark excitement with its vibrant colors and playful presentation.
To make Gummy Bear Jello, you’ll need a few key ingredients and some simple steps. The jello is prepared according to package instructions, but with an added twist of incorporating gummy bears for an extra burst of flavor and texture.
This recipe can be customized by choosing your favorite flavors of jello and gummy bears, making it versatile for any occasion. Whether you’re hosting a birthday party or a casual get-together, this jello will be a hit!
Ingredients:
- 1 package of flavored jello (any color/flavor)
- 2 cups boiling water
- 1 cup cold water
- 1 cup gummy bears
- Optional: whipped cream for serving
Now let’s move on to the cooking steps.
Cooking Steps
Now that you’ve got the recipe in hand, it’s time to jump into the fun cooking steps!
First, you’ll prepare the gelatin mixture, then stir in those delightful gummy bears for a burst of color and flavor.
After chilling until set, you can cut your creation into fun shapes and serve it with a dollop of whipped cream—your taste buds will thank you!
Step 1. Prepare Gelatin Mixture
To prepare the gelatin mixture, start by gathering your ingredients: flavored gelatin, unflavored gelatin, and water. This step is essential because the right combination will give your Gummy Bear Jello that delightful, chewy texture everyone loves.
Here’s what you’ll need:
- 1 pack of flavored gelatin (your favorite flavor!)
- 1 pack of unflavored gelatin
- 2 cups of boiling water
- 1 cup of cold water
- A mixing bowl
Once you have everything ready, it’s time to bring it all together. In a mixing bowl, pour in the flavored gelatin and unflavored gelatin.
Next, carefully add the boiling water and stir until both gelatins are completely dissolved. This might take a minute, but it’s worth it!
After that, add the cold water and mix again. You’ll notice the mixture starts to thicken slightly. This is the magic happening!
Make sure there are no lumps left, as it’ll affect the final texture of your Jello.
Excited yet? You should be! You’re just a few steps away from creating a delicious treat that’s perfect for any occasion.
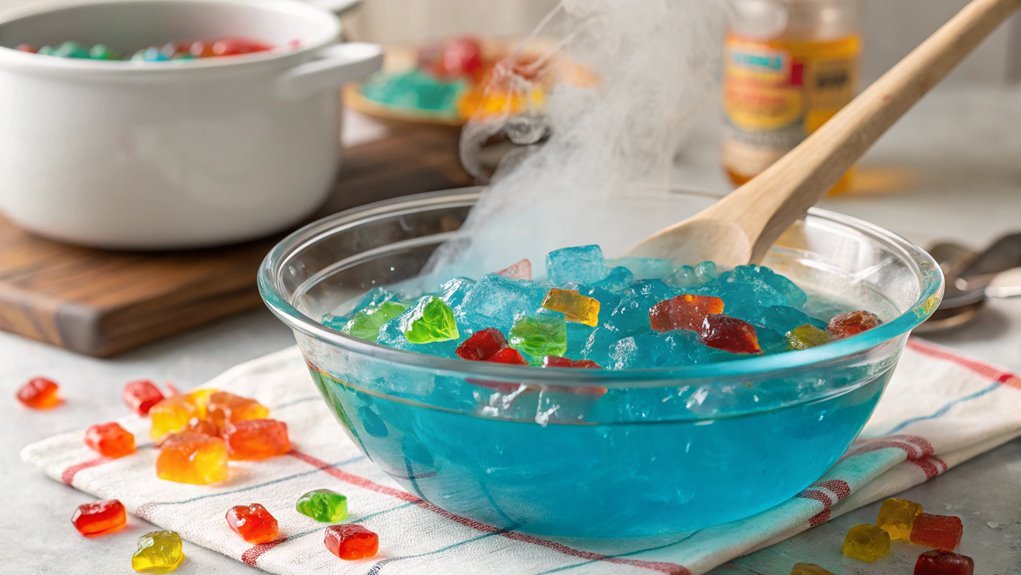
Step 2. Add Gummy Bears to Mixture

Carefully drop your Gummy Bears into the gelatin mixture, guaranteeing they’re evenly distributed throughout. This is the moment when your fun creation starts to come alive! As you add those colorful candies, picture how they’ll transform the Jello into a delightful treat.
Use a spatula or a spoon to gently stir the mixture, but be careful not to crush the Gummy Bears. You want them to retain their shape and chewy texture.
Take a moment to admire how the vibrant colors of the Gummy Bears contrast with the shimmering gelatin. It’s such a visual treat! Mixing them in guarantees that every bite will be bursting with flavor and sweetness. Plus, kids will love digging in and discovering the hidden gummy treasures waiting for them.
Once you’ve mixed them in, make sure everything’s well combined. This will enhance the overall taste and give each serving a little surprise. After all, the more Gummy Bears, the better!
Now you’re ready to move on to the next step in this scrumptious adventure. It’s nearly time to chill your creation, so get excited—your Gummy Bear Jello is just about to be ready!
Step 3. Chill Until Set
Once your mixture is ready, place it in the refrigerator for about 4 to 6 hours, or until it’s completely set. This is the moment where your patience pays off! As the Jello chills, you’ll watch the magic happen. The vibrant colors and the gummy bears will slowly solidify into a delightful treat.
While you wait, here are a few tips to keep in mind:
- Cover it up: Make sure to cover your container with plastic wrap to prevent any odors from the fridge from affecting your Jello.
- Check the temperature: The fridge should be set to a consistent temperature, ideally around 40°F (4°C), for the best results.
- Avoid opening the door: Try not to peek too often! Each time you open the fridge, it can raise the temperature and slow the setting process.
- Use a stable container: Choose a dish that won’t tip over easily while it chills.
- Plan ahead: Consider making your Jello the night before a gathering, so it’s ready to impress when you need it!
Once it’s fully set, you’ll be one step closer to enjoying this fun and colorful treat!
Step 4. Cut Into Fun Shapes
As you’re ready to transform your set Jello into delightful shapes, grab a sharp knife or cookie cutters for a fun twist. The excitement builds as you envision the adorable gummy bear shapes waiting to be revealed!
If you’re using a knife, carefully cut the Jello into squares, triangles, or even fun zigzag patterns. Just make sure to keep your cuts even for a neat presentation.
If you want to take it up a notch, cookie cutters are your best friend! Choose shapes that match the occasion, like stars for a party or hearts for a sweet gesture. Press the cookie cutter firmly into the Jello, and gently wiggle it to release the shape.
You’ll be amazed at how cute and colorful your creations will look!
Once you’ve cut out all your shapes, place them on a serving platter, and admire your handiwork. This step not only adds a playful touch but also makes your Gummy Bear Jello more fun to eat.
The vibrant colors and unique shapes are sure to delight everyone—so don’t hesitate to jump in and enjoy the delightful results of your creative efforts!
Step 5. Serve With Whipped Cream
To elevate your Gummy Bear Jello experience, serve it with a generous dollop of whipped cream. This delightful addition adds a creamy texture that perfectly complements the chewy, fruity goodness of the jello.
It’s not just about taste; it also makes your dessert look extra inviting!
Here’s how to make it even more special:
- Use flavored whipped cream: Infuse your whipped cream with a hint of vanilla, chocolate, or even fruit flavors for a fun twist.
- Add a sprinkle of colorful jello bits: Scatter some finely chopped Gummy Bears or jello pieces on top for a playful touch.
- Drizzle with syrup: A little chocolate or caramel syrup can take your dessert to the next level.
- Garnish with fruit: Fresh berries or banana slices can enhance the flavor and add a pop of color.
- Serve in fun dishes: Use colorful cups or bowls to make the presentation as enjoyable as the taste.
Get creative with your whipped cream toppings and watch your Gummy Bear Jello transform into a crowd-pleaser. Enjoy every bite!
Final Thoughts
While you may have enjoyed making this Gummy Bear Jello, the fun doesn’t have to stop here. This delightful recipe opens up a world of creative possibilities in your kitchen.
You can easily experiment with different flavors, colors, and even the types of gummy candies you use. Imagine mixing in fruity flavors like strawberry or tropical punch, or using gummy worms for a spooky twist!
Don’t forget, you can also customize the presentation. Consider layering different colors of jello for a stunning visual effect.
It’s a fantastic way to impress your friends and family during parties or gatherings. Plus, you can easily make individual servings in cups or fun molds, making each serving special.
Frequently Asked Questions
Can I Use Sugar-Free Gelatin for This Recipe?
Yes, you can use sugar-free gelatin for this recipe. It’ll give you a similar texture and flavor, but be mindful that the sweetness may vary. Adjust your other ingredients accordingly for the best results.
How Long Will the Gummy Bear Jello Last in the Fridge?
Like a treasure chest of sweetness, your creation will last about 5 to 7 days in the fridge. Just keep it covered, and it’ll stay fresh, ready to delight your taste buds whenever you crave it!
Are There Alternative Molds for Shaping the Jello?
Absolutely, you can use various molds for shaping your jello! Consider silicone molds for fun shapes, cupcake liners for individual servings, or even a baking dish for a classic presentation. The options are endless!
Can I Add Fruit or Other Ingredients to the Jello?
Think of your jello as a canvas. You can definitely add fruit or other ingredients to it! Just mix in your favorites before it sets, and watch your creation come to life with vibrant flavors.
Is This Recipe Suitable for Vegan Diets?
This recipe isn’t suitable for vegan diets since it typically contains gelatin, which comes from animal products. You’ll need to substitute with vegan alternatives like agar-agar to make it vegan-friendly and still delicious.
Conclusion
Indulge in a delightful gummy bear jello treat, combining fun flavors and textures. Create colorful cubes to impress your guests and craft unforgettable memories at your next gathering. Gather your ingredients, unleash your creativity, and dive into this dessert adventure. Craft a cheerful centerpiece that everyone will love.