Fruit Kabobs With Yogurt Dip Recipe
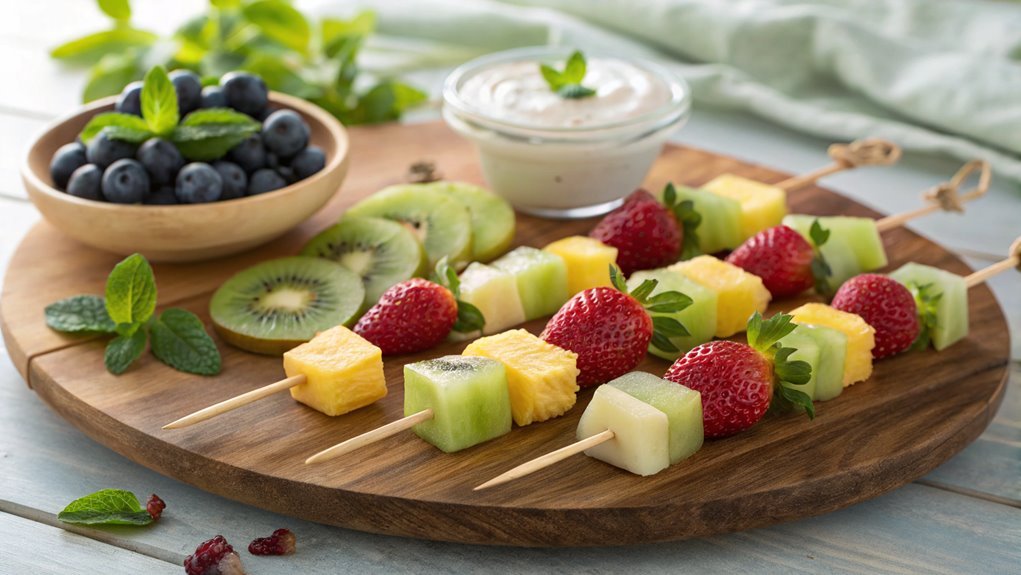
For a simple yet crowd-pleasing snack, try fruit kabobs with yogurt dip. Arrange fresh fruits like strawberries, kiwi, and pineapple on skewers for an eye-catching display.
For the yogurt dip, blend plain yogurt with honey and a dash of vanilla for a delightful complement. Use these tips to ensure your kabobs impress guests or satisfy family cravings.
Recipe
Fruit kabobs are a delightful and vibrant dish perfect for any occasion, whether it’s a summer barbecue, a birthday party, or a healthy snack option.
These colorful skewers aren’t only visually appealing but also packed with vitamins and nutrients from a variety of fresh fruits. The combination of flavors and textures makes each bite a revitalizing treat that can be enjoyed by both kids and adults alike.
Making fruit kabobs is simple and fun, allowing you and your family to get creative with the ingredients. You can customize your kabobs with your favorite fruits or even add a dip on the side for extra flavor.
Whether you prefer juicy berries, sweet melons, or tropical pineapple, the choices are endless. Plus, assembling the fruit on skewers is a great activity to do together, making it an enjoyable experience for everyone.
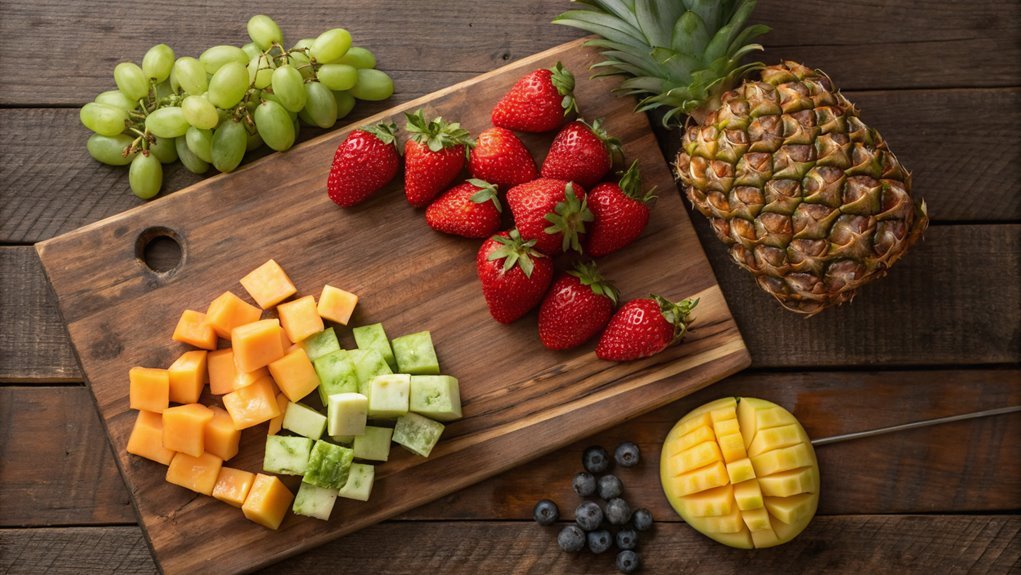
Ingredients:
- Strawberries
- Pineapple chunks
- Grapes
- Melon (cantaloupe or honeydew), cut into cubes
- Kiwi, peeled and sliced
- Blueberries
- Empty skewers or wooden sticks
- Optional: Honey or yogurt for dipping
Now let’s move on to the cooking steps.
Cooking Steps
Let’s get started on making your delicious fruit kabobs!
First, you’ll prepare the fruit for skewering, ensuring each piece is perfect for a tasty bite.
Once you’ve assembled the skewers, don’t forget to add a lovely drizzle of honey or syrup and let them chill before serving—this little touch makes all the difference!
Step 1. Prepare Fruit for Skewering
To create delicious fruit kabobs, start by selecting fresh, ripe fruits that’ll hold up well on skewers. Think about juicy strawberries, sweet pineapple, and vibrant melons. These fruits not only taste fantastic, but they also add beautiful colors to your kabobs.
Once you’ve picked your favorites, wash them thoroughly under cold water to remove any dirt or pesticides.
Next, pat the fruits dry with a clean towel to make sure they’re not slippery on the skewer. For larger fruits like pineapples and melons, you’ll want to slice them into bite-sized pieces. Aim for uniform pieces so they’ll cook evenly if you’re grilling. Strawberries can be halved or left whole if they’re small. Don’t forget to remove any stems or seeds from your fruit!
If you’re using softer fruits, such as bananas or peaches, cut them just before skewering to keep them fresh and prevent browning.
It’s all about finding the right balance of flavors and textures! By carefully preparing your fruits, you’re setting the stage for an amazing fruit kabob experience that’ll impress your friends and family.
Let’s get started on creating something delicious!
Step 2. Assemble Skewers With Fruit
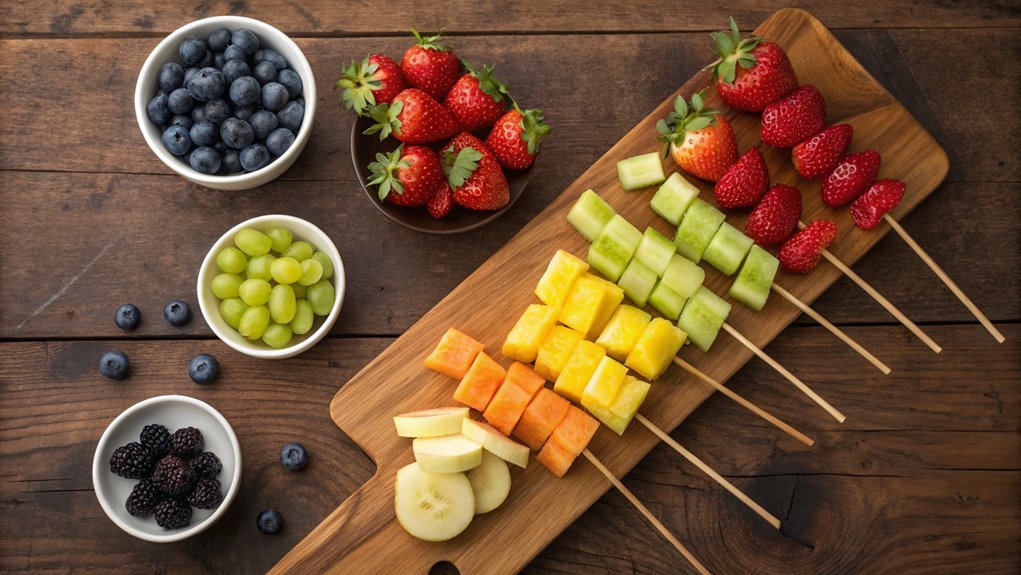
With your freshly prepared fruits in hand, it’s time to start assembling your skewers. Grab your bamboo or metal skewers and get ready to create colorful, delicious treats.
Begin by picking a skewer and starting with a sturdy fruit, like grapes or melon chunks, as your base. This helps stabilize the rest of the fruits as you stack them.
Next, mix and match your fruits for visual appeal and taste! Alternate between different colors and shapes—like juicy strawberries, sweet pineapple, and vibrant kiwi slices. Aim for a balance of textures too; combining soft fruits with crunchy ones adds a delightful contrast.
Don’t worry about making them perfect; the best kabobs are just as beautiful as they’re tasty.
As you assemble, think about how many pieces you want on each skewer, typically around 5 to 7 pieces is a great choice. Be sure to leave a little space at the end for easy handling.
Once you’ve filled your skewers with a fun array of fruits, step back and admire your colorful creations. You’re one step closer to enjoying a fresh and healthy treat!
Step 3. Drizzle With Honey or Syrup
Once your fruit kabobs are beautifully assembled, it’s time to add a touch of sweetness by drizzling honey or syrup over them. This simple step elevates your kabobs from tasty to truly delightful. Choose a good-quality honey, or opt for maple syrup for a different flavor twist. Both choices will add a luscious shine and an irresistible sweetness that pairs perfectly with your fresh fruits.
To drizzle, you can use a spoon, or for a more controlled application, try using a squeeze bottle. Just hold the bottle a few inches above the kabobs and gently squeeze as you move it back and forth. This way, you’ll create an even layer of sweetness that accents each piece of fruit beautifully. Don’t be shy; let your creativity shine as you decide how much honey or syrup to use!
This simple drizzle not only enhances the visual appeal of your kabobs but also balances the natural flavors of the fruit beautifully. Get ready for a burst of flavor in every bite!
With this added touch, your fruit kabobs are truly ready to impress your family and friends. Enjoy the sweet touch they bring to your next gathering!
Step 4. Chill Before Serving
After assembling your fruit kabobs, it’s best to chill them before serving. Chilling enhances the flavors and gives a revitalizing burst with every bite. Plus, it allows the yogurt dip to complement the fruity goodness perfectly.
Here’s why chilling is a game changer for your kabobs:
- Enhanced Flavor: Cold fruit tastes fresher and more vibrant.
- Stability: A chilled kabob holds its form better, preventing any mess.
- Presentation: Serving cold adds a stunning appeal for gatherings.
- Texture: The coolness brings out a crisp texture, making each bite delightful.
- Invigorating Treat: Especially on warm days, cold fruit kabobs are a welcome treat.
To chill your kabobs, simply place them in the refrigerator for at least 30 minutes before serving. This little step makes a big difference, allowing the flavors to meld beautifully.
When you’re ready to impress, reveal those vibrant, chilled kabobs to your friends and family. They’ll be excited to dig in, and you’ll feel proud knowing your thoughtful preparation has paid off.
Trust me, you won’t regret taking this extra step; it’ll elevate your fruit kabob experience to a whole new level!
Step 5. Serve With Fresh Mint
To elevate your fruit kabobs even further, consider serving them with fresh mint. The vibrant, aromatic flavor of mint not only adds a pop of color but also enhances the delightful taste of the fruit.
Imagine taking a bite of sweet, juicy strawberries or revitalizing watermelon, then experiencing a burst of minty goodness. It’s a match made in culinary heaven!
To incorporate fresh mint, start by picking a handful of vibrant leaves. Rinse them gently under cold water to remove any dirt, then pat them dry with a clean towel.
Next, chop the leaves finely for a more intense flavor or leave them whole for a beautiful presentation. You could also create a simple mint garnish for your serving platter. Just place a few leaves alongside the kabobs to make the dish even more inviting.
If you’re feeling adventurous, consider making a mint-infused yogurt dip. Just mix some chopped mint with your yogurt dip for a revitalizing twist!
It’s an easy way to inspire your taste buds and impress your guests. So, don’t skip the mint—give your fruit kabobs that extra touch of freshness they deserve!
Final Thoughts
As you wrap up your fruit kabob-making adventure, it’s important to reflect on the benefits of this simple yet delightful treat. Not only are fruit kabobs visually appealing, but they also pack a nutritious punch while allowing for plenty of creativity.
Whether you’re making them for a party or just as a snack, these kabobs are sure to satisfy your taste buds!
Here are some reasons to love your fruit kabobs:
- Healthy and Invigorating: They’re a great way to enjoy fresh fruit and get your daily vitamins.
- Customizable: Mix and match your favorite fruits to create a kabob that’s uniquely yours.
- Fun for Everyone: Kids and adults alike love the hands-on experience of eating from a stick.
- Quick and Easy: You can whip these up in no time, making them perfect for last-minute gatherings.
- Great with Dips: Pair them with a yogurt dip or your favorite drizzle for an added flavor boost.
Frequently Asked Questions
Can I Use Frozen Fruit for Kabobs?
Yes, you can use frozen fruit for kabobs! Just make sure to thaw them beforehand. Keep in mind, though, the texture might be different, so you may want to use them in creative ways.
How Long Do Fruit Kabobs Last in the Fridge?
You’ll find that fruit kabobs last about three to four days in the fridge. Coincidentally, they taste even better as the flavors meld. Just remember to keep them stored in an airtight container for freshness.
What Yogurt Flavors Pair Best With Fruit Kabobs?
When choosing yogurt flavors, you can’t go wrong with vanilla, strawberry, or coconut. These pair beautifully with various fruits, adding a creamy, flavorful touch that elevates your kabobs and makes every bite enjoyable.
Are There Vegan Alternatives for the Yogurt Dip?
You’ve struck gold! Yes, there are fantastic vegan alternatives for yogurt dips. Try coconut yogurt, cashew cream, or almond yogurt; they’re creamy, delicious, and perfect for enhancing your fruit kabobs without sacrificing flavor. Enjoy!
Can I Prepare Fruit Kabobs in Advance?
Yes, you can prepare fruit kabobs in advance! Just assemble the fruit skewers, cover them in plastic wrap, and store them in the fridge. They’ll stay fresh and delicious for a day or two.