Fruity Popsicle Recipe
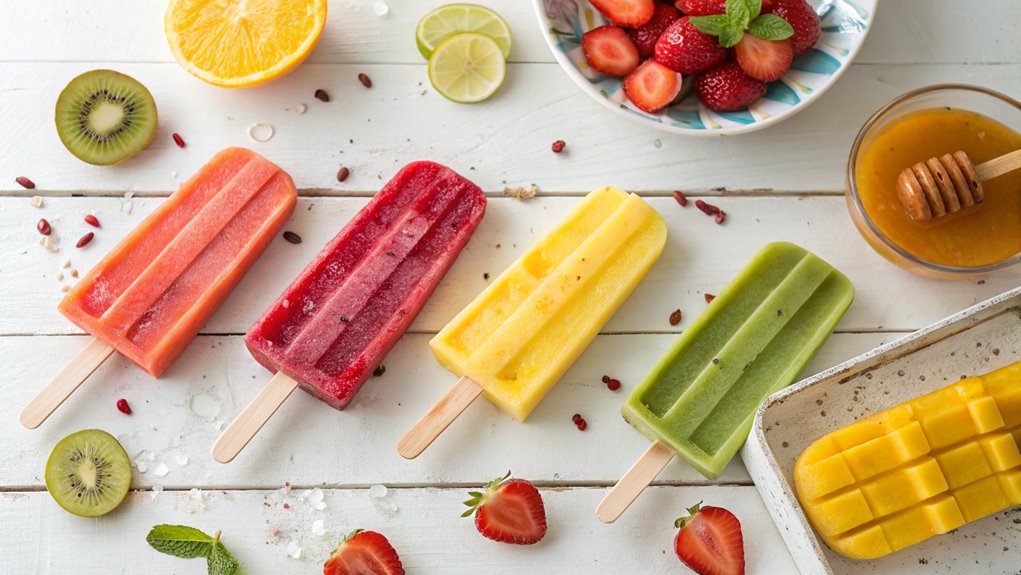
Fruity popsicles offer a sweet indulgence that’s light and refreshing. They are easy to make and allow endless customization with fresh fruits and the right liquid base. You can enhance flavors with surprising ingredients. Ready to explore the creative possibilities in your kitchen?
Recipe
Fruity popsicles are a delightful and invigorating treat that are perfect for hot summer days or any time you crave something sweet and fruity.
They’re incredibly easy to make and can be customized to your liking, allowing you to experiment with various fruits and flavors. With just a few simple ingredients and a bit of patience, you can create your very own delicious popsicles that aren’t only tasty but also healthy!
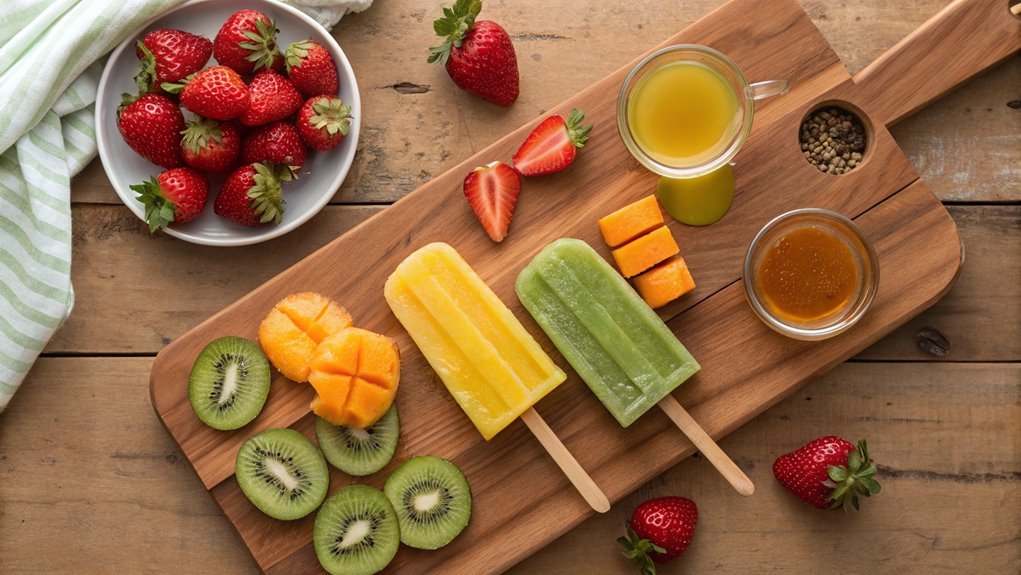
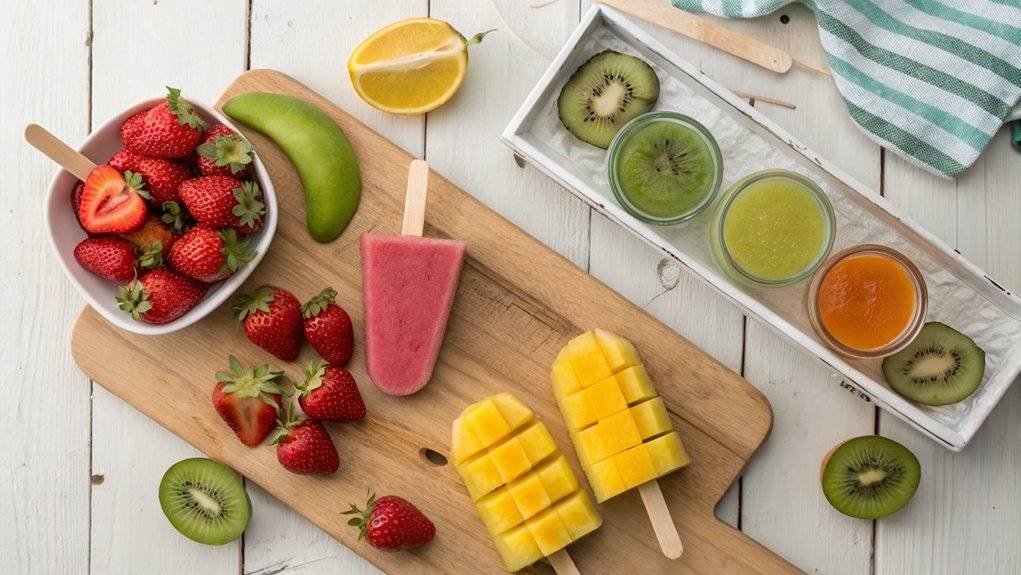
To get started, decide on your favorite fruits. Whether you prefer the sweetness of strawberries, the tartness of kiwi, or the tropical flavor of mango, the options are endless.
You can use fresh, frozen, or even canned fruit, and even mix different fruits for a colorful and delightful combination. To add a bit of creaminess, you might consider incorporating yogurt or coconut milk.
Once you gather your ingredients, it’s time to blend and freeze your way to invigorating popsicle perfection!
Ingredients:
- 2 cups of fresh fruit (strawberries, mango, kiwi, etc.)
- 1 cup of fruit juice (orange juice, apple juice, etc.)
- 1 tablespoon of honey or maple syrup (optional, adjust to taste)
- 1/2 cup of yogurt (optional for creaminess)
- Popsicle molds
- Wooden sticks or plastic popsicle sticks
Now let’s move on to the cooking steps.
Cooking Steps
Now that you have your fruity ingredients ready, it’s time to bring your popsicles to life!
Start by blending the fresh fruit into a smooth puree, adding just the right amount of sweetener to enhance the flavors.
Once your mixture is ready, pour it into molds, freeze until solid, and get ready for a revitalizing treat!
Step 1. Blend Fresh Fruit Puree
To create a delicious fruity popsicle, start by blending fresh fruit into a smooth puree. You can use any combination of your favorite fruits—think strawberries, mangoes, or peaches!
Begin by washing your fruit, removing any skins or seeds if necessary, and then chop them into smaller pieces. This step helps your blender work its magic more easily.
Once your fruit is prepped, toss it into a blender. If you’re using a high-powered blender, you’ll get that perfect creamy texture. Blend on high until the fruit transforms into a delightful, smooth puree. Keep an eye on it and stop to scrape down the sides if needed; you want every bit to be incorporated!
Don’t be afraid to experiment! Mix fruits for unique flavors or add a splash of lemon juice for a zesty kick. The vibrant colors and aromas will fill your kitchen, making it an irresistible experience.
Once you’ve achieved that silky texture, you’re one step closer to popsicle bliss! Pour the puree into your popsicle molds, and get ready to freeze. This step is where the fun really begins—your invigorating treats are just a few hours away!
Step 2. Add Sweetener to Mixture
As you blend your fruit puree to perfection, it’s important to contemplate the sweetness level you want in your popsicles. Everyone has a different taste, so don’t hesitate to experiment! Start with a small amount, then adjust to your preference.
Here’s how you can sweeten your mixture:
- Honey: A natural and tasty option, honey adds a floral note and rich sweetness that pairs beautifully with fruit.
- Agave Syrup: If you’re looking for a milder sweetness, agave syrup works wonders and dissolves easily in your mix.
- Maple Syrup: With its unique flavor profile, maple syrup gives your popsicles an earthy sweetness that’s hard to resist.
Once you’ve selected your sweetener, stir it into your fruit puree until completely blended.
Taste the mixture and decide if it needs a little more sweetness. Keep in mind that as your pops freeze, some of that sweetness may become less pronounced, so don’t hold back!
The joy of making your own popsicles lies in customizing flavors and sweetness just the way you like them. Immerse yourself, and savor the deliciousness you’re creating!
Step 3. Pour Into Molds
Once you’ve sweetened your fruit mixture to perfection, the next step is to pour it into your molds.
Grab your favorite popsicle molds—silicone ones work great for easy removal—and place them on a flat surface. Using a measuring cup or a small ladle, carefully pour the fruity blend into each mold, leaving a little space at the top. This space allows the mixture to expand as it freezes, ensuring your popsicles maintain their shape.
As you pour, take a moment to admire the vibrant colors of your fruit blend. It’s not just a treat for your taste buds; it’s a feast for your eyes, too!
If you want a little fun twist, you can add pieces of whole fruit, herbs, or even a dollop of yogurt to some molds. This gives your popsicles texture and an enticing look.
Once you’ve filled the molds, gently tap them on the counter to eliminate any air bubbles. This little trick helps make your popsicles more solid and creamy.
Now, you’re one step closer to enjoying those invigorating treats! Get excited; the next phase is just around the corner!
Step 4. Freeze Until Solid
Now that your molds are filled and ready, it’s time to freeze them until solid. This is where the magic happens—your fruity mixture transforms into delightful icy treats! Grab your molds, carefully placing them in the freezer, and let them chill for a few hours.
To make the wait a little more fun, think about how invigorating those popsicles will taste on a warm day!
Here’s what you can expect during freezing:
- Bright colors: As they freeze, watch how the vibrant fruit blends create a rainbow of flavors, enticing you with their beauty.
- Invigorating aroma: You’ll catch sweet scents wafting through your kitchen, making your mouth water in anticipation.
- Smooth texture: Once solid, they’ll offer a perfect balance of icy crunch and fruity flavor, a real treat!
After about four to six hours (or overnight for the best results), your popsicles should be fully frozen.
Step 5. Unmold and Serve Popsicles
After waiting patiently, it’s finally time to enjoy your homemade popsicles!
First, grab your popsicle molds from the freezer. If you’re having trouble removing them, run warm water over the outside of the molds for a few seconds. This will help loosen the popsicles while keeping them intact.
Once you’ve successfully unmolded your treats, hold each popsicle by the stick and gently wiggle it until it releases. If you made any adjustments, like adding layers or fun toppings, you’ll be thrilled to see how vibrant and colorful they look!
Now, it’s time to serve them up! Arrange the popsicles on a plate or a serving tray. You can even garnish them with fresh fruit or a sprinkle of coconut for an extra touch.
Gather your family and friends, and let the taste-testing begin! Feel free to cut the popsicles in half for little ones or to share bites with friends.
You’ll love watching everyone’s faces light up with joy as they take that first invigorating bite. Enjoy your delicious creations, and don’t forget to share the recipe so others can experience this fruity delight!
Final Thoughts
As you savor these fruity popsicles on a warm day, you’ll realize how easy it’s to create revitalizing treats that brighten up your summer. Making your own popsicles not only allows you to control the ingredients, but it also releases your creativity. You can experiment with flavors, colors, and textures, ensuring every batch is uniquely yours.
Imagine the delight of tasting:
- Refreshing watermelon and mint – Perfect for hot afternoons, it combines sweet and zesty notes.
- Tropical mango and coconut – A blissful escape to the beach with every creamy bite.
- Zesty lemon-lime with a splash of blueberries – Tart and sweet, it awakens your senses.
These vibrant popsicles can be enjoyed at gatherings, parties, or simply as a delightful afternoon snack. Not only are they delicious, but they’re also a fun way to get your family involved in the kitchen.
Let kids choose their favorite fruits and help with the blending. You’ll be creating lasting memories together. So go ahead, grab your molds and start blending!
You’ll soon be hooked on making your own fruity delights, and your taste buds will thank you. Enjoy every delicious moment!
Frequently Asked Questions
Can I Use Frozen Fruit Instead of Fresh Fruit?
Yes, you can definitely use frozen fruit instead of fresh fruit! Just let it thaw slightly before blending. It’ll still give your popsicles great flavor and texture, making them a delicious frozen treat. Enjoy!
How Long Does It Take for Popsicles to Freeze?
It typically takes about four to six hours for popsicles to freeze completely. If you’re in a hurry, try using smaller molds; they’ll freeze faster, allowing you to enjoy your tasty treat sooner!
What Molds Are Best for Making Popsicles?
Did you know that over 30% of people prefer silicone molds for popsicles? These molds are flexible, making it easier for you to release your frozen treats. Consider their durability and shape options when choosing your perfect mold.
Can I Add Alcohol to My Popsicle Recipe?
Yes, you can definitely add alcohol to your popsicle recipe! Just remember to use it sparingly; too much can prevent them from freezing properly. Experiment with flavors to find your perfect balance and enjoy!
How Can I Prevent Popsicles From Sticking to Molds?
To prevent popsicles from sticking to molds, you can lightly grease the molds with cooking spray or use warm water to gently rinse the outside. It’ll help slide them out easily without breaking. Enjoy!