Easy Chocolate Pudding Recipe
Making an easy chocolate pudding involves blending cocoa, sugar, and milk to create a rich, indulgent dessert. This simple combination of ingredients offers a comforting and satisfying flavor.
To achieve perfect texture and taste, follow the essential steps that can elevate your dessert game. Discovering these secrets will transform your basic ingredients into a luxurious treat.
Recipe
If you’re craving a rich and creamy dessert that’s both simple to make and delicious, this easy chocolate pudding recipe is just what you need. With just a few basic ingredients and minimal cooking time, you can whip up a delightful treat that’s perfect for any occasion.
Whether you’re satisfying a sweet tooth after dinner or preparing a special dessert for guests, this pudding is sure to impress.
The beauty of this chocolate pudding recipe lies in its versatility. You can enjoy it on its own, or elevate it with toppings like whipped cream, chocolate shavings, or fresh fruit.
Plus, it’s a great make-ahead dessert that can be stored in the refrigerator until you’re ready to serve. Get ready to indulge in a velvety chocolate experience that will have everyone coming back for more!
Ingredients
- 2 cups whole milk
- 1/2 cup granulated sugar
- 1/3 cup unsweetened cocoa powder
- 1/4 cup cornstarch
- 1/4 teaspoon salt
- 1 teaspoon vanilla extract
- 2 tablespoons unsalted butter
Now let’s move on to the cooking steps.
Cooking Steps
Let’s get started on making that delicious chocolate pudding!
First, you’ll want to gather all your ingredients so you’re ready to mix and create that creamy goodness.
Once you have everything set up, it’s time to combine the cocoa and sugar, and trust me, the aroma will be irresistible!
Step 1. Gather All Ingredients First
Before you plunge into making your delicious chocolate pudding, gather all the ingredients you’ll need. This step is essential because it sets the stage for a smooth cooking experience. Make sure you have unsweetened cocoa powder, granulated sugar, cornstarch, a pinch of salt, milk, and vanilla extract ready to go. Don’t forget to grab a whisk and a medium saucepan, too!
Having everything on hand means you won’t have to scramble around looking for that elusive ingredient midway through the process. It’s all about keeping the momentum going and enjoying the journey of creating something delightful.
Plus, there’s something incredibly satisfying about laying out your ingredients, almost like a mini celebration before you start cooking.
Once everything is gathered, take a moment to appreciate the rich, chocolatey goodness that’s about to come together. You’ll be amazed at how simple it’s to whip up this treat, and having your ingredients organized will help you feel more confident and ready to create.
Step 2. Mix Cocoa and Sugar Together
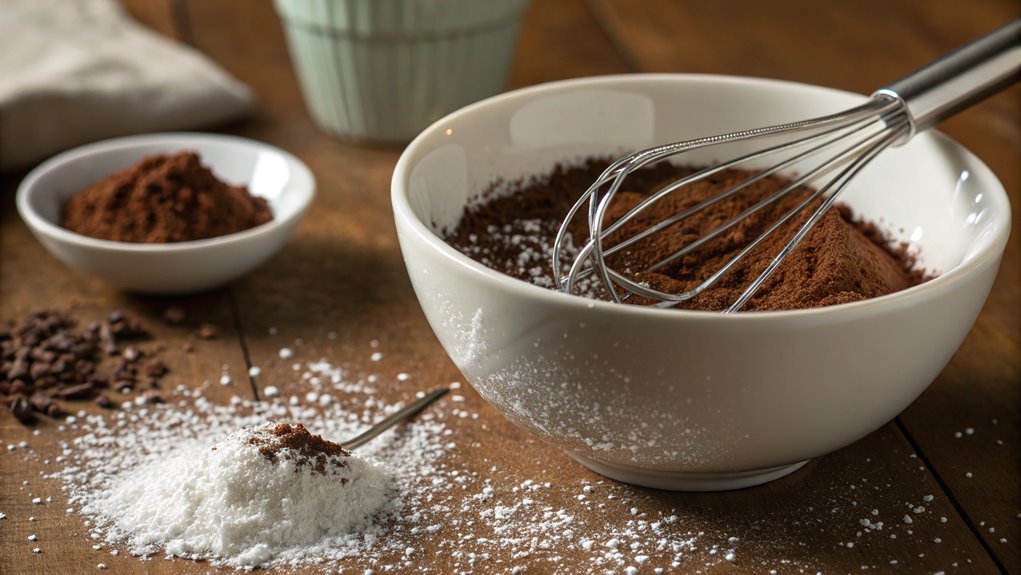
To create a rich chocolate flavor, start by mixing the cocoa powder and granulated sugar together in a medium bowl. This step is vital because it lays the foundation for your pudding’s taste. Use a whisk to combine the two ingredients thoroughly; this guarantees that the cocoa and sugar are evenly distributed. You want a smooth blend that will dissolve beautifully when you add the liquid later.
As you mix, take a moment to appreciate the delightful aroma wafting from the cocoa. It’s a sure sign that you’re on your way to something delicious!
Make certain there are no lumps in the mixture, as this will help your pudding achieve that velvety texture everyone loves. If you find any stubborn clumps, don’t hesitate to break them up with the back of your spoon.
Once the cocoa and sugar are well combined, you’ll feel a rush of excitement knowing you’re one step closer to a homemade treat that’s sure to impress.
Step 3. Add Milk Gradually
As you prepare to create your chocolate pudding, gradually adding the milk is vital for achieving a smooth and creamy texture. Start by pouring a small amount of milk into your dry mixture of cocoa and sugar. Stir it gently with a whisk to combine. This initial addition helps to create a paste, allowing you to dissolve the dry ingredients without clumps forming.
Once you have a smooth base, continue adding the milk slowly, a bit at a time. Keep whisking as you pour, ensuring that the mixture remains smooth and free of lumps. This gradual process not only helps to integrate the flavors but also prevents the pudding from becoming too watery too quickly.
Take your time with this step; it’s essential for the perfect pudding experience. Enjoy the rhythm of whisking and watching the mixture transform. You’ll see the chocolate color deepen and the texture become richer. It’s a delightful moment in your cooking journey!
Keep adding milk until you’ve used the required amount. Now you’re ready for the next exciting step in making your delicious chocolate pudding!
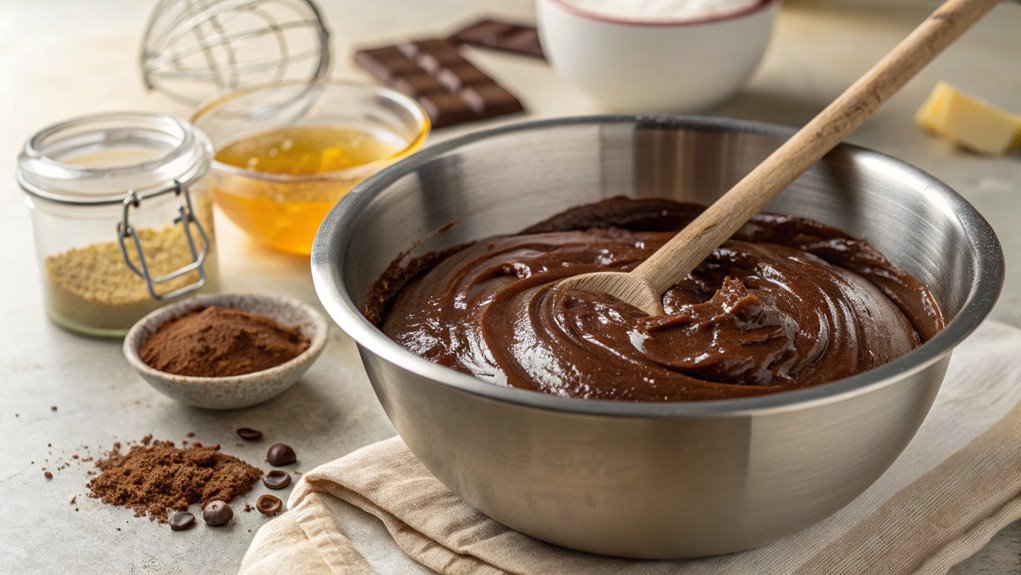
Step 4. Heat Mixture Until Thickened
Now it’s time to heat your mixture until it thickens beautifully. This step is essential for achieving that rich and creamy texture you love in chocolate pudding. Start by placing your saucepan over medium heat, stirring constantly. You want to make certain that everything combines evenly, so keep an eye on it!
As the mixture heats, watch for these signs that it’s thickening:
- You’ll notice small bubbles forming around the edges.
- The mixture will start to look glossier.
- It may slightly pull away from the sides of the pan.
- A spoon should leave a clear trail when you swipe through it.
- The overall consistency will resemble a thick custard.
Don’t rush this process! Patience is key, as it usually takes about 5 to 10 minutes. If you let it cook too long, it could become too thick or even burn, which we definitely want to avoid.
Keep stirring, and feel that excitement build as your pudding transforms into something truly delightful. Once it reaches the desired thickness, you’ll be ready for the next step in your chocolate pudding adventure! Enjoy the process and savor the moment!
Step 5. Stir in Vanilla Extract
Once your mixture has thickened to that perfect custard-like consistency, it’s time to enhance the flavor with some vanilla extract. This step might seem small, but trust me, it makes a huge difference! Grab your bottle of pure vanilla extract, and measure out about one teaspoon.
Now, it’s time to add that magical ingredient to your pudding. Remove the saucepan from the heat, and pour the vanilla into the thickened chocolate mixture. As you do this, you’ll notice the aroma filling your kitchen, making it even more inviting.
Using a whisk or a wooden spoon, stir the vanilla extract in gently but thoroughly. This guarantees that the vanilla is evenly distributed throughout the pudding, giving every spoonful a deliciously rich flavor.
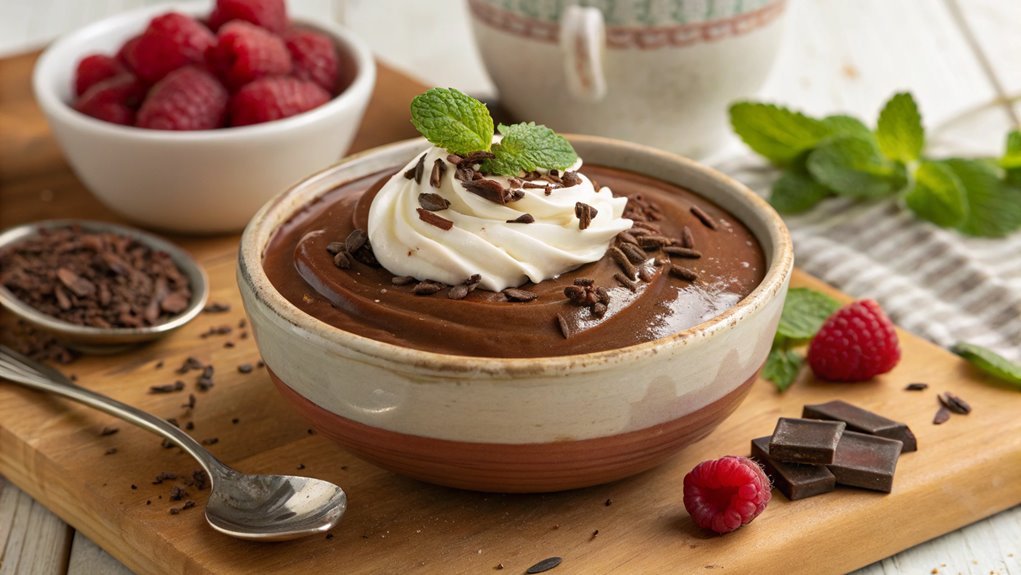
Once the vanilla is fully incorporated, take a moment to admire your creation. It’s looking luscious and glossy! You can enjoy it warm, or let it cool down and set in the refrigerator for an even silkier texture.
Either way, you’re in for a treat! Prepare to delight your taste buds with this simple yet scrumptious chocolate pudding. Happy cooking!
Final Thoughts
While enjoying your homemade chocolate pudding, you might reflect on how simple and satisfying the process was. This delightful treat not only satisfies your sweet tooth but also brings a sense of accomplishment.
You’ve created something delicious from scratch!
As you savor each creamy spoonful, consider these points that highlight why this recipe is a must-try:
- Quick and Easy: You can whip up this pudding in no time, making it perfect for busy days or spontaneous cravings.
- Customizable: Feel free to experiment with flavors or toppings, like whipped cream, berries, or nuts.
- Kid-Friendly: It’s a fantastic recipe to involve kids in the kitchen, creating fun memories together.
- Budget-Friendly: With just a few simple ingredients, you’ll save money while enjoying a delicious dessert.
- Perfect for Any Occasion: Whether it’s a family dinner or a casual gathering, this pudding will impress your guests.
Frequently Asked Questions
Can I Use Dairy-Free Milk for This Recipe?
Yes, you can definitely use dairy-free milk for this recipe. Just choose a substitute like almond, oat, or coconut milk, and adjust the sweetness if needed. It’ll still taste delicious and creamy!
How Long Does Chocolate Pudding Last in the Fridge?
Chocolate pudding typically lasts about three to five days in the fridge. Just make sure you cover it tightly to prevent it from absorbing any odors or flavors from other foods in there. Enjoy!
Can I Make This Pudding Ahead of Time?
Imagine saving a slice of cake for later; you can absolutely make this pudding ahead of time! Just store it in an airtight container, and it’ll stay delicious for about three to five days in the fridge.
Is It Possible to Add Flavors to Chocolate Pudding?
Absolutely, you can add flavors to chocolate pudding! Try incorporating vanilla extract, almond extract, or even a splash of coffee for a unique twist. Experiment with spices like cinnamon or nutmeg to enhance the taste further.
What Are Some Great Toppings for Chocolate Pudding?
You can elevate chocolate pudding with various toppings. Try whipped cream, crushed cookies, fresh berries, or shaved chocolate. Nuts, caramel drizzle, or a sprinkle of sea salt can also add delightful textures and flavors. Enjoy experimenting!
Conclusion
Here’s your shortcut to chocolate bliss in a few easy steps. Why bother with fancy desserts when you can whip up this creamy delight at home?
This simple chocolate pudding is not just a treat; it’s a flavor celebration that will impress everyone. Gather your ingredients, embrace your inner chocolatier, and dive into this delightful recipe.
You’ll not only make pudding but also create sweet memories that last. Happy cooking!