Flourless Chocolate Torte Recipe
A flourless chocolate torte, reminiscent of a chocolate waterfall’s indulgence, boasts a rich and dense texture. Despite its decadence, this gluten-free dessert requires only simple ingredients and basic skills.
With a few straightforward steps, you can create a treat that caters to various dietary needs and impresses your guests. Curious to master this exquisite recipe?
Recipe
Flourless chocolate torte is a rich and decadent dessert that’s perfect for chocolate lovers and those following a gluten-free diet. This indulgent cake boasts a velvety texture and deep chocolate flavor, making it an impressive choice for gatherings or special occasions.
The simplicity of the ingredients allows the chocolate to shine, while the lack of flour results in a dense and fudgy consistency that’s sure to delight your taste buds.
Making a flourless chocolate torte is easier than you might think. With just a few steps and minimal equipment, you can create a stunning dessert that will have everyone asking for seconds.
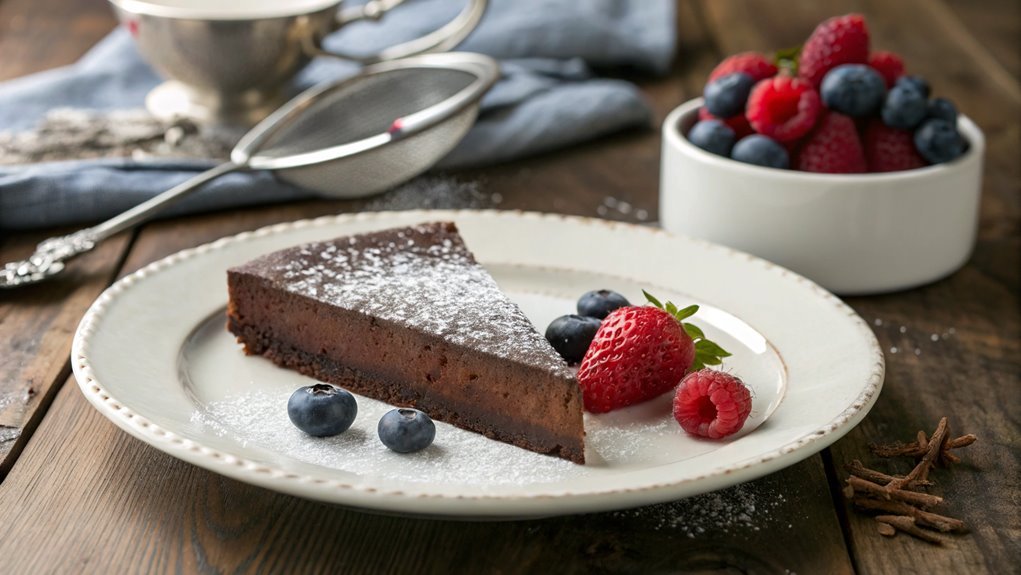
Whether served plain or dressed up with a dusting of powdered sugar and fresh berries, this torte is a showstopper. Now, let’s explore the ingredients you’ll need to create this delightful treat.
Ingredients:
- 8 ounces semisweet or bittersweet chocolate, chopped
- 1/2 cup unsalted butter
- 3/4 cup granulated sugar
- 1 teaspoon vanilla extract
- 1/4 teaspoon salt
- 4 large eggs
- 1/2 cup unsweetened cocoa powder
- Powdered sugar (for dusting, optional)
- Fresh berries (for serving, optional)
Cooking Steps
Now that you have your ingredients ready, it’s time to get cooking!
Start by preheating your oven to 350°F, which is essential for that perfect torte texture.
Melt the chocolate and butter together, and let the delicious aroma fill your kitchen as you prepare to whisk together the eggs and sugar for a rich, indulgent batter.
Step 1. Preheat Oven to 350°F
Preheating your oven to 350°F is an important step in achieving the perfect flourless chocolate torte. This temperature guarantees that your torte bakes evenly, creating that rich, velvety texture that makes this dessert so irresistible.
Before diving into mixing your ingredients, take just a moment to turn on your oven. It may seem like a small task, but it sets the stage for your baking adventure.
While the oven warms up, you can gather your ingredients and prep your baking pan. Having everything ready will streamline the process, allowing you to focus on the fun part—creating your delicious torte!
Preheating is vital because it helps the torte rise beautifully, giving it that perfect lift without any flour.
Make sure to give your oven enough time to reach the right temperature. An oven thermometer can help you verify accuracy if you’re unsure about your oven’s calibration.
Once the oven beeps, signaling it’s ready, you’ll be all set to pour in your luscious batter. Embrace this step; it’s the foundation of a dessert that’s bound to impress everyone at your table!
Happy baking!
Step 2. Melt Chocolate and Butter

Start by breaking your chocolate into small pieces and adding it to a heatproof bowl along with the butter. This step is essential because it helps the chocolate melt evenly, creating that smooth, luscious texture you’re after.
Now, you’ve got a couple of options for melting. You can use a double boiler by placing your bowl over a pot of simmering water, making sure the bottom of the bowl doesn’t touch the water. Stir gently as the chocolate and butter begin to melt, watching as they transform into a glossy mixture.
Alternatively, if you’re short on time, you can melt them in the microwave. Just make sure to heat them in short bursts of 20 to 30 seconds, stirring in between to prevent burning. You want to achieve a silky consistency, so be patient!
Once everything’s melted and combined, take a moment to appreciate the rich aroma wafting from the bowl. It’s pure chocolate bliss!
You’re now ready for the next steps in your flourless chocolate torte adventure. Enjoy the process, and get excited—the best is yet to come!
Step 3. Whisk Eggs and Sugar
Whisking together three large eggs and a cup of granulated sugar creates the foundation for your torte’s airy texture and rich flavor. Start by cracking the eggs into a large mixing bowl, ensuring no shell pieces sneak in. Add the sugar and grab your whisk! Whisk enthusiastically until the mixture turns a pale yellow and thickens; this usually takes about 3-5 minutes. The goal here is to incorporate air, which is essential for achieving that decadent, fluffy torte.
As you whisk, feel the energy building. The combination of eggs and sugar not only sweetens the batter but also acts as a leavening agent, giving your torte its signature lift. If you have an electric mixer, you can use that instead to save time and effort. Just keep an eye on it to avoid overmixing!
Once you’ve reached the right consistency, it’s time to move on to the next steps. This delightful egg-sugar mixture is now ready to be combined with your melted chocolate and butter, creating a deliciously rich treat that’ll impress anyone who takes a bite.
Enjoy this exciting process and get ready for a fantastic dessert!
Step 4. Fold in Dry Ingredients
Once you’ve achieved that perfect egg-sugar mixture, gently fold in your dry ingredients to create a smooth batter. This step is essential, as it combines your cocoa powder and any other dry elements without losing the air you’ve incorporated in the previous step.
Take a spatula and start by scraping down the sides of the bowl. Then, with a soft hand, lift the mixture from the bottom and over the top, turning the bowl as you go. Continue this motion until you see no more streaks of dry ingredients.
It’s important not to overmix, as you want to maintain the lightness of the batter. The goal here is to create a rich, velvety texture that melts in your mouth. If you see clumps, don’t worry; just keep folding until everything is well combined.
You’ll notice the batter becoming thicker and darker, which is a good sign that you’re on the right track! Enjoy this moment of transformation, as your delightful dessert is coming together beautifully.
Once you’ve reached that luscious consistency, you’re ready to move on to the next steps. Happy baking!
Step 5. Pour Batter Into Pan
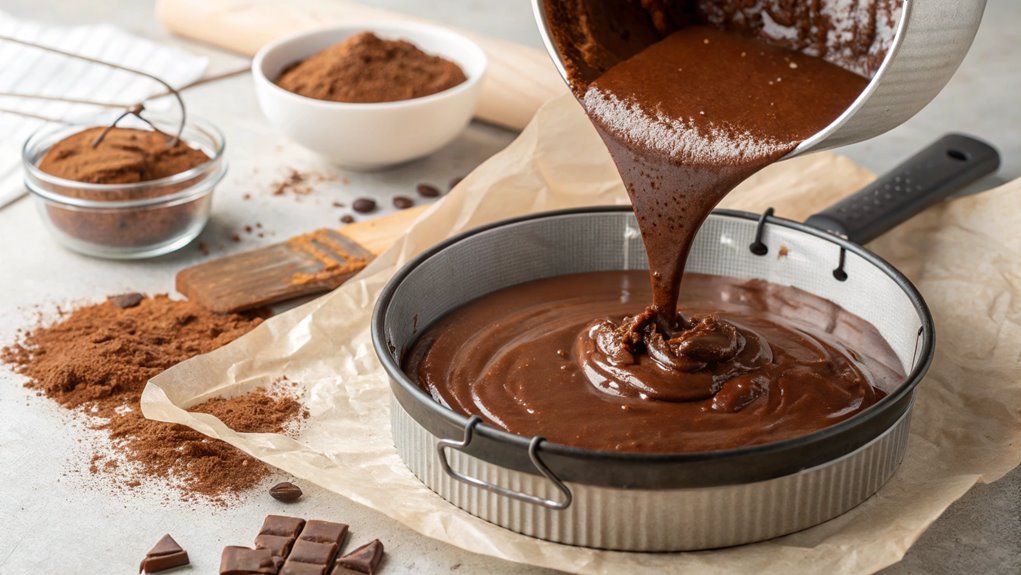
Now that your batter is perfectly mixed, it’s time to pour it into the prepared pan. Grab your 9-inch round cake pan, which you’ve already lined with parchment paper and greased. This step guarantees that your delicious torte comes out smoothly after baking.
Carefully lift the bowl containing the rich, chocolatey batter and tilt it slightly. Start pouring the batter into the center of the pan, allowing it to gently spread toward the edges. Don’t worry if it looks a bit uneven at first; it’ll settle as it bakes.
Use a spatula to scrape out any remaining batter, making sure you don’t leave any of that luscious goodness behind.
Once the pan is filled, give it a gentle tap on the counter. This helps release any air bubbles trapped within the batter, which can lead to a denser texture.
Now, you’re ready for the next step! Your oven should be preheated, waiting for that delightful chocolate aroma to fill your kitchen.
It’s all coming together beautifully, and soon you’ll have a stunning flourless chocolate torte to impress your friends and family. Enjoy the process—it’s all part of the fun!
Final Thoughts
As you savor the rich, velvety goodness of your flourless chocolate torte, you’ll realize just how rewarding this simple yet elegant dessert can be.
It’s a dessert that not only impresses but also brings comfort and joy. With just a handful of ingredients, you’ve created something truly special that can elevate any occasion. Whether it’s a dinner party or a quiet night in, this torte fits perfectly.
The beauty of this recipe lies in its versatility. You can dress it up with fresh berries, a dusting of powdered sugar, or a dollop of whipped cream, allowing you to personalize it to your taste.
Plus, it’s gluten-free, making it a fantastic option for those with dietary restrictions.
Don’t hesitate to share this delightful treat with friends and family; they’ll be amazed at your baking skills!
The process is straightforward and fun, so gather your ingredients, roll up your sleeves, and enjoy every moment in the kitchen.
You’re not just making dessert; you’re creating memories. So, immerse yourself and let the magic of the flourless chocolate torte transform your next gathering into something unforgettable!
Frequently Asked Questions
Can I Substitute Dark Chocolate With Milk Chocolate?
You can substitute dark chocolate with milk chocolate, but the flavor and texture will change. Milk chocolate is sweeter and creamier, so adjust the sugar and other ingredients to achieve your desired result. Enjoy experimenting!
How Should I Store Leftover Flourless Chocolate Torte?
You should store leftover torte in an airtight container in the fridge. It’ll stay fresh for up to a week. Just remember to let it come to room temperature before serving for the best taste.
Is Flourless Chocolate Torte Gluten-Free?
Imagine a delicious wave of chocolate melting on your tongue. Yes, flourless chocolate torte is gluten-free! It’s crafted without any flour, making it a perfect indulgence for those avoiding gluten. Enjoy every rich, decadent bite!
Can I Add Nuts or Fruit to the Torte?
You can definitely add nuts or fruit to the torte! Just be mindful of the balance in flavors and textures. Experimenting with ingredients will enhance your dessert and make it even more delicious. Enjoy!
How Long Will the Torte Last in the Fridge?
Tempting torte treats typically stay fresh in the fridge for up to a week. Just store it in an airtight container, and you’ll enjoy delightful bites over several days without losing flavor or texture.
Conclusion
Indulge in a decadent flourless chocolate torte with a simple and rewarding baking process. Each bite melts in your mouth, leaving everyone wanting more, whether served plain or with whipped cream. Gather your ingredients and dive into this delightful chocolate experience; you won’t regret it!