Swedish Princess Cake Recipe
The Swedish Princess Cake is a beloved dessert, with over 35 million consumed annually in Sweden. Its charm lies in the artful layering of sponge cake, raspberry jam, and marzipan. Mastering these elements can turn ordinary ingredients into a show-stopping treat. Ready to learn the key steps to achieve its signature look and taste?
Recipe
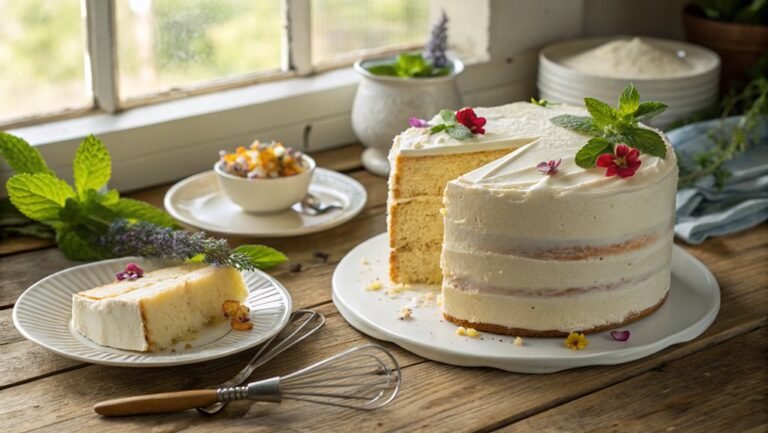
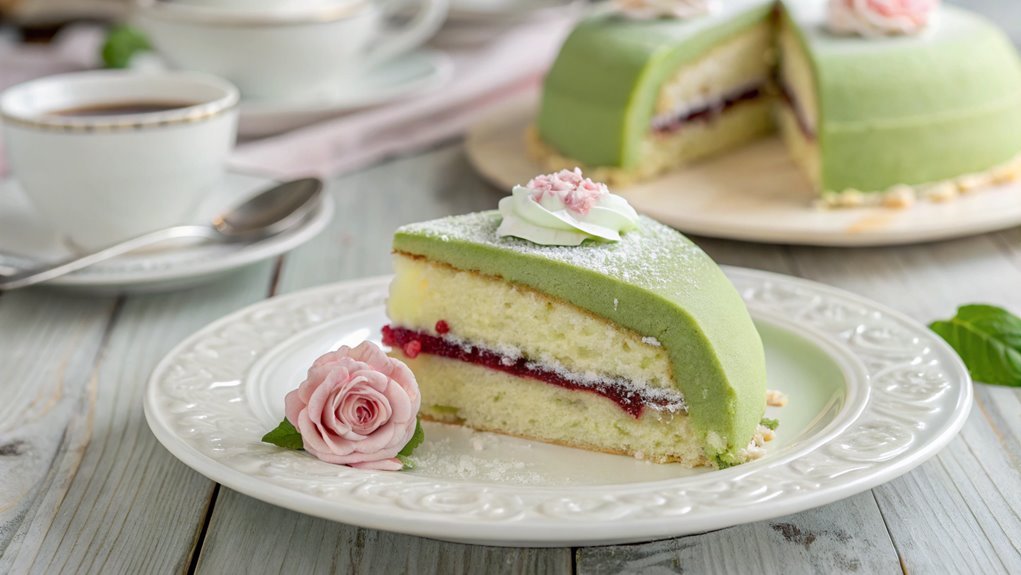
Swedish Princess Cake, or “Prinsesstårta,” is an iconic dessert that embodies the flavors and traditions of Sweden. Characterized by its layers of light sponge cake, creamy filling, and a vibrant green marzipan exterior, this cake isn’t only visually stunning but also delicious.
Traditionally served on birthdays and special occasions, the Princess Cake has become a beloved staple in Swedish bakeries worldwide. The combination of delicate flavors, including raspberry jam, vanilla custard, and whipped cream, creates a perfect harmony that captures the essence of celebration.
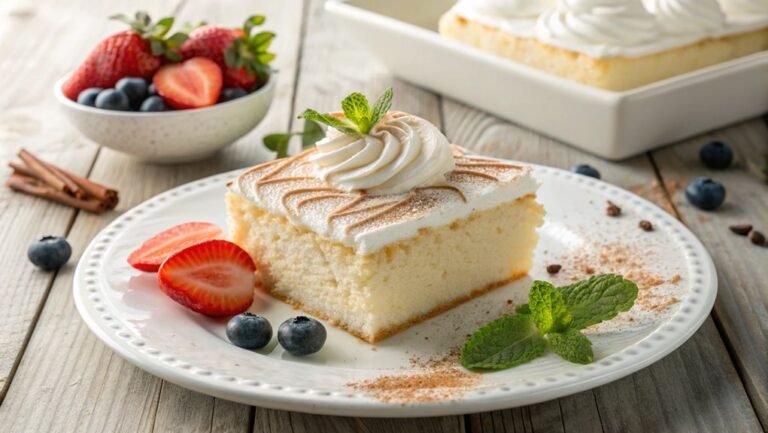
To make your very own Swedish Princess Cake, gather your ingredients and follow the steps to create each component: the sponge cake, pastry cream, and the marzipan covering. The cake is typically layered, starting with a base of sponge cake, followed by a generous spread of raspberry jam and lavish amounts of pastry cream and whipped cream.
Finally, it’s encased in a stunning layer of green marzipan that represents the lush landscapes of Sweden. With a touch of powdered sugar and a marzipan rose on top, your cake will be fit for royalty.
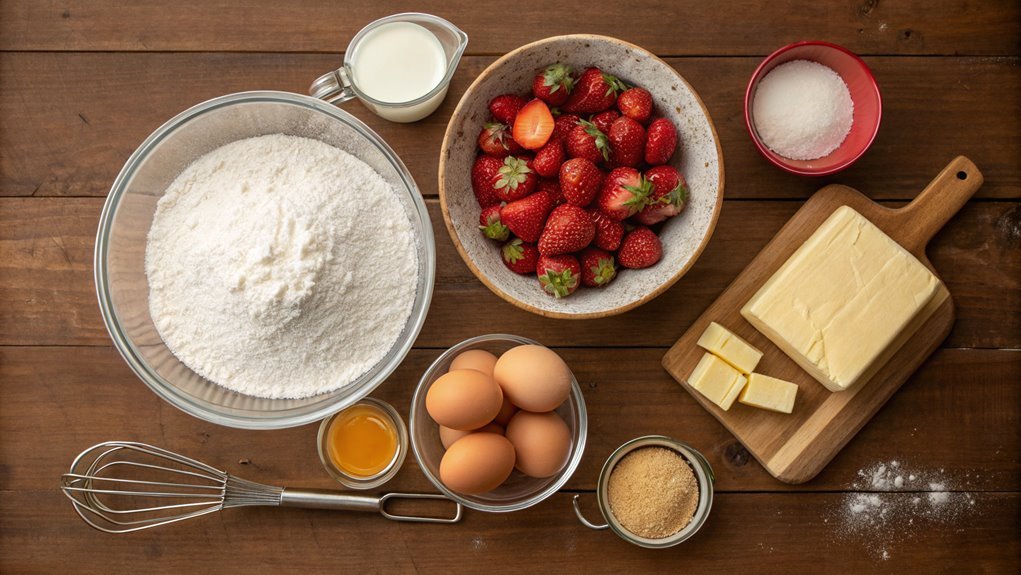
Ingredients:
- 2 cups all-purpose flour
- 1 cup granulated sugar
- 1/2 cup unsalted butter, softened
- 4 large eggs
- 1 tablespoon baking powder
- 1/2 teaspoon salt
- 1/2 cup milk
- 1 teaspoon vanilla extract
- 1 cup raspberry jam
- 2 cups pastry cream
- 2 cups heavy cream, whipped
- 1 pound marzipan (green)
- Powdered sugar for dusting
- Marzipan roses for decoration (optional)
Now let’s move on to the cooking steps.
Cooking Steps
Now that you’ve gathered all your ingredients, it’s time to jump into the exciting cooking steps for your Swedish Princess Cake!
You’ll start by preparing those light and fluffy sponge cake layers, then layer in that zesty raspberry jam filling to add a burst of flavor.
Once you’ve frost with the sweet marzipan cover, don’t forget to decorate it with whipped cream for a truly stunning finish—this cake is sure to impress everyone!
Step 1. Prepare Sponge Cake Layers
To prepare the sponge cake layers, you’ll want to start by preheating your oven to 350°F (175°C).
Next, grab a mixing bowl and combine four large eggs with one cup of granulated sugar. Whisk them together until the mixture is light and fluffy—this will create that wonderful airiness in your sponge cake.
Now, gently fold in one cup of all-purpose flour with a pinch of salt. Be careful not to over-mix; you want the batter to stay airy and delicate.
Once your batter is ready, line two 8-inch round cake pans with parchment paper and lightly grease the sides. Pour the batter evenly into the pans, making sure you smooth the tops.
Bake them in your preheated oven for about 25 minutes, or until they’re golden brown and a toothpick inserted in the center comes out clean.
After baking, let the layers cool in the pans for about 10 minutes, then transfer them to a wire rack to cool completely.
It’s important to let them cool, so they don’t become soggy when you layer them later. Enjoy the sweet smell of baking; you’re closer to creating a delightful Swedish Princess Cake!
Step 2. Add Raspberry Jam Filling
Start by preparing about a cup of raspberry jam, which will add a vibrant and fruity layer to your Princess Cake. It’s the perfect balance to the fluffy sponge, providing a burst of flavor that everyone will love.
Once your jam is ready, set aside your cooled sponge cake layers. Place the first layer on a serving plate, ensuring it’s stable.
Now, grab a spatula and spread a generous layer of raspberry jam over the cake. Don’t be shy; you want that delicious fruitiness to shine through! Layer it evenly, reaching the edges of the cake, so every bite is bursting with flavor.
After that, carefully place the second sponge layer on top, pressing gently but firmly to keep it in place.
Repeat this process if you’ve made more layers. Just imagine how delightful it’ll be when you slice into the cake later on!
Once you’ve assembled all your layers with raspberry jam in between, take a moment to admire your handiwork. This fruity filling not only enhances the taste but also adds a lovely color contrast, making your Princess Cake truly eye-catching.
Now you’re ready for the next exciting step!
Step 3. Frost With Marzipan Cover
With your sponge layers stacked and filled with rich raspberry jam, it’s time to create that signature finish with a marzipan cover.
Start by rolling out your marzipan on a clean surface dusted with powdered sugar. Aim for a thickness of about 1/8 inch—this will create a smooth, elegant finish. Once it’s rolled out, gently lift it onto your rolling pin, then unroll it over the cake, making sure to fully cover the top and sides.
Next, trim the excess marzipan around the base of the cake, using a sharp knife. Make it neat, as this will enhance the overall look.
With your hands, smooth the marzipan around the cake, eliminating any air bubbles. You can also gently press it into the layers below, ensuring a snug fit.
If you want a lovely shine, you can lightly brush the marzipan with water or a simple syrup. This step helps seal in moisture and gives that beautiful finish we all love.
And just like that, you’ve set the stage for the most delightful Princess Cake! You’re one step closer to enjoying this delicious treat. Enjoy every moment!
Step 4. Decorate With Whipped Cream
Once the marzipan cover is beautifully applied, it’s time to add a fluffy layer of whipped cream that brings both taste and elegance to your Princess Cake.
Begin by whipping heavy cream in a chilled bowl. You’ll want to keep whipping until soft peaks form; this usually takes about 3 to 5 minutes. If you’re feeling adventurous, add a tablespoon of powdered sugar and a splash of vanilla extract to enhance the flavor and sweetness.
Now, carefully spread the whipped cream evenly over the marzipan. Use a spatula or a knife to create soft swirls and peaks, giving it a charming, homemade look. Don’t worry about perfection—embrace those little imperfections!
The fluffy texture and rich flavor of the cream will create a delightful contrast to the smooth marzipan and the cake layers underneath.
Once you’ve covered the cake, consider piping some extra whipped cream around the base or on top for added decoration. This simple touch elevates the cake’s appearance and adds even more creaminess to each slice.
Trust me, this elegant finishing touch will impress everyone at your gathering and make your Swedish Princess Cake a true showstopper!
Step 5. Chill Before Serving
Chilling is essential for achieving the perfect texture and flavor in your Swedish Princess Cake. Once you’ve carefully assembled your cake with layers of soft sponge, rich pastry cream, and luscious marzipan, it’s time to let it chill.
Pop it in the refrigerator for at least 4 hours, or ideally overnight. This waiting period helps the flavors to meld beautifully while allowing the cake to set.
When you take it out, you’ll be greeted by a lovely, firm structure that’s easy to slice and serve. The cream and filling maintain their delightful textures, making for a lovely presentation.
Plus, the chill gives the marzipan a slightly firmer texture, enhancing your cake’s overall experience.
Once it’s chilled and ready, feel free to add any final touches, like extra whipped cream or fresh fruit. You’ll love the way each slice looks and tastes!
Serving a perfectly chilled Swedish Princess Cake at your next gathering won’t only impress your friends but also leave them wanting more.
It’s a true labor of love that showcases your baking skills, so don’t skip this vital step—your efforts will be fully rewarded! Enjoy every delicious bite!
Final Thoughts
As you wrap up your baking adventure with the Swedish Princess Cake, remember that the joy is in the process as much as in the delicious final product.
Creating this stunning cake is more than just following a recipe; it’s an opportunity to connect with tradition and share something beautiful with those you love.
Whether it’s a special occasion or just a delightful treat for yourself, every slice tells a story.
Here are three reasons why trying this recipe is worth it:
- Celebrate Tradition: This cake has a rich history, making it a great way to celebrate Swedish culture right in your kitchen.
- Visual Delight: The vibrant colors and delicate layers create a show-stopping centerpiece that will impress friends and family alike.
- Flavor Explosion: Every bite combines soft cake, creamy filling, and fruity jam, giving you an unforgettable taste experience.
Frequently Asked Questions
What Can I Substitute for Almond Paste in This Recipe?
If you need an almond paste substitute, try marzipan or a homemade blend of powdered sugar and ground nuts. You could also use sunflower seed butter for a nut-free alternative that still adds sweetness and flavor.
How Should I Store Leftover Princess Cake?
To store leftover cake, wrap it tightly in plastic wrap or place it in an airtight container. Keep it in the fridge for up to a week, and enjoy it chilled or at room temperature!
Can I Make This Cake Gluten-Free?
Yes, you can make this cake gluten-free by substituting regular flour with a gluten-free blend. Just guarantee that all other ingredients are also gluten-free, and check labels to avoid any cross-contamination. Enjoy your baking!
What Is the Origin of the Swedish Princess Cake?
You won’t believe how delightful the story of the Swedish Princess Cake is! It originated in the early 20th century, created for Swedish royalty. The cake symbolizes celebration and elegance, enchanting generations ever since.
How Long Does Princess Cake Last in the Fridge?
Princess cake can last up to five days in the fridge. Just make sure you store it in an airtight container to keep it fresh and flavorful. You might want to enjoy it sooner, though!