Pumpkin Pie Recipe
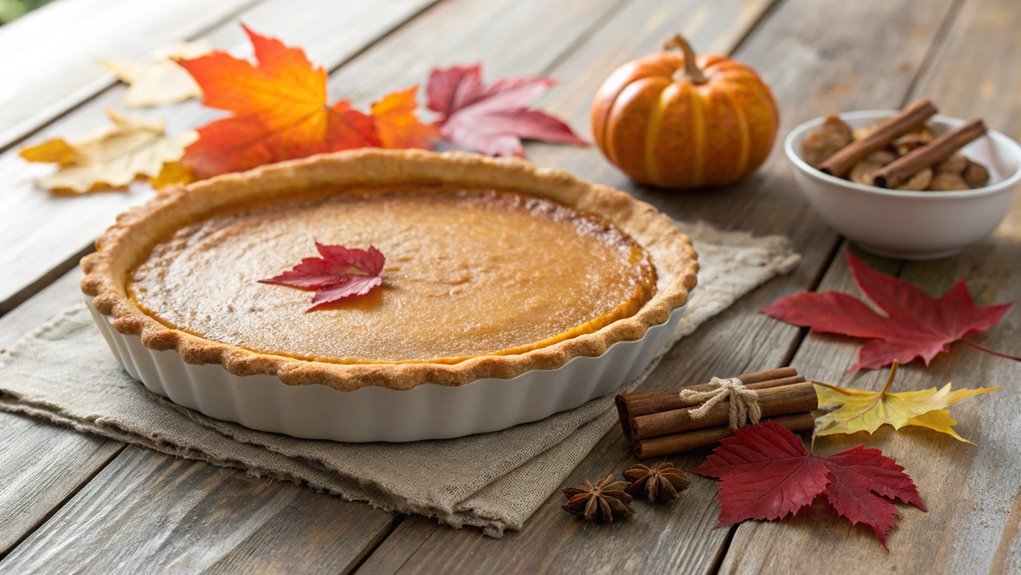
Pumpkin pie epitomizes the ideal fall dessert with its rich blend of creamy pumpkin and warm spices. Achieving the perfect balance of flavors and texture is possible by following a simple method that ensures an impressive and delicious result.
The initial steps are crucial, as they establish the foundation for the entire dish. What do you think comes next?
Recipe
Pumpkin pie is a beloved dessert that embodies the essence of fall with its warm spices and creamy texture. This classic recipe is perfect for holidays like Thanksgiving or any gathering where you want to impress your guests with a homemade treat.
The rich flavor of pumpkin combined with the aromatic spices creates a comforting dessert that’s sure to be a hit.
Making pumpkin pie from scratch is easier than you might think! With just a few simple ingredients and some basic kitchen tools, you can create a delicious pie that rivals any bakery version.
Whether you’re using freshly roasted pumpkin or canned puree, the result is a silky filling nestled in a flaky crust that will make your taste buds dance with joy.
Ingredients:
- 1 (9-inch) unbaked pie crust
- 2 cups pumpkin puree (fresh or canned)
- 1 cup heavy cream
- 3/4 cup granulated sugar
- 1/2 cup packed brown sugar
- 3 large eggs
- 1 teaspoon vanilla extract
- 1 teaspoon ground cinnamon
- 1/2 teaspoon ground ginger
- 1/4 teaspoon ground nutmeg
- 1/4 teaspoon ground cloves
- 1/2 teaspoon salt
Now let’s move on to the cooking steps.
Cooking Steps
Now that you’ve got your ingredients ready, it’s time to bring your pumpkin pie to life!
Start by preheating your oven to 425°F, so it’s nice and hot for baking.
Then, mix your pumpkin with spices, pour that delicious mixture into the crust, and let the magic begin!
Step 1. Preheat the Oven to 425°F
To kick off your pumpkin pie adventure, preheat your oven to 425°F. This step is essential because a hot oven helps create that perfectly baked crust you’re dreaming of. As you turn the dial, take a moment to revel in the deliciousness that’s about to unfold in your kitchen.
While the oven heats up, you can get excited about the wonderful aromas that will soon fill the air. A well-preheated oven guarantees that your pie crust bakes evenly, achieving that golden-brown finish. It’s all about setting the stage for success!
Keep in mind that some ovens can take a little longer to reach the desired temperature, so it’s a good idea to give it a few extra minutes if needed. You don’t want to rush this part; the anticipation is half the fun!
Once your oven hits that magical 425°F, you’ll be ready to jump into the next steps of your pumpkin pie creation. So, get your ingredients and tools lined up and prepare for a delightful journey that will lead to a scrumptious dessert everyone will love. Happy baking!
Step 2. Mix Pumpkin and Spices
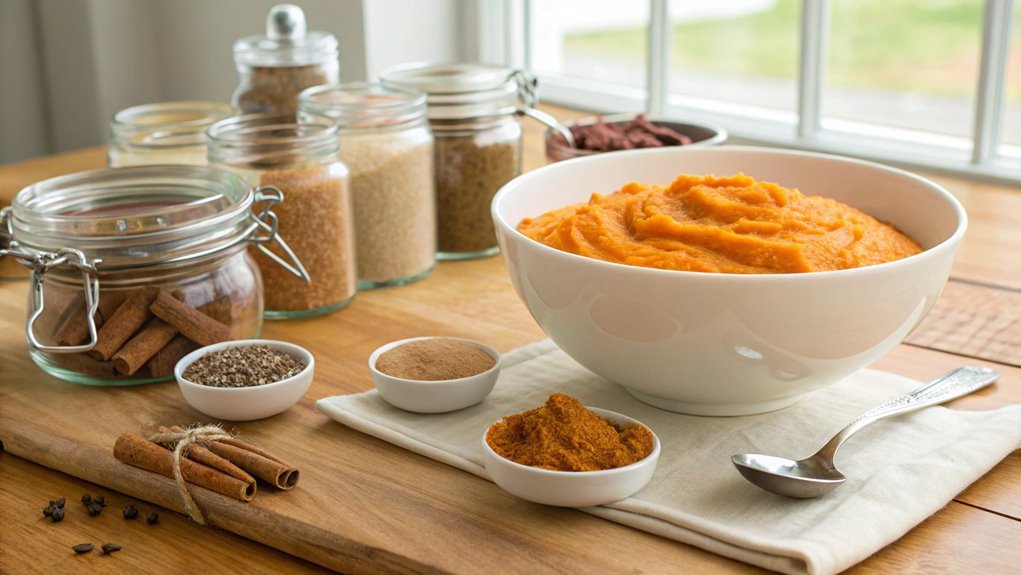
Combine the pumpkin puree with the spices in a large mixing bowl to create a rich, flavorful filling.
Begin by adding the cinnamon, nutmeg, and ginger to the pumpkin. These spices will elevate your pie, filling it with that warm, cozy flavor everyone loves. Don’t forget to add a pinch of salt; it enhances the sweetness beautifully.
Next, crack in the eggs one at a time, whisking them into the mixture until everything’s well combined. The eggs not only bind the filling but also give it that smooth, velvety texture.
Pour in the evaporated milk and give it another good stir. This will add creaminess that makes each bite irresistible.
As you mix, take a moment to savor the aroma wafting from the bowl. It’s a promise of deliciousness to come!
Make sure to scrape down the sides of the bowl so that every bit of pumpkin and spice is blended perfectly.
Once you achieve a smooth consistency, you’re ready to move on to the next step. Your flavorful pumpkin mixture is just waiting to be transformed into a delightful pie!
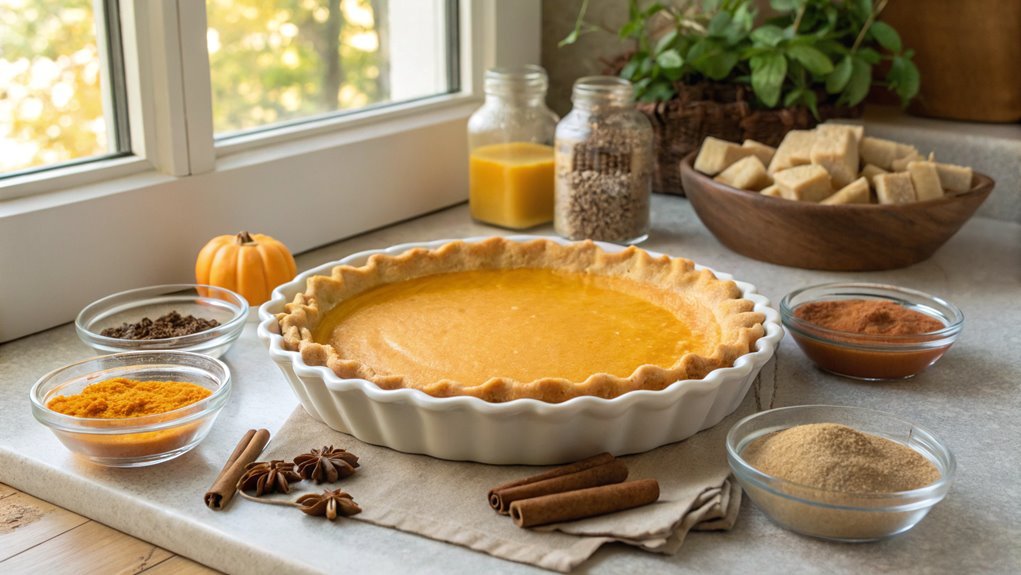
Step 3. Pour Mixture Into Crust
Gently pour your creamy pumpkin mixture into the prepared pie crust, ensuring it fills every nook and cranny. As you do this, take a moment to admire the vibrant orange hue of the filling; it’s a sign of the deliciousness to come!
Use a spatula to scrape every last bit from your mixing bowl, because every drop counts in creating that rich flavor.
Once the filling is poured, give the pie dish a gentle shake. This helps level the mixture, creating a smooth surface that will look stunning once baked. You might notice a few bubbles forming on top—that’s completely normal! If you see any larger bubbles, gently pop them with a toothpick or the edge of a spatula.
Now, take a step back and appreciate all your hard work. You’ve blended the spices perfectly, and now it’s time for this pie to shine.
Make sure the crust edges are neat, as they’ll frame your beautiful pie. With the mixture settled in its crust, you’re just moments away from baking magic.
Get ready to fill your kitchen with the warm, inviting scent of pumpkin pie as it bakes to perfection!
Step 4. Bake for 15 Minutes
Now that your pie is filled and ready, it’s time to bake. Preheat your oven to the desired temperature, and carefully place your pie in the center. This is where the magic starts!
You’ll want to bake the pie for 15 minutes, which allows the crust to begin setting and the filling to start firming up. As it bakes, the sweet aroma of pumpkin and spices will fill your kitchen, creating an inviting atmosphere that makes you enthusiastic for dessert.
Keep an eye on the pie during this initial phase. You want the edges of the crust to start turning a lovely golden brown. If your oven has a window, peek in occasionally to watch the transformation. This is an important step, as it sets the stage for the perfect texture and flavor.
While the pie bakes, take a moment to think about how amazing it’ll taste once it’s done. The anticipation is part of the experience! Enjoy this time; it’s just a short wait before you plunge into the next steps of your pumpkin pie adventure. You’re on your way to a delicious homemade treat!
Step 5. Reduce Temperature to 350°F
After the initial 15 minutes of baking, it’s vital to reduce the oven temperature to 350°F. This step is important for achieving that perfect, velvety texture we all love in pumpkin pie. Lowering the temperature allows the pie to cook evenly without burning the edges.
So, take a moment to carefully adjust your oven dial. Once you’ve set it to 350°F, gently close the oven door. You’ll want to bake the pie for an additional 30 to 40 minutes. Keep an eye on it—when the filling looks set but still has a slight jiggle in the center, it’s ready to come out.
This is where the magic happens! The warm spices mingle beautifully with the pumpkin, creating a heavenly aroma that fills your kitchen. As it bakes, you can almost taste the anticipation.
After baking, let your pie cool completely on a wire rack. This cooling time allows the flavors to deepen and the texture to firm up.
Trust me; the first slice will be worth the wait! Enjoy the delightful experience of sharing your homemade pumpkin pie with family and friends. You’ve earned it!
Final Thoughts
As you savor the last bites of your homemade pumpkin pie, it’s clear that this beloved dessert is more than just a seasonal treat; it brings warmth and joy to gatherings with family and friends. Each slice tells a story, filled with the aromas of cinnamon and nutmeg that embrace your kitchen.
You’ve crafted something special that everyone can enjoy, and that’s a wonderful accomplishment!
Now that you’ve mastered this classic recipe, don’t hesitate to experiment with flavors and spices to make it your own. Maybe you’ll add a hint of ginger or swap in a graham cracker crust for a twist. The possibilities are endless, and each variation can create new memories to cherish.
Sharing this pie is just as important as baking it. Watch as your loved ones gather around, their faces lighting up with delight.
This experience of cooking and sharing is what makes the holidays truly special. So, gather your ingredients, roll up your sleeves, and plunge into baking!
You’ll create not just a dessert, but a cherished experience that lasts long after the last crumb is gone. Go ahead—enjoy every moment of this delicious journey!
Frequently Asked Questions
Can I Use Canned Pumpkin Instead of Fresh Pumpkin?
Yes, you can use canned pumpkin instead of fresh pumpkin. Canned pumpkin’s convenient and often has a consistent texture and flavor. Just make certain you choose pure pumpkin, not pumpkin pie filling, for the best results.
How Do I Store Leftover Pumpkin Pie?
To store leftover pie, you’ll cover it tightly with plastic wrap or aluminum foil, place it in the fridge, and enjoy it within a few days. Your delicious creation deserves to be savored again!
What Spices Are Commonly Used in Pumpkin Pie?
You’ll find that common spices in pumpkin pie include cinnamon, nutmeg, ginger, and sometimes allspice or cloves. These spices bring warmth and depth, enhancing the pumpkin’s natural sweetness and creating a comforting flavor profile.
Can I Make Pumpkin Pie Without Eggs?
Yes, you can make pumpkin pie without eggs! Substitute eggs with ingredients like silken tofu, applesauce, or flaxseed meal mixed with water. These alternatives help bind and add moisture, ensuring your pie maintains its delicious texture.
How Long Does Pumpkin Pie Last in the Fridge?
In the fridge, your pumpkin pie lasts about three to four days. Just make sure it’s properly covered or stored in an airtight container to keep it fresh and delicious for your next slice!
Conclusion
Homemade pumpkin pie is more than just a dessert; it’s a warm embrace of autumn and the joy of gathering with loved ones. Each slice symbolizes tradition and the sweet moments we share.
Roll up your sleeves, embrace the season, and create this delightful treat. You’ll fill both bellies and hearts, making memories that last beyond the last bite. Enjoy every moment!