Rustic Peach Galette Recipe
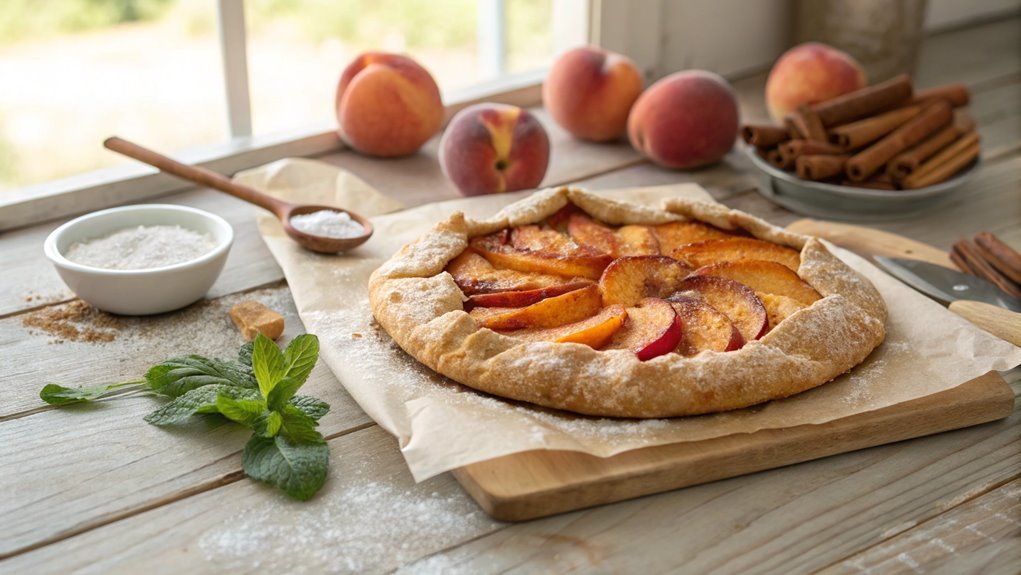
Creating a Rustic Peach Galette means capturing the essence of summer with the simplicity of flaky pastry and juicy peaches. Achieving the perfect balance of flavors and textures involves straightforward yet surprising steps that can elevate your galette.
Begin by gathering your ingredients and focusing on the key steps to ensure your galette stands out. The initial step is crucial for guaranteeing your dessert shines.
Recipe
A rustic peach galette is the perfect dessert for summer, showcasing the sweet, juicy flavors of fresh peaches in a beautifully simple and flaky pastry. This free-form tart isn’t only easy to make, but it also allows the natural sweetness of the peaches to shine through, making it an ideal choice for gatherings or a cozy night in.
The galette’s rustic appearance adds to its charm, giving it a homemade feel that will impress your family and friends.
To begin making your rustic peach galette, you’ll first need to prepare the pastry dough, which is surprisingly simple and forgiving. Once the dough is chilled and rolled out, it serves as a delightful base for the luscious peach filling.
Toss the peaches with a touch of sugar and spice for added flavor, then arrange them on the dough before folding the edges over to create a lovely, rustic presentation. Bake until golden brown, and you’ll have a dessert that’s sure to delight with every bite.
Ingredients:
- 1 ½ cups all-purpose flour
- 1/4 cup granulated sugar
- 1/4 teaspoon salt
- 1/2 cup unsalted butter, chilled and diced
- 4 to 5 tablespoons ice water
- 4 to 5 ripe peaches, sliced
- 1 tablespoon lemon juice
- 2 tablespoons brown sugar
- 1 teaspoon ground cinnamon
- 1 egg, beaten (for egg wash)
- Extra sugar for sprinkling on top
Now let’s move on to the cooking steps.
Cooking Steps
Let’s get cooking and bring that rustic peach galette to life!
Start by preheating your oven to a warm 375°F, which will create the perfect environment for baking.
Once that’s set, slice your peaches thinly, arrange them beautifully on the dough, sprinkle some sugar and cinnamon, and you’ll be just about ready to bake this delicious treat for 30 minutes of pure bliss!
Step 1. Preheat Oven to 375°F
Preheating your oven to 375°F is an essential step in making sure your rustic peach galette bakes evenly and develops that perfect golden crust. It sets the stage for deliciousness!
While you’re in the kitchen getting ready, take a moment to prepare your workspace. Here’s a quick checklist to help you out:
- Check your oven: Make sure it’s clean and ready for action.
- Turn on the oven: Set it to 375°F and let it preheat while you prepare the filling.
- Use an oven thermometer: If you have one, this guarantees your oven’s temperature is just right.
- Keep an eye on the time: Preheating typically takes about 10-15 minutes, so plan accordingly.
Once the oven reaches that perfect temperature, you’ll know you’re on your way to creating something wonderful.
The heat will help the crust become flaky and golden, while the peaches bubble up, releasing their sweet aroma. Just imagine the satisfying sound of the galette baking away!
Step 2. Slice Peaches Thinly
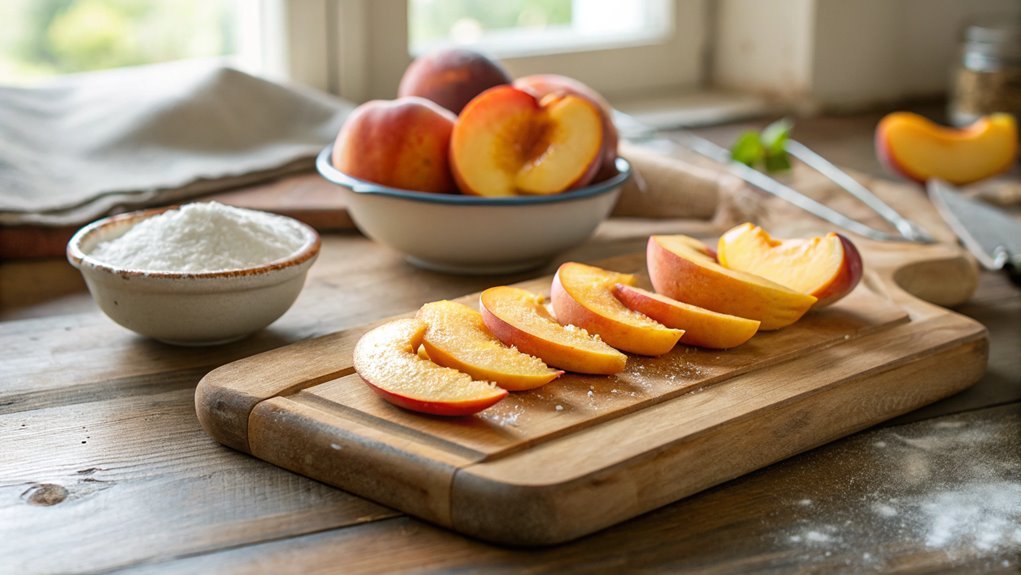
While your oven preheats, it’s time to slice the peaches thinly for your galette. Start by washing the peaches thoroughly under cool water to remove any dirt or residue.
Once they’re clean, place them on a cutting board. If you prefer, you can also peel the peaches for a smoother texture, but leaving the skin on adds a lovely color and flavor.
Using a sharp knife, cut each peach in half and remove the pit. Then, slice each half into thin wedges, about a quarter-inch thick. The thinner the slices, the more they’ll caramelize and meld together while baking, creating that delicious, juicy filling everyone loves.
Don’t worry if they’re not perfect; rustic is the name of the game here!
As you slice, you might want to place the peach wedges in a bowl. This makes it easy to toss them with a little sugar, lemon juice, or spices later on, enhancing their natural sweetness.
Plus, the aroma of fresh peaches will fill your kitchen, making the wait for that galette even more exciting!
Now that you’ve got your peaches ready, you’re one step closer to a delightful dessert. Enjoy the process!
Step 3. Arrange Peaches on Dough
With the peach wedges ready, it’s time to arrange them on the prepared dough. This step is where the magic happens, transforming your galette into a stunning centerpiece! You’ll want to create a beautiful display, so let’s plunge into it.
- Start by placing the peach wedges in the center of the dough, leaving about a 1.5-inch border around the edges.
- Overlap the wedges slightly for a more rustic look; it adds texture and depth to your galette.
- Arrange the peaches in a circular pattern, radiating outwards from the center. This way, every slice will be bursting with juicy flavor!
- Feel free to play around with the arrangement—your galette should reflect your personal style.
As you work, take a moment to appreciate the vibrant colors and sweet aroma of the peaches. Imagine how amazing it’ll taste once it’s baked!
Once you’ve got them arranged just right, you’re one step closer to enjoying this delightful dessert. Trust me, this galette is going to impress everyone at the table, and you’ll feel proud of your creation!
Now, let’s get ready to sprinkle on some sugar and cinnamon!
Step 4. Sprinkle Sugar and Cinnamon
Now that your peaches are beautifully arranged, it’s time to enhance their natural sweetness with a sprinkle of sugar and cinnamon. Grab a small bowl and mix together about two tablespoons of granulated sugar and a teaspoon of ground cinnamon. This delightful combination won’t only elevate the flavor of the peaches but also create a gorgeous caramelization as they bake.
Using your fingers, gently sprinkle the sugar and cinnamon mixture over the peaches, making sure to cover them evenly. Don’t be shy! This is your chance to give your galette that sweet, aromatic touch. The sugar will draw out the juices from the peaches, creating a lovely syrupy layer underneath the crust.
You can adjust the amount of sugar and cinnamon based on your preference—more if you love a sweeter taste, or less if you prefer a more natural fruit flavor. Remember, you want to complement the peaches, not overpower them.
Once you’ve sprinkled the mixture, take a moment to admire your handiwork. The vibrant colors and enticing aroma are just the beginning of an incredible dessert experience. You’re one step closer to enjoying this rustic peach galette!
Step 5. Bake for 30 Minutes

It’s time to bake your rustic peach galette! Preheat your oven to 400°F (200°C) and get ready for the delicious aroma that’ll fill your kitchen.
Once you’ve got your galette assembled and the peaches sprinkled with sugar and cinnamon, it’s time to pop it in the oven. Bake it for about 30 minutes, and here’s what you need to do during that time:
- Set a Timer: Keep an eye on the clock to make sure it doesn’t overbake.
- Check the Crust: Look for a golden-brown crust that’s beautifully flaky and crisp.
- Smell the Magic: Enjoy the sweet scent of peaches and cinnamon wafting through your home; it’s part of the experience!
- Let it Cool: Once it’s done, let your galette cool for a few minutes. This helps the juices set and makes it easier to slice.
After those 30 minutes, your rustic peach galette will be ready to delight your taste buds. Serve it warm, perhaps with a scoop of vanilla ice cream, and watch everyone’s faces light up with joy. Enjoy every bite!
Final Thoughts
As you savor the last bite of your rustic peach galette, it’s clear that this dish offers more than just a delightful taste; it embodies the essence of home-cooked comfort.
This galette captures the sweetness of summer peaches, wrapped in a flaky, golden crust that’s simply irresistible. You’ve brought a bit of warmth and love to your kitchen, and that’s something worth celebrating.
Making this galette isn’t just about following a recipe; it’s about embracing the joy of cooking. Each step, from rolling out the dough to arranging the peaches, invites you to connect with the ingredients and your creativity.
Frequently Asked Questions
Can I Use Frozen Peaches for the Galette?
Yes, you can use frozen peaches for your galette! Just thaw and drain them before using. They’ll still taste delicious, but keep in mind they might release more moisture than fresh peaches during baking.
What Alternative Sweeteners Can I Use?
If you’re trying to cut sugar, consider using honey instead. It adds a delightful flavor and moisture. You can also try maple syrup or agave nectar for a unique twist in your desserts!
How Can I Make the Crust Gluten-Free?
To make the crust gluten-free, you can use a blend of almond flour and tapioca starch. Mix them with a bit of salt and cold butter, then add cold water until it forms a dough.
Can I Prepare the Galette in Advance?
You can certainly get a head start on your galette! Prepare it in advance, but don’t bake it until you’re ready to enjoy. This way, the flavors will be fresh and delightful when served.
What Are Some Serving Suggestions for the Galette?
You can serve the galette warm with a scoop of vanilla ice cream or a dollop of whipped cream. Fresh mint leaves add a pop of color, while a drizzle of honey enhances its sweetness. Enjoy!
Conclusion
You’ll love making this Rustic Peach Galette! Peaches are over 90% water, making them juicy and revitalizing.
This dessert celebrates summer flavors with a crispy, flaky crust and sweet, tender peaches. Impress your family and friends by diving into this delightful recipe.
Gather your ingredients and roll up your sleeves. You won’t regret it—enjoy every bite!
