Fresh Berry Tart Recipe
Discover how a Fresh Berry Tart can elevate your dessert game with ease. This recipe combines a buttery crust, smooth cream cheese filling, and vibrant fresh berries for a stunning centerpiece. Though it sounds sophisticated, it’s surprisingly straightforward to make. Achieve a perfect, silky finish by following these simple steps.
Recipe
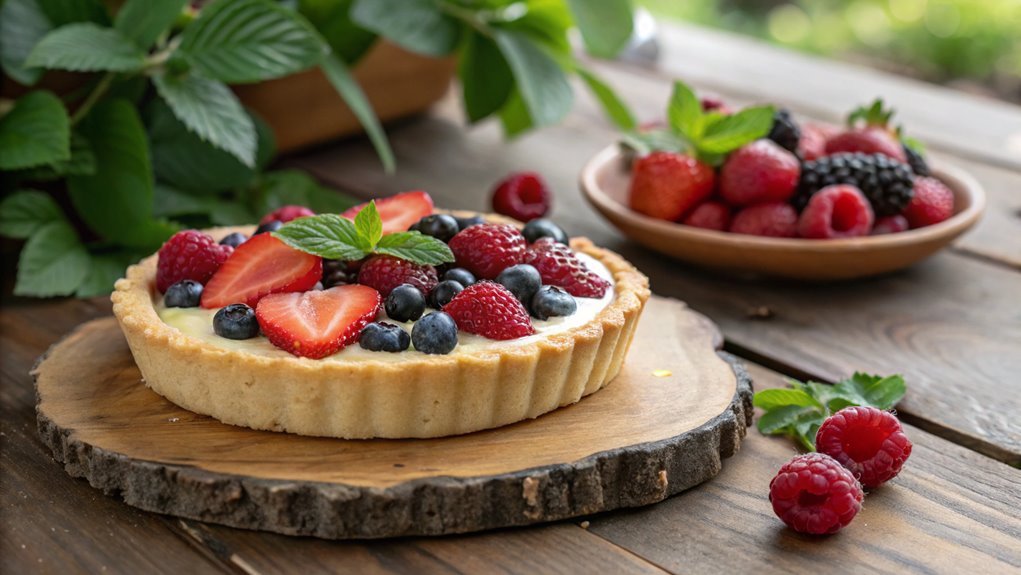
Fresh Berry Tart is a delightful dessert that brings together the sweetness of fresh fruits and the richness of a creamy filling, all nestled within a buttery tart shell.
This recipe is perfect for summer gatherings or any occasion when you want to impress guests with a stunning and delicious dessert. With its vibrant colors and invigorating flavors, the Fresh Berry Tart isn’t just a feast for the palate but also a visual treat.
To create the perfect Fresh Berry Tart, you’ll need to start by preparing the tart shell, which has a crumbly and flaky texture that pairs wonderfully with the creamy filling.
The filling is typically made from smooth cream cheese or mascarpone mixed with a touch of sugar and vanilla, creating a luxurious base for the juicy berries that top it off. Feel free to experiment with different types of berries; strawberries, blueberries, raspberries, and blackberries all work beautifully.
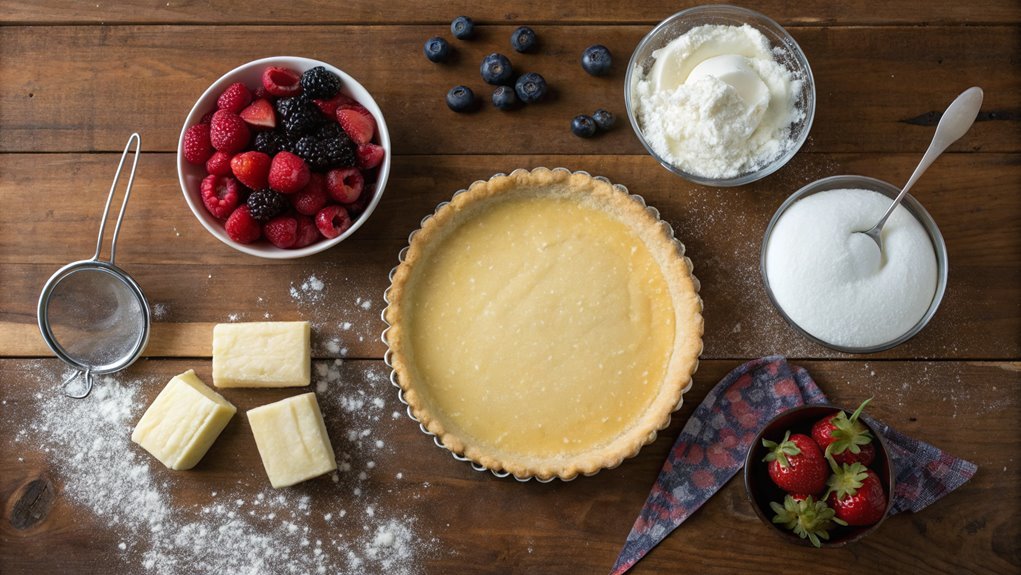
Ingredients:
- 1 prepared tart shell (store-bought or homemade)
- 8 oz cream cheese (softened)
- 1/2 cup powdered sugar
- 1 teaspoon vanilla extract
- 1 cup heavy whipping cream
- 2 cups mixed fresh berries (strawberries, blueberries, raspberries, blackberries)
- Mint leaves (for garnish, optional)
Now let’s move on to the cooking steps.
Cooking Steps
Let’s get started on creating your delicious fresh berry tart!
First, you’ll want to preheat the oven to set the perfect stage for your tart crust, and trust me, that aroma in your kitchen is just the beginning.
As you move through each step, from mixing the cream cheese filling to artfully arranging the berries, you’ll see just how easy and rewarding it’s to whip up this delightful dessert!
Step 1. Preheat the Oven
Preheating the oven is an essential step, and it should be done before you prepare your tart filling. This vital process guarantees that your oven reaches the perfect temperature, allowing your tart to bake evenly and turn golden brown.
Start by setting your oven to 375°F (190°C). While the oven heats up, the delightful aroma of freshly baked goods fills your kitchen, building anticipation for the delicious tart you’re about to create.
Make certain to give your oven enough time to preheat—usually around 10 to 15 minutes should do it. A properly preheated oven creates the ideal environment for your ingredients to come together beautifully. It helps the crust achieve that perfect crispy texture while the filling melds into a luscious treat.
During this time, take a moment to gather your tools and ingredients. Having everything ready will make the whole process smoother and more enjoyable.
Plus, you’ll be well on your way to impressing your family and friends with a stunning homemade berry tart. So, turn on that oven, feel the excitement, and let’s get ready to create something delicious!
Step 2. Prepare the Tart Crust

Start by gathering your ingredients for the tart crust, which typically includes flour, sugar, salt, butter, and an egg yolk. This simple mixture creates a delicious base for your fresh berry tart! You’ll love the process and the delightful aroma that fills your kitchen as you work.
- Softened butter that blends easily with other ingredients.
- A pinch of salt to enhance the sweetness.
- An egg yolk for a rich, golden color.
Now, in a mixing bowl, combine your flour, sugar, and salt. Cut the butter into small cubes and add it to the flour mixture, using a pastry cutter or your fingers to combine until it resembles coarse crumbs. This step is essential for achieving that flaky texture.
Next, add the egg yolk and mix until the dough starts to come together. Don’t worry if it feels a bit crumbly—it’ll be perfect!
Lightly knead the dough on a floured surface until it’s smooth. Press it gently into a tart pan, making sure to cover the sides evenly. Once that’s done, chill it in the fridge while you get excited for the next step in this delicious journey!
Step 3. Mix Cream Cheese Filling
Once your tart crust is chilled and ready, mixing the cream cheese filling is a breeze.
Begin by gathering your ingredients: softened cream cheese, powdered sugar, vanilla extract, and a splash of lemon juice. Softening the cream cheese is key, as it makes for a smooth, luscious filling.
In a large bowl, beat the cream cheese with an electric mixer until it’s creamy and free of lumps. You’ll want to mix it for about two minutes; this will help achieve that delightful texture.
Next, gradually add the powdered sugar, mixing on low speed to prevent a sugary cloud from forming. Once it’s well combined, stir in the vanilla extract and lemon juice for a hint of freshness.
Don’t rush this step—take your time to incorporate everything until the filling is velvety smooth. Taste it! If you’re craving a little more sweetness, feel free to adjust the powdered sugar to your liking.
Congratulations! You’ve just created a fabulous cream cheese filling that’s ideal for your fresh berry tart.
This filling brings a creamy, tangy delight that perfectly complements the sweetness of the berries. Get ready to assemble your masterpiece!
Step 4. Arrange Fresh Berries Artfully
Now that you’ve whipped up your luscious cream cheese filling, it’s time to artfully arrange the fresh berries. This is where your tart truly comes to life, showcasing vibrant colors and textures.
Begin by gently spreading your filling evenly across the crust, creating a perfect canvas for your berries.
Next, let your creativity flow as you select and place the berries. You’ll want to create a visually appealing arrangement that invites everyone to dig in. Think about using:
- Juicy strawberries for a pop of red
- Plump blueberries that add a burst of sweetness
- Ripe raspberries for their lovely texture and tang
Start with the larger strawberries, placing them strategically around the edges. Next, sprinkle in the blueberries, filling in gaps and creating a balanced look.
Finally, nestle in the raspberries where they fit best for that final touch of charm. Don’t stress about making it perfect; it’s all about having fun and showcasing your favorite fruits.
Each bite will be a delightful surprise, making your fresh berry tart not just beautiful, but absolutely delicious. Get ready to impress everyone at your next gathering!
Step 5. Chill Before Serving
After you’ve arranged the fresh berries on your tart, it’s time to let it chill before serving. Chilling the tart enhances the flavors and allows the filling to firm up, making every slice a delight. You’ll want to cover it lightly with plastic wrap or a clean kitchen towel to protect it from odors in the fridge while it sets.
Place the tart in your refrigerator for at least one hour—this time allows the luscious flavors to meld perfectly. If you have more time, letting it chill for a couple of hours or even overnight can make a dramatic difference. Imagine serving your guests a slice of tart that’s invigorating, vibrant, and beautifully chilled.
During this chilling time, you can prepare any additional toppings or sauces you might want to serve alongside it. Consider whipping up some fresh cream or a berry coulis; these will elevate your tart experience to the next level.
Once it’s sufficiently chilled, take a moment to admire your creation before slicing. You’ve worked hard to craft this stunning dessert, and now it’s time to enjoy the fruits of your labor. Your guests are in for a real treat!
Final Thoughts
Creating a fresh berry tart is a delightful way to celebrate seasonal fruits and indulge in homemade goodness.
You’ll find that not only is the process enjoyable, but the end result is simply stunning. Each bite bursts with flavor, showcasing the beauty of nature on a plate.
Imagine yourself in the kitchen, surrounded by vibrant colors and tantalizing aromas. As you prepare your tart, you’re not just baking; you’re creating memories.
Picture the moment when you serve it to family and friends, their eyes lighting up with anticipation.
Here’s what makes this tart irresistible:
- Juicy, fresh berries that offer a burst of sweetness – strawberries, blueberries, raspberries, all dancing together in harmony.
- A buttery, flaky crust that cradles the delicious filling, providing a perfect balance of textures.
- A silky-smooth cream layer that elevates the flavors, leaving everyone wanting more.
Frequently Asked Questions
Can I Use Frozen Berries Instead of Fresh Ones?
Absolutely, you can use frozen berries instead of fresh ones. Just thaw them and drain excess liquid to avoid sogginess. Your dish’ll still taste great, though the texture might differ slightly. Enjoy experimenting!
How Do I Make the Tart Crust Gluten-Free?
You’re in for a treat! To make that tart crust gluten-free, swap regular flour for almond or gluten-free flour. Add a pinch of salt and cold butter, then mix until crumbly. Enjoy your delicious creation!
What Type of Berries Work Best for This Tart?
For the best results, you’ll want to use a mix of sweet strawberries, tart raspberries, and juicy blueberries. Their contrasting flavors and vibrant colors really elevate your tart, making it visually stunning and delicious!
How Long Can the Tart Be Stored in the Fridge?
If you’re hosting a dinner party, you might wonder how long your dessert lasts. Typically, you can store the tart in the fridge for about three days. Just cover it to keep it fresh!
Can I Substitute the Cream Cheese in the Filling?
Yes, you can substitute cream cheese in the filling! Try using Greek yogurt, mascarpone, or a dairy-free cream alternative. Adjust sweetness to your taste, and enjoy experimenting with flavors that suit your preferences.