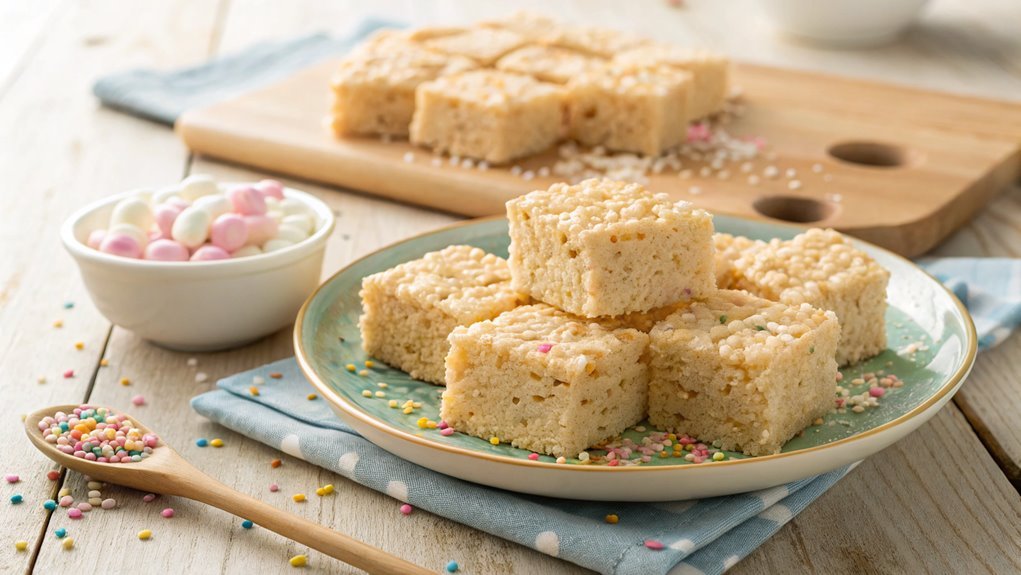
Easy Rice Krispies Treats Recipe
Did you know that over 50 million boxes of Rice Krispies are sold annually, reflecting their popularity in many households? Surprisingly, you can easily make Rice Krispies treats with just three ingredients, offering both chewy and crispy textures.
As you gather your ingredients, think about customizing this straightforward recipe to suit your taste. This classic snack not only brings back fond memories but can also adapt to modern preferences.
Recipe
Rice Krispies Treats are a timeless classic that brings back fond memories of childhood. These delightful snacks aren’t only simple to make, but they also require just a few ingredients, making them an accessible treat for anyone.
Whether you’re hosting a get-together, packing a lunch, or just craving something sweet, Rice Krispies Treats are sure to hit the spot. Their chewy, crispy texture paired with the sweetness of marshmallows creates a delicious combination that’s hard to resist.
Making Rice Krispies Treats is a fun activity that can involve the whole family. With minimal prep time and a quick cook time, you can whip up a batch in no time at all.
Plus, these treats are incredibly versatile; you can customize them by adding chocolate chips, sprinkles, or even a drizzle of melted chocolate on top. So, gather your ingredients, roll up your sleeves, and let’s get started on making these delightful snacks!
Ingredients:
- 3 tablespoons butter
- 1 package (10 oz) mini marshmallows
- 6 cups Rice Krispies cereal
- Optional: 1 teaspoon vanilla extract
- Optional: chocolate chips or sprinkles for topping
Now let’s move on to the cooking steps.
Cooking Steps
Get ready to whip up some delicious Rice Krispies Treats!
First, you’ll melt the butter in a saucepan, creating a rich base that will make everything stick together beautifully.
As you add the marshmallows and stir in the Rice Krispies, you’ll feel the excitement build as your sweet creation starts to come to life!
Step 1. Melt Butter in Saucepan
Start by placing a medium saucepan over low heat and adding your butter. As it begins to melt, you’ll immediately notice that delicious, creamy aroma filling your kitchen. This is the first step in creating those delightful Rice Krispies Treats, and trust me, it’s going to be worth the wait!
As the butter gently melts, keep an eye on it, stirring occasionally to guarantee it doesn’t brown. You want it to become perfectly smooth and silky, which will help create the best texture for your treats. Cooking on low heat is key to avoiding any burnt bits that could ruin the flavor.
While you’re stirring, think about how much fun it’ll be to mix the remaining ingredients together. Picture those sweet and chewy treats coming together in just a few moments!
Once the butter is completely melted, you’re on your way to creating a nostalgic favorite that everyone loves. So, take your time and enjoy this process. Let the warmth of the melting butter inspire you, and get ready for the next exciting step in making your Rice Krispies Treats!
You’re doing great, and deliciousness is just around the corner!
Step 2. Add Marshmallows to Mixture
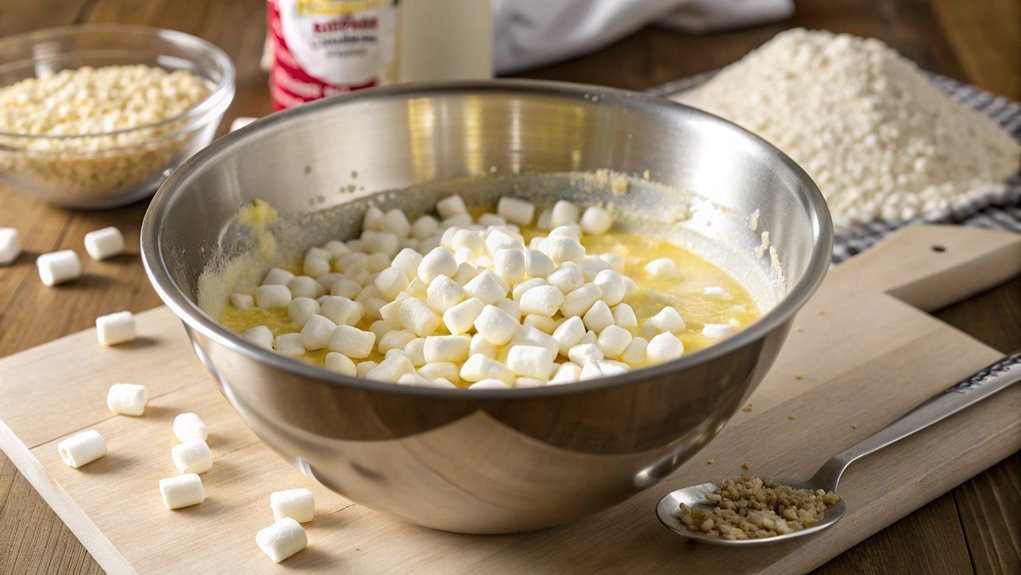
Once your butter is perfectly melted and smooth, it’s time to add the marshmallows to the mixture. Grab a bag of mini marshmallows or regular ones, whichever you prefer. Pour them into the saucepan, and watch the magic happen! The marshmallows will begin to melt and blend beautifully with the butter, creating a gooey, irresistible mixture.
Stir continuously with a spatula or wooden spoon to guarantee they melt evenly. This step is essential because you want that lovely, creamy consistency to form without any lumps.
As you stir, you might find yourself mesmerized by how quickly the marshmallows transform. The aroma will fill your kitchen, making it hard to resist sneaking a taste. Keep stirring until the marshmallows are completely melted and the mixture is smooth and shiny. This usually takes just a few minutes. Don’t rush it; patience is key!
Once you’ve achieved that perfect melted marshmallow and butter blend, you’ll be ready for the next exciting step. You’re one step closer to creating those delicious Rice Krispies treats that everyone loves. Get ready to add the Rice Krispies soon, and enjoy the process!
Step 3. Stir in Rice Krispies
Gently fold the Rice Krispies into the melted marshmallow mixture, guaranteeing every puffed grain gets coated in that sweet, gooey goodness. This step is where the magic really happens! As you mix, you’ll feel the delightful crunch of the cereal blending with the soft marshmallows, creating a perfect harmony of texture.
Make sure to use a spatula or wooden spoon to combine everything well, so each piece of cereal is embraced by the marshmallow. Don’t rush this process—take your time to guarantee an even coating. It’s tempting to dig in right away, but the real treat comes from this careful mixing.
As you stir, you might notice the mixture starting to thicken. That’s a sign that you’re on the right track! Keep your movements gentle to avoid crushing the Rice Krispies; you want to maintain that light, crispy texture.
Once everything is mixed, you can’t help but feel excited about what’s coming next. The aroma of melted marshmallows wafts through the air, making your mouth water. You’re just a step away from creating a classic treat that’s loved by all ages.
Enjoy this moment; it’s all part of the fun of cooking!
Step 4. Press Into Pan
Now it’s time to press your delicious mixture into the pan. This step is super important, as it shapes your Rice Krispies treats into their final form. Grab a 9×13-inch pan and lightly coat it with cooking spray or butter to prevent sticking.
Next, pour your sticky Rice Krispies mixture into the pan.
Here’s how to make it easier:
- Use a spatula or a spoon to spread the mixture evenly.
- Wet your hands slightly to keep the mixture from sticking to your fingers.
- Press down firmly but gently to pack it into the pan.
- Aim for an even thickness, about an inch high, so every bite is perfect.
- Make certain to get into the corners and edges for a well-shaped treat.
Don’t rush this step! Take your time to guarantee everything is evenly distributed. The more you press it down, the better your treats will hold together when you’re ready to cut them.
This is the fun part where you can really feel the magic of cooking happening! Enjoy the process, and get ready for the deliciousness that’s about to come!
Step 5. Cool and Cut Treats
After you’ve pressed your mixture into the pan, let it cool for about 30 minutes at room temperature. This cooling time is essential, as it helps the treats firm up, making them easier to cut later.
You can use this time to tidy up your kitchen or even gather some fun toppings like sprinkles or chocolate chips for extra flair!
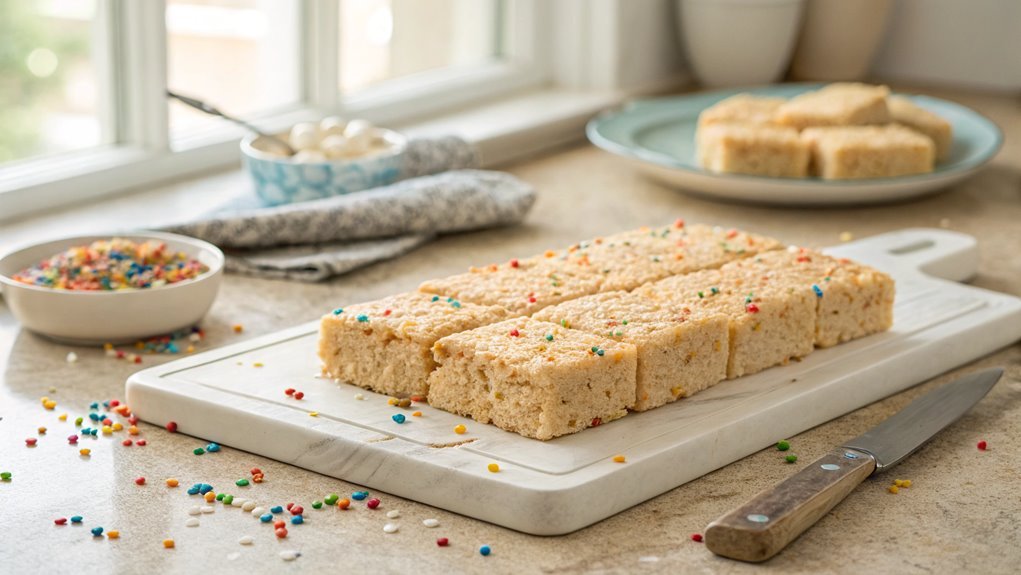
Once the treats are cool, grab a sharp knife or a pizza cutter to slice them into squares or rectangles. A gentle sawing motion works best, as it prevents the treats from crumbling.
If you find the mixture sticking to your knife, just give it a quick spray with cooking oil. It’ll glide through like a dream!
After cutting, you can arrange the treats on a platter or pack them into cute bags for sharing. These delicious, gooey squares are perfect for any occasion, from birthday parties to cozy movie nights.
Enjoy the satisfaction of creating something delightful, and don’t forget to share your tasty treats with friends and family. You’ll love seeing their smiles as they indulge in your homemade Rice Krispies treats!
Final Thoughts
As you wrap up your Rice Krispies Treats adventure, remember that the joy of making these delightful snacks lies in their simplicity and versatility.
You can customize them in countless ways, making each batch a unique experience. Whether you’re whipping them up for a special occasion or just indulging yourself, these treats are sure to bring smiles to everyone’s faces.
Here are some fun ideas to enhance your Rice Krispies Treats:
- Add Mix-ins: Toss in chocolate chips, sprinkles, or dried fruit for a flavorful twist.
- Flavor Variations: Experiment with flavored marshmallows or a splash of vanilla extract.
- Shape Creatively: Use cookie cutters to create fun shapes for holidays or parties.
- Make Them Colorful: Drizzle melted chocolate or colored candy melts on top.
- Try Different Cereals: Swap Rice Krispies for other cereals like Cocoa Krispies or Fruity Pebbles for a different taste.
Frequently Asked Questions
Can I Use Gluten-Free Rice Krispies for This Recipe?
Yes, you can definitely use gluten-free Rice Krispies for this recipe. They’ll work just as well, ensuring you enjoy a delicious treat without worrying about gluten. Just check the label to confirm they’re certified gluten-free.
How Do I Store Leftover Rice Krispies Treats?
To store leftover Rice Krispies Treats, cut them into squares and place them in an airtight container. You can keep them at room temperature for up to a week or refrigerate them for longer freshness.
Can I Add Food Coloring to the Treats?
Absolutely, you can add food coloring to the treats! Just mix in a few drops before combining the marshmallows and cereal. It’ll give your treats a fun, colorful twist that everyone will love. Enjoy!
What Alternatives Can I Use for Marshmallows?
You can use melted chocolate, honey, or agave syrup as alternatives to marshmallows. Nut butters like peanut or almond also work well, adding flavor and binding ingredients together for a delicious treat.
How Long Do Rice Krispies Treats Last?
Rice Krispies treats typically last about 2 to 3 days at room temperature, but notably, they can stay fresh for up to a week if stored in an airtight container. Enjoy them while they’re at their best!
Conclusion
Relish the nostalgic delight of Rice Krispies Treats. Perfect for parties or cozy nights, they’re guaranteed to bring smiles. Gather your ingredients and make a batch—you’ll be hooked after the first bite!