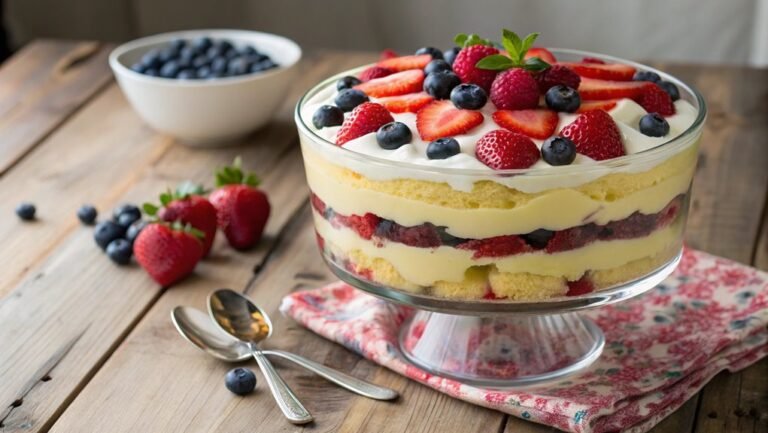
Vegan Layered Dessert Cups Recipe
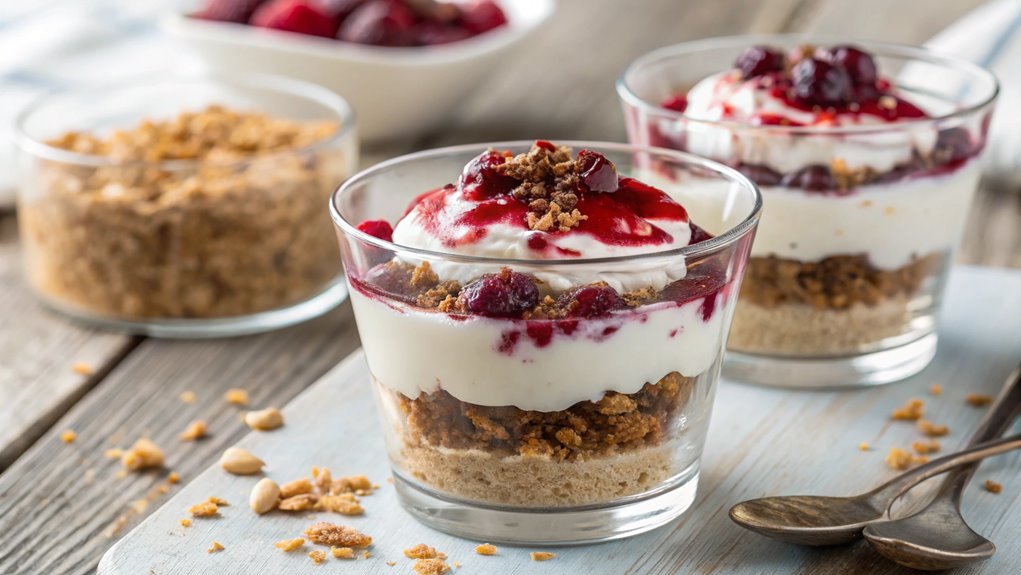
For an impressive and elegant plant-based dessert, try vegan layered dessert cups. Combining creamy coconut, sweet Medjool dates, and vibrant berries creates a visually appealing and delicious treat. The layering technique adds both visual appeal and a delightful mix of textures. Want to know how to make this dessert and enhance it further? Let’s dive into the details.
Recipe
Indulging in a delicious vegan layered dessert is a delightful way to satisfy your sweet tooth while sticking to plant-based ingredients. This vegan layered dessert cups recipe is perfect for any occasion, from family gatherings to a casual evening at home.
It combines creamy layers of coconut whipped cream, a fruity filling, and a crunchy base, delivering a balanced mix of flavors and textures. This dessert isn’t only visually appealing but also easy to make, allowing you to impress your guests without spending hours in the kitchen.
To get started, gather your ingredients and prepare a few simple components. The base can be made from crushed nuts and dates, while the creamy layer features coconut milk whipped to perfection, adding a light and airy texture.
A fruit purée, such as berry or mango, will serve as the vibrant centerpiece of the dessert, creating a beautiful contrast with the layers. Assemble the dessert in clear cups to showcase the colorful layers, making it as much a feast for the eyes as it’s for the palate.
Ingredients:
- 1 cup mixed nuts (almonds, cashews, or walnuts)
- 1 cup pitted Medjool dates
- 1 can (13.5 oz) full-fat coconut milk, chilled
- 2 tablespoons maple syrup (or to taste)
- 1 teaspoon vanilla extract
- 1 cup fresh or frozen berries (raspberries, blueberries, or strawberries)
- 1 tablespoon lemon juice
- Pinch of salt
- Optional toppings: shredded coconut, crushed nuts or seeds, fresh fruit
Now let’s move on to the cooking steps.
Cooking Steps
Get ready to whip up something delicious with these easy cooking steps!
First, you’ll prepare your dessert cups and chill the coconut cream to achieve that perfect texture.
Once everything’s set, layer the rich chocolate over the cream, top it off with fresh berries, and don’t forget a sprig of mint for that extra pop!
Step 1. Prepare the Dessert Cups
To prepare the dessert cups, start by gathering all your ingredients and tools. Having everything at hand will make the process smooth and enjoyable.
You’ll want to create a delicious layering effect that’s visually appealing and satisfying to eat.
- Vegan cookies or crumbled granola
- Fresh fruit, such as berries or banana slices
- Coconut cream or a cashew-based cream
- Small dessert cups or jars for assembly
Begin by crumbling your vegan cookies or granola at the bottom of each dessert cup. This forms a delightful base that adds crunch.
Next, layer on your coconut cream, spreading it evenly to create a smooth, creamy texture. Then, go ahead and add a layer of your favorite fresh fruit. Choose a mix of vibrant berries or bananas to keep things colorful and crisp!
Repeat these layers until you reach the top of each cup. Don’t be afraid to get creative with the order of your layers! The more vibrant your layers, the more enticing your dessert cups will look.
Once finished, take a moment to admire your gorgeous creations! You’re one step closer to enjoying a rejuvenating vegan treat.
Step 2. Chill the Coconut Cream
Before you layer your dessert cups, chilling the coconut cream is essential for achieving that perfect fluffy consistency. Start by placing a can of full-fat coconut milk in the fridge overnight. This allows the cream to rise to the top, separating it from the liquid.
When you’re ready, take the can out and open it carefully, so you don’t mix the layers. Scoop out the solid coconut cream using a spoon, leaving the watery part behind, unless you want to use it for another recipe.
Now, transfer that creamy goodness to a mixing bowl. For added sweetness, consider adding a tablespoon of maple syrup or agave nectar, depending on your taste preferences. With an electric mixer or a whisk, beat the coconut cream until it’s light and fluffy. This usually takes around 2-3 minutes.
Don’t forget to taste as you go! If you want it sweeter, add a little more syrup. The more you whip, the airier it gets, which is just what you want for that delightful layered effect.
Now you’re all set to create those stunning dessert cups! Enjoy the process and the delicious results!
Step 3. Layer Chocolate Over Cream
With your whipped coconut cream ready, layering the chocolate over it’s the next exciting step. This is where the magic happens! You’ll be creating a luscious chocolate layer that pairs beautifully with the fluffy coconut cream.
Start by melting your vegan chocolate chips or dark chocolate in a microwave-safe bowl or using a double boiler on the stove. Stir gently until it’s smooth and glossy.
Next, it’s time to layer! Use a spoon or a spatula to spread the melted chocolate evenly over the coconut cream in each cup. You want to have a nice, thick layer that won’t only be delicious but also visually appealing.
Here are some tips to guarantee your chocolate layer is perfect:
- Use high-quality vegan chocolate for a richer taste.
- Let the chocolate cool slightly before pouring; this prevents it from melting the cream underneath.
- Layer generously; no one wants a thin chocolate layer!
- Work quickly, as melted chocolate can set fast, especially in cooler environments.
Once you’ve applied the chocolate layer, take a moment to admire your creation. You’re one step closer to a delightful dessert that everyone will love!
Step 4. Add Fresh Berries on Top
Now that your chocolate layer is set, it’s time to elevate your dessert by adding fresh berries on top. Nothing says indulgence quite like the bright colors and natural sweetness of fresh fruit.
Begin by selecting a mix of your favorite berries—strawberries, raspberries, blueberries, or blackberries all work beautifully to create a stunning contrast with the chocolate layer.
Once you’ve chosen your berries, wash them gently under cool water. Pat them dry with a clean towel to remove excess moisture; this guarantees they stay fresh and don’t water down your dessert.
Now, it’s time to get creative! For a lively presentation, arrange the berries artistically on top of your chocolate layer. You can scatter them randomly for a rustic look or create a charming design by placing them in neat rows or circles.
Feel free to mix and match the berries for added flavor and visual appeal. As you do this, imagine your guests’ delight when they see these vibrant cups of deliciousness.
You’ve crafted a treat that’s not only visually stunning but also bursting with invigorating flavors. Enjoy this step; your dessert is almost ready for the final touches!
Step 5. Serve With Mint Leaves
To truly elevate your vegan layered dessert cups, adding fresh mint leaves not only enhances the presentation but also introduces a rejuvenating flavor. The bright green color pops against the layers of cream and fruit, inviting everyone to dig in.
When serving, consider placing a few mint leaves on each cup as a garnish. This small touch can turn your dessert from ordinary to extraordinary!
Here are some tips to maximize the impact of your mint garnish:
- Choose Fresh Leaves: Select vibrant, unblemished leaves for the best visual and flavor impact.
- Add Flavor: Gently bruise the leaves before placing them on the dessert. This releases essential oils, intensifying the minty aroma.
- Combine with Berries: Pair mint leaves with fresh berries for a harmonious blend of flavors that elevates your dessert’s profile.
- Serve Chilled: Verify your dessert cups are well-chilled. The coolness of the dessert complements the rejuvenating mint, making each bite delightful.
Try these simple tricks to make your vegan layered dessert cups irresistibly appealing. Your guests will appreciate the extra effort and enjoy every last spoonful!
Enjoy your cooking adventure!
Final Thoughts
As you savor the last bite of your vegan layered dessert cups, it’s clear that this recipe not only delights the taste buds but also showcases how easy it’s to indulge in plant-based treats. The layers of creamy goodness, luscious fruit, and crunchy elements come together in perfect harmony, making each spoonful a delightful experience.
You don’t have to be a culinary expert to create this stunning dessert. With just a few simple ingredients, you can impress friends and family, proving that vegan desserts can be both delectable and satisfying.
The versatility of this recipe allows you to customize it with your favorite flavors or seasonal fruits, making it perfect for any occasion.
Whether you serve it at a dinner party or enjoy it after a long day, these dessert cups are bound to put a smile on your face. So, why not gather your ingredients and give this recipe a try?
You’ll enjoy every step of the process, from layering to savoring. With each treat, you’ll feel proud of embracing a plant-based lifestyle that’s both delicious and kind to the planet. Immerse yourself, and let the indulgence begin!
Frequently Asked Questions
Can I Substitute the Nuts for a Nut-Free Option?
Absolutely, you can substitute nuts with seeds like sunflower or pumpkin. They’ll provide a similar crunch and nutritional value, ensuring your dish remains delicious and satisfying without compromising flavor. Just choose what works best for you!
How Long Do These Dessert Cups Last in the Fridge?
These dessert cups typically last about 3 to 5 days in the fridge. Just make sure you store them in an airtight container to keep them fresh and maintain their delicious flavors for as long as possible.
What Can I Use Instead of Coconut Cream?
Substituting coconut cream’s like swapping an old friend; you want something equally comforting. You can use silken tofu, cashew cream, or almond milk, all offering a creamy texture and great taste without dairy.
Are There Gluten-Free Options Available for This Recipe?
Yes, there are gluten-free options available. You can use gluten-free cookies or alternative layers like fruit and yogurt. Just verify all your ingredients are labeled gluten-free, so you can enjoy your dessert worry-free!
Can I Make These Vegan Dessert Cups Ahead of Time?
Why wait for dessert? You can absolutely make those vegan dessert cups ahead of time! Just assemble them and store in the fridge. Enjoy the convenience while impressing friends with your deliciously planned treat!
