Classic Trifle Recipe
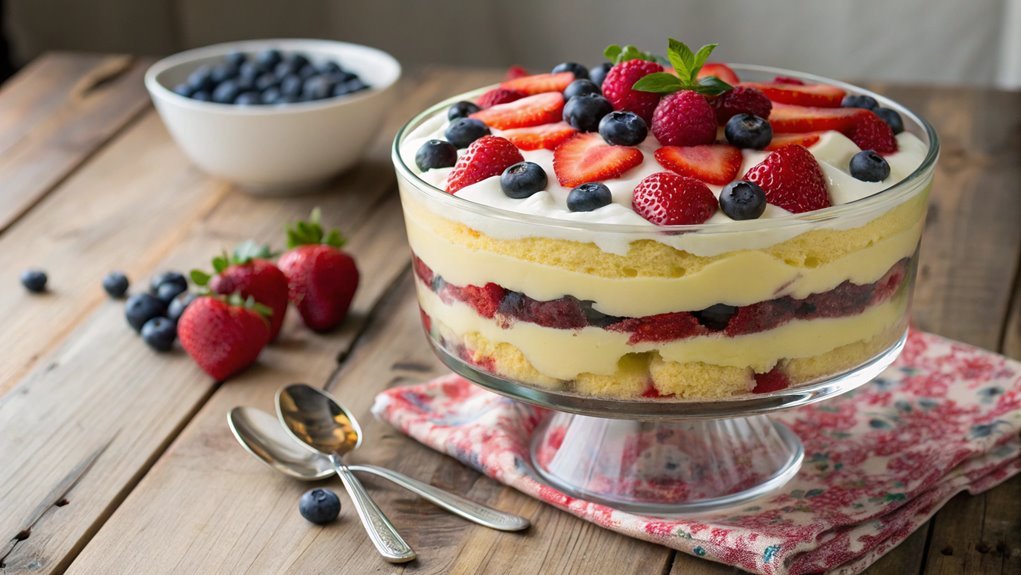
A classic trifle is a delightful dessert featuring layers of soft sponge cake soaked in sherry or juice, creamy custard, and fresh fruits, creating a harmonious blend of flavors and textures. Each component is essential for making this visually appealing treat special.
The art of assembling a trifle lies in perfecting these layers to elevate the dessert experience. Follow the essential steps to master this timeless creation and impress with its exquisite taste and presentation.
Recipe
Classic Trifle Recipe
Trifle is a delightful and visually stunning dessert that has been enjoyed for centuries. This layered treat typically features sponge cake, fruit, creamy custard, and whipped cream, all beautifully arranged in a glass dish to showcase the colorful layers.
It’s a versatile dessert, perfect for celebrations or gatherings, and can easily be customized with your favorite flavors and ingredients. The combination of textures and tastes makes it a favorite among dessert lovers, while its presentation adds a touch of elegance to any table.
To prepare a classic trifle, begin by selecting a base, such as a light sponge cake or ladyfingers. Layer it with your choice of fresh fruits, like berries or peaches, and then add a rich custard made from scratch or store-bought.
Finally, top it all off with a generous layer of whipped cream and a sprinkle of nuts or chocolate shavings for added flair. The key to a perfect trifle is allowing the layers to meld together, which enhances the flavors and creates a harmonious dessert that everyone will adore.
Ingredients:
- 1 pound sponge cake or ladyfingers
- 2 cups mixed fresh berries (strawberries, blueberries, raspberries)
- 2 cups vanilla custard (homemade or store-bought)
- 2 cups heavy whipping cream
- 1/4 cup powdered sugar
- 1 teaspoon vanilla extract
- 1/2 cup sliced almonds or chocolate shavings (for garnish)
Now let’s move on to the cooking steps.
Cooking Steps
Now that you’ve got your ingredients ready, it’s time to jump into the cooking steps of your classic trifle!
First, you’ll prepare the sponge cake, creating a soft and airy base.
Then, layer it with the creamy custard mixture, add fresh berries for a burst of flavor, and top it all off with whipped cream—this delightful treat will have everyone coming back for seconds!
Step 1. Prepare the Sponge Cake
Begin by preheating your oven to 350°F (175°C) and greasing a round cake pan.
This sponge cake will be the foundation of your delightful trifle, so let’s make it perfect! In a large mixing bowl, beat together four eggs and one cup of sugar until the mixture is thick and pale. You’ll want to see ribbons form when you lift the whisk—this means you’re on the right track!
Next, gently fold in one cup of all-purpose flour and a pinch of salt. Be careful not to overmix; you want to keep that air in the batter for a light, fluffy cake.
Once everything’s combined, pour the batter into your prepared cake pan. Bake it for about 25 minutes, or until a toothpick inserted in the center comes out clean.
When it’s ready, let the cake cool in the pan for a few minutes, then turn it out onto a wire rack to cool completely.
The aroma will fill your kitchen, making it hard to resist! Once cooled, you’re ready to transform this sponge into the star of your trifle. Enjoy the process—it’s going to be delicious!
Step 2. Layer With Custard Mixture
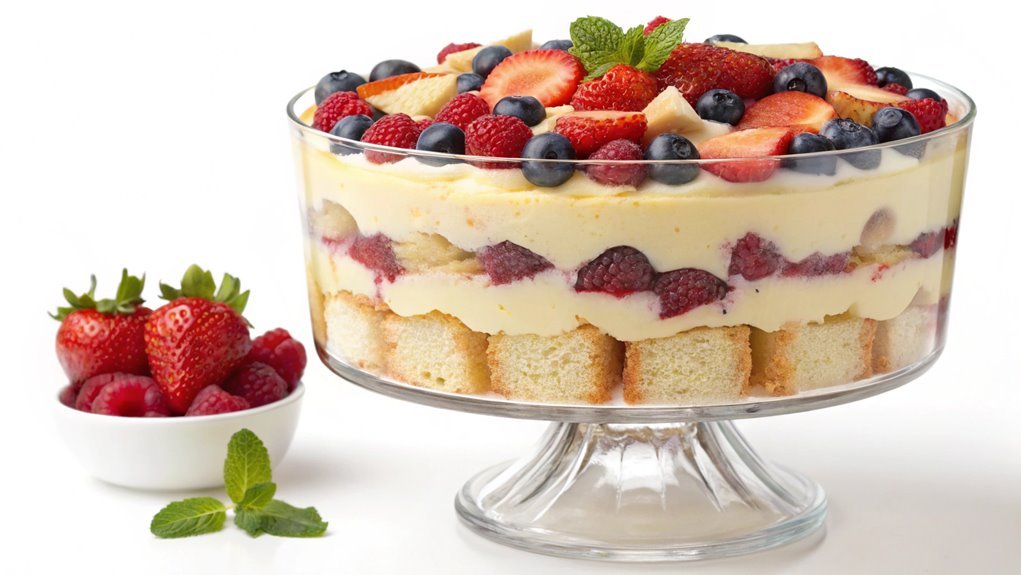
Once your sponge cake has cooled completely, it’s time to create that luscious custard mixture that will elevate your trifle. This custard is the heart of your dessert, bringing a rich, creamy texture that pairs wonderfully with the sponge. Let’s get started!
- Whisk Together: In a saucepan, whisk together egg yolks, sugar, and cornstarch until smooth. Gradually add milk, stirring constantly to avoid lumps.
- Cook the Mixture: Place the saucepan over medium heat, and keep stirring until the mixture thickens. You’ll know it’s ready when it coats the back of a spoon. Don’t rush this step; that thick, velvety custard is what makes your trifle special!
- Cool It Down: Once thickened, remove the custard from heat and stir in vanilla extract. Let it cool for a bit, and then cover it with plastic wrap, making sure it touches the surface to prevent a skin from forming.
Now, you’re ready to layer this dreamy custard with your sponge cake! Each layer you build will create a beautiful, delicious trifle that’s sure to impress anyone who gets a spoonful. Enjoy the process!
Step 3. Add Fresh Berries
As you layer your trifle, adding fresh berries not only enhances the flavor but also adds a vibrant pop of color. Start by choosing a mix of berries like strawberries, blueberries, and raspberries. Their natural sweetness and tangy notes will create a delightful contrast to the creamy layers.
Once you’ve prepared your custard mixture, take a handful of berries and arrange them evenly over the custard layer. You can slice the strawberries for a more elegant presentation, while leaving the blueberries and raspberries whole.
Don’t shy away from piling them on; the more, the merrier!
This step is all about balance, so feel free to experiment with the amounts. You’ll want to alternate layers of berries with custard and cake, creating a stunning visual effect as you build your trifle.
As you add each layer, think about how the flavors will meld together, inviting your guests to plunge in.
Step 4. Top With Whipped Cream
To finish off your classic trifle, you’ll want to top it with a generous layer of whipped cream, which adds a light, airy texture that complements the rich custard and fruit.
Whipped cream not only looks beautiful but also enhances the overall flavor, creating a delightful balance in every bite.
Here’s how to get that perfect whipped cream topping:
- Choose Your Cream: Use heavy whipping cream for the best results. It whips up nicely and holds its shape well.
- Sweeten It Up: Add a touch of powdered sugar and a splash of vanilla extract to your cream before whipping. This will elevate the flavor and make it extra delicious.
- Whip to Perfection: Using a hand mixer or a whisk, whip the cream until soft peaks form. Be careful not to overwhip, or you’ll end up with butter!
Once you’ve whipped your cream, gently spread it over the top of your trifle.
Feel free to swirl it around for a fun design! You can also sprinkle some chocolate shavings or nuts on top for an extra touch.
Enjoy the satisfaction of serving your stunning, delicious classic trifle!
Step 5. Chill Before Serving
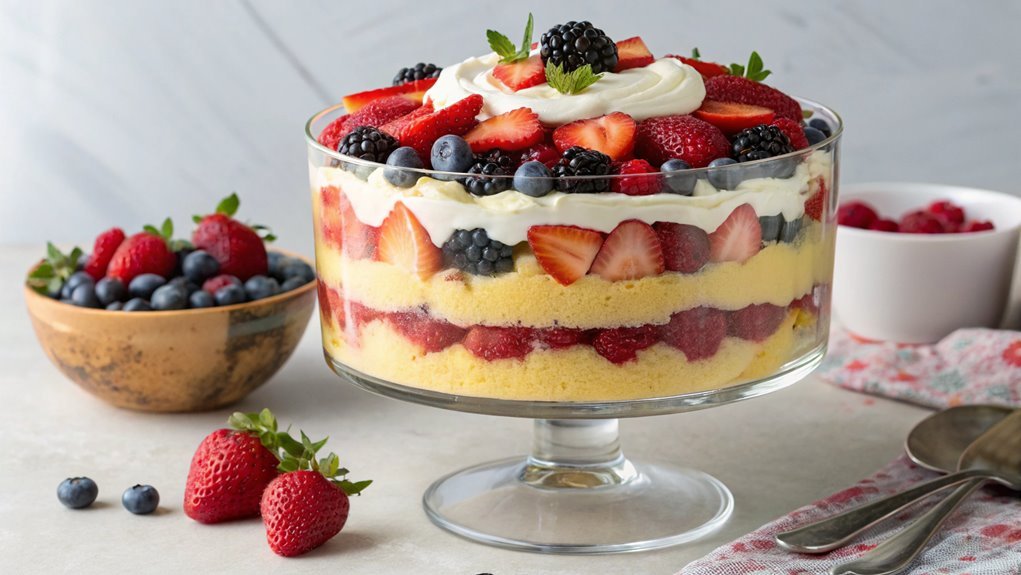
Chilling your classic trifle before serving is essential for allowing the flavors to meld and the layers to set properly. After you’ve assembled your trifle, it’s time to give it the love it deserves by placing it in the refrigerator. Aim for at least four hours, but overnight is even better if you can wait! This chilling time lets the custard soak into the cake, making each bite a delightful explosion of flavor.
As the layers cool together, their textures and tastes harmonize beautifully, creating that perfect balance that makes trifles so irresistible. Plus, the chill enhances the overall experience, making each spoonful invigorating and satisfying.
When you’re finally ready to serve, take a moment to admire your creation. The vibrant colors of the fruit, the fluffy whipped cream, and the luscious custard all beckon to be enjoyed.
Final Thoughts
While making a classic trifle might seem intimidating at first, you’ll soon find it’s a rewarding endeavor. Layering flavors and textures creates a beautiful dessert that’s sure to impress your family and friends.
Once you experience the joy of creating your own trifle, you’ll want to make it again and again!
Here are a few tips to keep in mind while preparing your trifle:
- Choose Your Ingredients Wisely: Fresh fruits, quality custard, and flavorful cake make all the difference. Don’t hesitate to experiment with flavors that excite you!
- Let It Chill: Allowing your trifle to chill is essential. It helps the flavors meld together beautifully and enhances the overall taste.
- Get Creative with Presentation: Use a clear bowl or individual cups to showcase those lovely layers. A well-presented trifle not only tastes great but looks stunning too!
Frequently Asked Questions
Can I Make Trifle a Day in Advance?
Yes, you can absolutely make trifle a day in advance! Just assemble it, cover it well, and store it in the fridge. This way, the flavors meld beautifully, and you’ll save time on the day of serving.
What Fruits Work Best for Trifle?
For trifle, you’ll want to use fruits like strawberries, blueberries, and raspberries. Their vibrant colors and sweet-tart flavors elevate the dessert, making it visually appealing and delicious. Don’t forget to layer them artfully!
Is There a Gluten-Free Trifle Option?
Yes, you can absolutely create a gluten-free trifle! Just use gluten-free cake or ladyfingers, and opt for gluten-free custard or pudding. Layer your favorite fruits and whipped cream for a delicious, satisfying dessert. Enjoy!
How Should I Store Leftover Trifle?
Think of leftover trifle as a treasure waiting to be preserved. You should cover it tightly with plastic wrap or transfer it to an airtight container, then refrigerate it to maintain its delicious layers for up to three days.
Can I Use Store-Bought Components for Trifle?
Absolutely, you can use store-bought components for your trifle! Grab pre-made cakes, custard, and whipped cream. It’ll save you time and still taste delicious, letting you enjoy the dessert without all the fuss.
Conclusion
Creating a classic trifle is like assembling an edible masterpiece that brings joy to any gathering. Layering sponge cake, custard, and berries crafts a delightful dessert experience for you and your loved ones. Dive into this delicious kitchen adventure! Your taste buds will thank you, and your guests will be thrilled with this stunning treat.
