No-Bake Oreo Lasagna Recipe

No-Bake Oreo Lasagna serves as the perfect dessert centerpiece for any gathering, requiring no oven time and letting you enjoy your guests. With layers of crushed Oreos and creamy fillings, it is both indulgent and customizable.
This simple treat is easy to prepare and offers endless variations to suit any palate. Elevate your dessert game with this impressive and effortless creation.
Recipe
No-Bake Oreo Lasagna is a delicious and easy dessert that combines layers of creamy goodness with the irresistible flavor of Oreos. This dessert is perfect for any occasion, whether it’s a family gathering, a potluck, or just a sweet treat at home.
The best part? You don’t need to turn on the oven! With just a few simple ingredients and a little bit of time, you can whip up a dessert that will impress everyone.
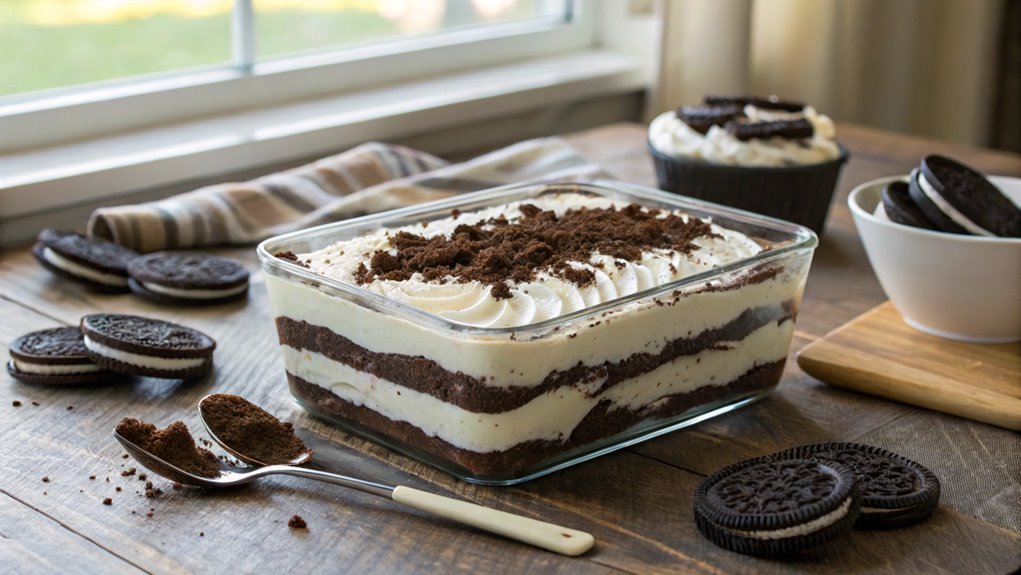
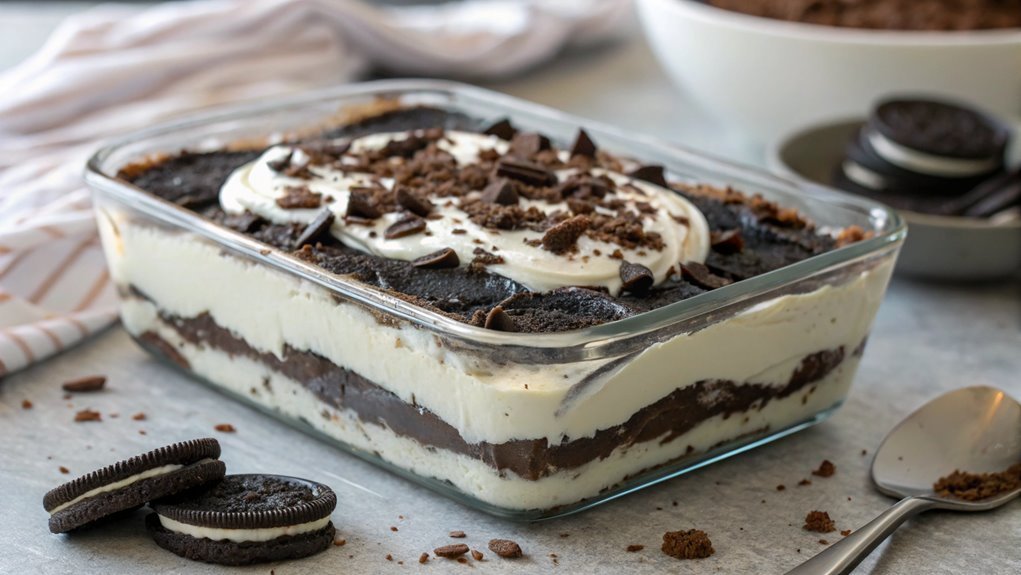
The layers of this lasagna consist of crushed Oreos, a rich cream cheese mixture, and whipped topping, all coming together to create a delightful treat. It’s a no-fuss recipe that allows you to enjoy all the flavors of traditional lasagna but in a sweet, dessert form.
Once assembled, you’ll let it chill in the fridge for a few hours, allowing the flavors to meld beautifully. Grab your ingredients and let’s get started!
Ingredients:
- 1 package of Oreo cookies
- ½ cup of unsalted butter, melted
- 8 oz cream cheese, softened
- 1 cup powdered sugar
- 1 tsp vanilla extract
- 3 cups whipped topping (like Cool Whip)
- 1 package of chocolate pudding mix (3.9 oz)
- 2 ¾ cups milk
- Additional crushed Oreos for topping (optional)
Now let’s move on to the cooking steps.
Cooking Steps
Get ready to create a delicious No-Bake Oreo Lasagna that’s sure to impress!
You’ll start by crushing those Oreo cookies finely, then mixing cream cheese and sugar to create a creamy filling.
Layer it all together with whipped topping and a drizzle of chocolate syrup, then chill it before serving for the ultimate sweet treat!
Step 1. Crush Oreo Cookies Finely
To start off, you’ll need to crush the Oreo cookies into fine crumbs. This step is essential for creating that delicious, layered texture in your no-bake Oreo lasagna.
Grab a package of Oreos and a zip-top bag. Place the cookies inside the bag, seal it tightly, and take a rolling pin or a heavy object to crush the cookies. You can also use a food processor if you have one handy, which makes the job super quick!
Aim for a fine crumb consistency, similar to sand, as this will help the crust hold together beautifully. Don’t worry if a few larger chunks remain; they’ll add a little crunch to your dessert.
Once you’ve finished crushing, pour the crumbs into a mixing bowl to get ready for the next step.
If you find yourself snacking on a few crumbs, that’s totally okay—it’s all part of the fun! This simple yet satisfying task sets the foundation for your amazing dessert.
You’re already on your way to creating a delightful treat that everyone will love. So, let’s get those cookies crushed and prepare for the delicious layers ahead!
Step 2. Mix Cream Cheese and Sugar

With your Oreo crumbs ready, it’s time to whip up the creamy filling that will bring your lasagna to life. Start by taking an 8-ounce package of cream cheese and letting it soften at room temperature for about 10 to 15 minutes. This step is essential; softened cream cheese blends more smoothly, creating that luscious texture you crave.
Once it’s softened, grab a mixing bowl and add the cream cheese along with 1/2 cup of granulated sugar.
Using an electric mixer, beat the cream cheese and sugar together on medium speed until the mixture is completely smooth and creamy. You want to make sure there are no lumps, as that’ll keep your Oreo lasagna from achieving its dreamy consistency. This usually takes around 2-3 minutes, so don’t rush it!
Once it’s well combined, you can taste a little bit for sweetness—because who doesn’t love a sweet treat?
This rich and creamy filling is the heart of your lasagna, so take pride in the process. You’re almost there, and the delicious layers are just waiting to be built. Let’s keep the momentum going!
Step 3. Layer With Whipped Topping
As you prepare to assemble your Oreo lasagna, layering in the whipped topping adds a light, airy sweetness that perfectly complements the creamy filling.
This step isn’t just about taste; it’s about creating a visually stunning dessert that will impress anyone. Grab your spatula and let’s plunge into this delicious moment!
- Spread Generously: Spoon a generous layer of whipped topping over your cream cheese mixture. This creates a fluffy cloud of sweetness that’s irresistible.
- Smooth It Out: Use your spatula to gently smooth the topping, ensuring every corner is covered. This helps keep each layer balanced and beautiful.
- Add Texture: Feel free to fold in some crushed Oreos into the whipped topping for an exciting crunch that elevates each bite!
- Repeat: If you’re making multiple layers, repeat this process with each layer. The more, the merrier!
Once you’ve completed this delightful step, you’ll see your Oreo lasagna come to life!
The whipped topping not only enhances the flavor but also adds a dreamy texture. Your dessert is shaping up beautifully—can you already taste the deliciousness?
Step 4. Add Chocolate Syrup Drizzle
Once you’ve layered your whipped topping, it’s time to elevate your Oreo lasagna with a decadent chocolate syrup drizzle. This step is where the magic really happens! Grab your favorite chocolate syrup and get ready to transform your dessert into a showstopper.
Start by gently squeezing the bottle to create a beautiful zigzag pattern across the top of the whipped topping. Let the syrup flow freely, making sure to cover it evenly. You can go for a generous drizzle or a light touch—it’s all about your personal preference!
If you’re feeling adventurous, consider adding a few extra crushed Oreos on top for added texture. The chocolate syrup not only enhances the flavor but also adds a stunning visual appeal that’ll have everyone drooling before they even take a bite.
Trust me, this simple addition makes a huge difference in presentation. Once you’ve drizzled the syrup, take a step back and admire your creation. You’re just moments away from serving up this delightful treat that’s sure to impress friends and family alike.
Enjoy this fun process, and get ready for some delicious results!
Step 5. Chill Before Serving

After adding that delicious chocolate syrup drizzle, your Oreo lasagna is almost ready to shine.
But hold on—before you indulge, it’s crucial to let it chill in the refrigerator. This step is key to achieving that perfect, creamy texture and allowing all those fabulous flavors to meld together. Trust me, the wait is worth it!
Here’s what you need to do:
- Cover the Dish: Use plastic wrap to cover your lasagna tightly. This keeps the moisture in and prevents any fridge odors from sneaking in.
- Chill for 4 Hours: Let it sit in the fridge for at least four hours. If you can wait overnight, even better!
- Slice with Care: When you’re ready to serve, use a sharp knife to cut through the layers smoothly.
- Garnish Before Serving: Before you dig in, add some extra crushed Oreos or a sprinkle of chocolate shavings for that wow factor!
Once you’ve followed these steps, you’ll be rewarded with a decadent dessert that’s sure to impress everyone.
Enjoy every bite of your heavenly creation!
Final Thoughts
While you may think that desserts require extensive preparation, this No-Bake Oreo Lasagna proves that simplicity can lead to delightful results.
You’ll love how easy it’s to whip up this decadent treat, layering creamy goodness and crunchy cookies without ever turning on the oven. It’s the perfect dessert for any occasion, whether you’re celebrating a birthday, hosting a party, or simply treating yourself after a long day.
Imagine serving this stunning dessert to your friends and family, watching their faces light up with excitement as they take that first bite.
The combination of flavors and textures is truly irresistible, and you’ll be proud to say you made it yourself. Plus, you can customize the recipe to suit your taste—try adding your favorite toppings or even switching up the cookies for a fun twist!
Frequently Asked Questions
Can I Use Gluten-Free Oreos for This Recipe?
Yes, you can definitely use gluten-free Oreos in your recipe! They’ll provide the same delicious flavor and texture while accommodating dietary restrictions. Just make sure to check for any other gluten-containing ingredients in your recipe.
How Long Does the Lasagna Need to Chill?
When you’re letting your creation rest, it’s best to give it a cozy chill in the fridge for about four hours. This way, it’ll set perfectly, ensuring every layer’s delightful when you dig in!
Can I Substitute Cream Cheese With Greek Yogurt?
Yes, you can substitute cream cheese with Greek yogurt. It’ll give your dish a tangy flavor and a lighter texture. Just make sure to adjust the sweetness to balance the tartness of the yogurt.
What Toppings Can I Add to My Oreo Lasagna?
You might think toppings aren’t necessary, but adding crushed Oreos, whipped cream, or chocolate drizzle elevates your dessert. Fresh berries or chopped nuts can also provide a delightful crunch and contrast to the creamy layers. Enjoy!
How Should I Store Leftovers?
To store leftovers, place them in an airtight container and refrigerate. They’ll stay fresh for up to three days. Just remember to cover the dish well to prevent any odors from affecting the flavor!
Conclusion
No-bake Oreo lasagna is a delightful dessert with creamy layers and a crunchy Oreo base. It’s a must-try treat that will impress everyone and make any gathering special.


