4th of July Berry Trifle Recipe

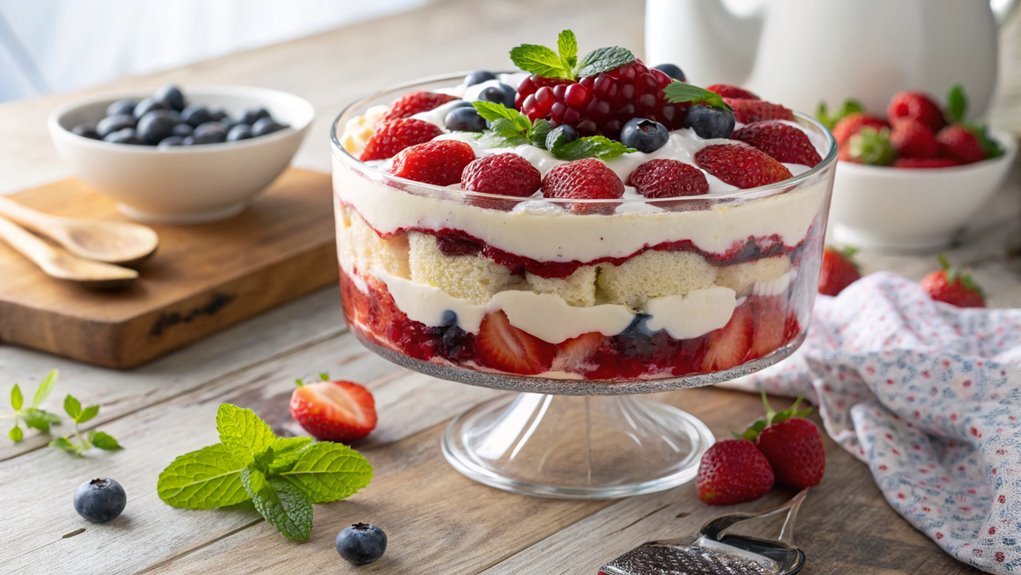
A 4th of July celebration feels incomplete without a berry trifle ready to grace the picnic table. Picture layers of fresh strawberries, blueberries, and fluffy cream enhancing your summer gathering.
This no-bake dessert not only serves as a stunning centerpiece but also promises a taste that will delight your guests. Interested in crafting this impressive treat? Follow the recipe steps to ensure your trifle shines this holiday.
Recipe
Berry Trifle Recipe
A berry trifle is a delightful dessert that layers luscious fruits, creamy fillings, and soft sponge cakes, creating an indulgent treat that not only tastes wonderful but also looks visually stunning.
This no-bake dessert is perfect for summer gatherings, parties, or a simple family meal, as it’s easy to assemble and can be made ahead of time. The combination of fresh berries—such as strawberries, blueberries, and raspberries—with rich whipped cream and sweet custard makes each bite a heavenly experience.
To make this berry trifle, you’ll need a large trifle bowl or individual serving glasses.
Begin by preparing the sponge cake, which you can either bake from scratch or use store-bought for efficiency. Once your cake is ready, chop it into cubes.
Then, layer the components in your dish, starting with cake, followed by custard, whipped cream, and finally the fresh berries. Repeat the layers until you’ve filled your bowl or cups.
Chill in the refrigerator for a few hours to allow the flavors to meld before serving.
Ingredients:
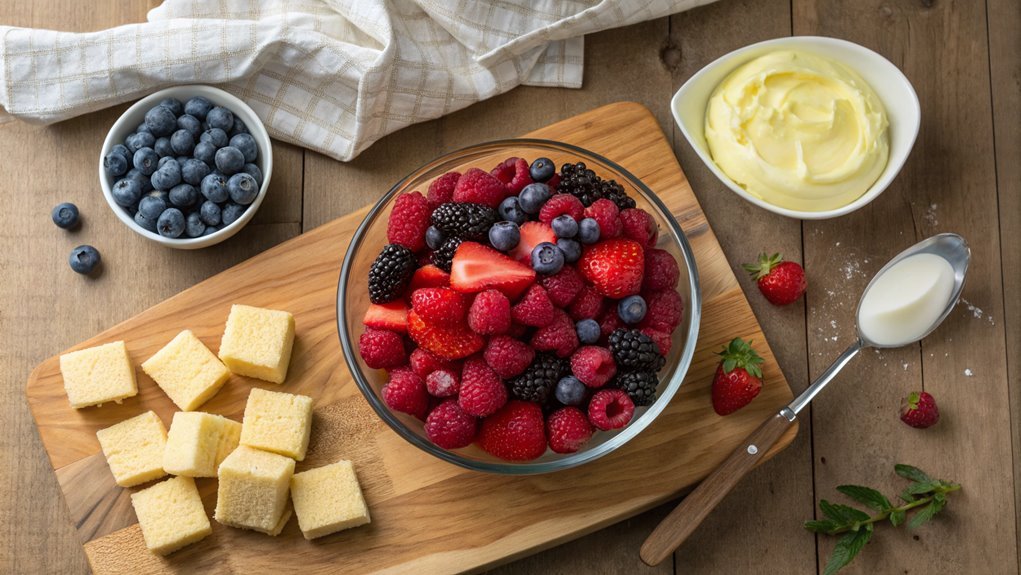
- 1 pound of mixed fresh berries (strawberries, blueberries, raspberries)
- 1 store-bought sponge cake or homemade sponge cake
- 2 cups of vanilla custard (store-bought or homemade)
- 2 cups of heavy cream
- 1/4 cup of powdered sugar
- 1 teaspoon of vanilla extract
- Mint leaves for garnish (optional)
Cooking Steps
Now that you’ve got all your ingredients ready, it’s time to bring your berry trifle to life!
You’ll start by preparing a delicious berry mixture, layering in whipped cream generously, and adding cake cubes evenly to create that perfect texture.
Don’t forget to drizzle with berry sauce and top it off with fresh mint for an extra burst of flavor—it’s going to be amazing!
Step 1. Prepare the Berry Mixture
To create a delicious berry mixture for your trifle, start by rinsing the fresh berries under cold water. Gently toss them in a colander to remove any dirt or debris. You can use a mix of strawberries, blueberries, raspberries, and blackberries to give your dessert a vibrant pop of color and flavor.
Once rinsed, pat the berries dry with a clean kitchen towel to make sure they’re not too watery.
Next, chop the strawberries into bite-sized pieces, while leaving the smaller berries whole. In a large mixing bowl, combine all the berries, and add a tablespoon of sugar. This simple step will enhance the sweetness of the berries and create a lovely syrup as they sit.
Gently stir the berries together, coaxing the sugar to coat every berry evenly. If you like, you can also add a splash of lemon juice to brighten the flavors.
Allow the mixture to rest for about 10-15 minutes. This waiting time is essential, as it lets the berries macerate, bursting with juices that’ll take your trifle to the next level. Enjoy the anticipation of your tasty creation!
Step 2. Layer Whipped Cream Generously

As you begin layering your trifle, make certain to whip up some heavy cream until it forms stiff peaks, creating a light and airy texture. This whipped cream is a vital component that not only adds richness but also balances out the sweetness of the berries.
Take your time with this step; the fluffy texture is what brings your dessert to life!
When you’ve achieved that perfect consistency, it’s time to layer it generously over your berry mixture. Don’t skimp—spread it thick, allowing the cream to cascade beautifully over the fruits. You want each bite of your trifle to be a glorious combination of flavors and textures.
Remember, the whipped cream serves more than just flavor; it binds everything together, making each layer a delightful experience.
- It enhances the overall visual appeal of your trifle.
- It creates a creamy contrast to the tartness of the berries.
- It guarantees a satisfying mouthfeel that keeps everyone coming back for more.
Step 3. Add Cake Cubes Evenly
Gently place your cake cubes atop the whipped cream layer, ensuring they’re distributed evenly across the surface. This step is essential for achieving that delightful balance of flavors and textures in your trifle. You want each spoonful to include the soft cake mingling with the creamy goodness below.
Start by picking your favorite cake, whether it’s a light vanilla sponge or a rich chocolate layer. Cut it into bite-sized cubes, so they soak up all the delightful berry juices and cream.
As you layer the cubes, make sure to fill in any gaps. It’s all about visual appeal and that heavenly combination of sweetness in every bite!
Once the cake is in place, take a moment to admire your work. The layers will look so inviting, encouraging everyone to dig in.
Plus, the beautiful contrast of colors from the cake and whipped cream adds a festive touch, perfect for any gathering. Remember, you’re creating a standout dessert that’s as delicious as it’s eye-catching!
Step 4. Drizzle With Berry Sauce
With the cake cubes arranged perfectly, it’s time to add a burst of flavor. Grab your homemade berry sauce or store-bought, and lovingly drizzle it over the cake layers. This sauce not only enhances the trifle’s appearance with its vibrant colors, but it also infuses the dessert with a delightful sweetness that harmonizes beautifully with the berries.
As you pour, let that luscious sauce cascade down the sides, ensuring every bit of cake gets a taste of that fruity goodness. The goal is to create a balance between the moist cake and tart berries, making every bite an experience.
Remember, this is your chance to get creative! Consider these key points:
- A mix of berry flavors can elevate your trifle, combining strawberries, blueberries, and raspberries for an explosion of taste.
- Don’t shy away from adjusting sweetness to match your preference; a little extra sugar can work wonders!
- Drizzling in layers can help create a stunning visual effect, making it look as enticing as it tastes.
Now, take a moment and admire your masterpiece before moving on. You’re one step closer to serving a deliciously irresistible berry trifle!
Step 5. Top With Fresh Mint

Fresh mint is the perfect finishing touch for your berry trifle, adding a pop of color and a hint of revitalizing flavor. Once you’ve layered your trifle with luscious berries, creamy custard, and fluffy whipped topping, it’s time to elevate your dessert experience.
First, take a handful of fresh mint leaves. Look for vibrant, deep green leaves, as they’ll provide the best flavor and visual appeal.
Gently rinse the leaves under cold water to remove any dirt, and pat them dry with a paper towel. Next, you can choose to either leave the leaves whole for a bold presentation or finely chop them for a burst of flavor in every bite. If you’re feeling adventurous, try chiffonading the leaves by stacking, rolling, and slicing them thinly.
Finally, sprinkle the mint over the top of your trifle just before serving. This step not only enhances the taste but also creates an inviting aroma that will draw everyone closer to the dessert.
Your berry trifle is now ready, and the fresh mint will impress your family and friends, making your celebration even more special. Enjoy every delightful bite!
Final Thoughts
As you wrap up your berry trifle journey, it’s important to remember that this dessert is a delightful way to showcase seasonal fruits while impressing your guests.
The vibrant layers of cream, cake, and fresh berries not only create a feast for the eyes, but they also burst with flavor that everyone will love. You can feel proud serving a dessert that’s as tasty as it’s beautiful.
To make your trifle even more special, consider the following:
- Use local, seasonal berries for the best flavor and freshness.
- Don’t hesitate to get creative! Mix different flavors of cake or yogurt for a unique twist.
- Always serve it in a clear dish to allow guests to appreciate those gorgeous layers.
Frequently Asked Questions
Can I Use Frozen Berries Instead of Fresh Ones?
Sure, you can use frozen berries instead of fresh ones! Just remember to thaw and drain them to avoid excess moisture. They’ll add great flavor and color, making your dish just as delicious!
How Many Servings Does This Trifle Recipe Make?
This trifle recipe typically makes about six to eight servings, depending on how generously you layer it. If you’re serving a crowd, consider doubling the recipe to guarantee everyone gets a delicious portion.
What Type of Dish Is Best for Serving a Trifle?
Who knew serving a trifle could be so fancy? You’ll want a clear glass dish to showcase those delicious layers. It makes you look like a gourmet chef, even if you just whipped it up!
Can I Prepare the Trifle a Day in Advance?
Absolutely, you can prepare the trifle a day in advance! Just layer all the components, cover it well, and refrigerate. This way, the flavors meld beautifully and save you time on the big day.
What Alternatives Can I Use for Whipped Cream?
If you’re looking for alternatives to whipped cream, consider using whipped coconut cream, Greek yogurt, or mascarpone cheese. Each option adds a unique taste, enhances texture, and fits diverse dietary preferences to suit your needs perfectly.


