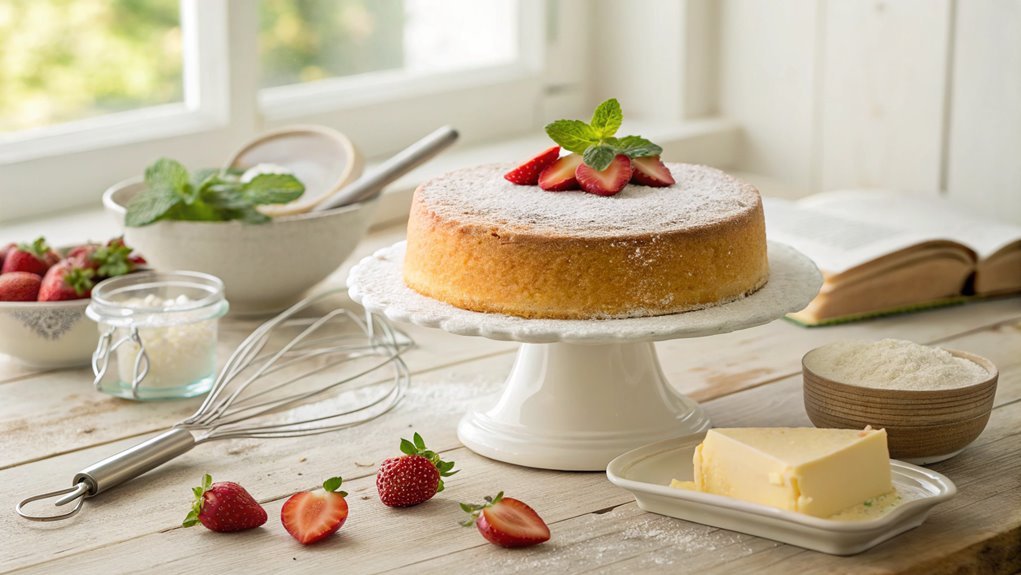
Sponge Cake Recipe
Sponge cake, dating back to the 16th century, is a light and airy dessert known for its adaptability to various flavors and toppings. Achieving the perfect texture involves understanding the essential steps and ingredients.
Exploring different variations can enhance your sponge cake experience, making it a favorite among both novice and seasoned bakers.
Recipe
Sponge cake is a delightful dessert known for its light and airy texture, making it perfect for any occasion. This classic cake is made by whipping air into the batter, which helps it rise beautifully during baking.
With its delicate crumb and subtle sweetness, a sponge cake can be enjoyed on its own or paired with a variety of toppings and fillings, such as fresh fruits, whipped cream, or a rich chocolate ganache.
Making a sponge cake at home is surprisingly easy, requiring only a few simple ingredients. The key to achieving the perfect sponge lies in the technique, particularly in how you incorporate air into the mixture.
By carefully folding the ingredients and ensuring your egg whites are whipped to the right consistency, you can create a cake that isn’t only delicious but also impressively fluffy. Get ready to whip up a batch of this timeless treat that everyone will love!
Ingredients:
- 4 large eggs
- 1 cup granulated sugar
- 1 cup all-purpose flour
- 1/4 cup unsalted butter, melted
- 1 teaspoon vanilla extract
- 1/2 teaspoon baking powder
- A pinch of salt
Now let’s move on to the cooking steps.
Cooking Steps
Now it’s time to get your hands into the delicious world of sponge cake with some simple cooking steps!
You’ll start by preheating your oven to 350°F and mixing together the eggs and sugar until they’re light and fluffy.
Once you fold in the flour and add a splash of vanilla extract, you’re just a bake away from enjoying a delightful treat in about 25 minutes!
Step 1. Preheat Oven to 350°F
Before you start mixing your ingredients, it’s important to preheat your oven to 350°F. This step is vital because it guarantees your sponge cake bakes evenly and rises beautifully. An oven that’s too cool won’t give your cake that light, airy texture we all love, while an oven that’s too hot can create an overcooked outer layer before the inside is done.
To preheat your oven, simply turn the temperature dial or press the buttons on your oven’s control panel. It usually takes about 10 to 15 minutes for the oven to reach the desired temperature, so it’s a great time to gather your ingredients and prepare your baking pan.
Make sure you have everything you need within reach, like flour, sugar, and eggs, so you’re ready to plunge into the mixing process once the oven is hot.
Don’t forget to check that your oven rack is in the center position. This placement helps your cake bake evenly.
As the oven warms up, you can already imagine the delicious aroma of your sponge cake filling your kitchen. So, get excited! You’re one step closer to enjoying a homemade treat that’s sure to impress.
Step 2. Mix Eggs and Sugar
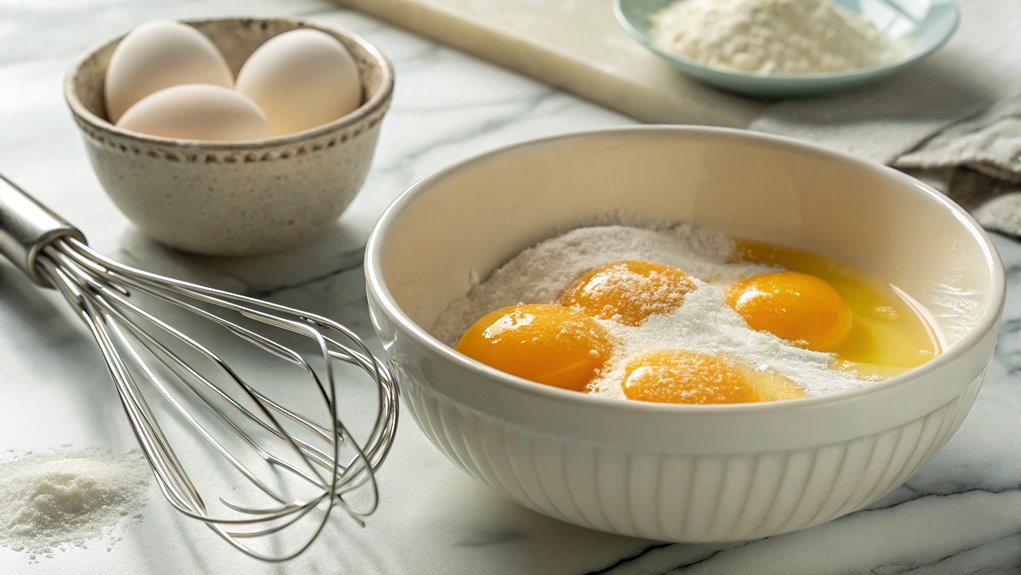
Whisk together the eggs and sugar until the mixture becomes pale and fluffy. This step is essential for creating that light and airy texture you want in a sponge cake.
As you whisk, you’ll notice the color changing and the volume increasing, which means you’re on the right track! Use a hand mixer or stand mixer for the best results, but if you’re feeling up for a workout, a good old-fashioned whisk works too.
Make sure you’re whisking at a medium speed to incorporate air without splattering. This process usually takes about 5 to 8 minutes, so don’t rush it! You want to achieve a beautiful ribbon-like consistency.
When you lift the whisk out of the bowl, the mixture should fall back in a thick ribbon. That’s your cue that it’s ready!
Once it’s fluffy and pale, you’ll feel that excitement building, knowing you’re closer to that delicious sponge cake. This mixture is the heart of your cake, so give it the attention it deserves.
You’re doing great! Keep going, and soon you’ll be ready for the next step in your baking adventure. Enjoy the process—it’s all part of the fun!
Step 3. Fold in Flour Gently
Once your egg and sugar mixture is fluffy and pale, it’s time to gently fold in the flour. This step is essential for achieving that light and airy sponge cake we all love.
Start by sifting your flour into the bowl. Sifting helps eliminate lumps and guarantees even distribution.
Now, grab a spatula and scoop from the bottom of the mixture, lifting it gently to the top. Remember, you want to incorporate the flour without deflating your precious mixture.
As you fold, use a circular motion, and don’t rush. Take your time to make sure everything blends smoothly. It’s okay if you see a few streaks of flour; you don’t want to overmix. Just a few folds should do the trick!
The batter will start to look uniform and slightly thicker, but you should still see some air bubbles. This air is what gives your sponge cake its lovely rise.
Once you’ve folded in the flour, you’re one step closer to baking magic! Your batter is now ready for the next exciting phase. Embrace the joy of baking, and let’s keep that momentum going!
Step 4. Add Vanilla Extract Carefully
As you prepare to add vanilla extract, remember that this simple ingredient can elevate your sponge cake’s flavor considerably. The moment you pour in that golden essence, you’re not just adding a flavor; you’re enhancing the entire baking experience. Vanilla extract brings warmth and richness, making each bite of your cake utterly delightful.
To add it correctly, measure out one teaspoon of pure vanilla extract. If you prefer a more intense flavor, feel free to add a little more, but don’t overdo it. Too much can overpower the delicate taste of the sponge.
Carefully drizzle the vanilla into the batter while gently folding it in. This guarantees that the extract blends evenly without deflating your mixture.
You’ll notice the wonderful aroma filling the kitchen, which is a hint of the deliciousness to come. As you stir, feel the excitement building; you’re just steps away from creating something truly special.
Step 5. Bake for 25 Minutes

Now it’s time to bake your sponge cake for 25 minutes. Preheat your oven to 350°F (175°C) if you haven’t already done so. Once your batter is ready and in the pan, it’s time to slide it into the oven. This is where the magic happens! As it bakes, the heat will cause your batter to rise, creating a light and fluffy texture that’s the hallmark of a great sponge cake.
While the cake is baking, resist the temptation to peek too often. Opening the oven door can let out heat, affecting how well your cake rises. Instead, set a timer and clean up your workspace or prepare any toppings you’d like to use later. Maybe some whipped cream or fresh fruit?
When the timer goes off, check your cake by inserting a toothpick into the center. If it comes out clean, your sponge cake is done. If not, give it a few more minutes and check again.
Once it’s baked to perfection, let it cool slightly before removing it from the pan. You’re on your way to enjoying a delightful treat that’s sure to impress! Happy baking!
Final Thoughts
While you may have experimented with various cake recipes, mastering the sponge cake can truly elevate your baking skills. This light, airy dessert isn’t just a treat for the taste buds; it’s also an opportunity for you to showcase your creativity in the kitchen.
Once you get the hang of it, you’ll see how it can become your go-to cake for any occasion.
Here are three reasons why you should explore making sponge cake:
- Versatility: You can dress it up or down, pairing it with fruits, creams, or even enjoying it plain.
- Simplicity: With just a few ingredients, it’s easy to whip up a delicious cake that impresses.
- Joy of Baking: There’s something magical about watching your cake rise in the oven, filling your kitchen with delightful scents.
Frequently Asked Questions
Can I Substitute Ingredients in a Sponge Cake Recipe?
Absolutely, you can substitute ingredients in many recipes! Just be mindful of how changes affect texture and flavor. Experimenting can lead to delightful surprises, but keep in mind that some substitutions work better than others.
How Do I Store Leftover Sponge Cake?
Think of leftover sponge cake like a treasured book. To store it well, wrap it tightly in plastic wrap or foil and keep it in an airtight container. It’ll stay fresh, just like your favorite read.
What Is the Best Type of Flour for Sponge Cake?
For light and airy results, you’ll want to use cake flour. It has lower protein content, which helps create that delicate texture. All-purpose flour works in a pinch, but cake flour’s your best option.
Can I Freeze Sponge Cake for Later Use?
Yes, you can freeze sponge cake for later use. Just wrap it tightly in plastic wrap or foil, and store it in an airtight container. When you’re ready, thaw it in the fridge for best results.
How Can I Make My Sponge Cake More Flavorful?
To enhance flavor, you can incorporate vanilla extract, citrus zest, or almond extract into your batter. Experiment with spices like cinnamon or nutmeg, and consider adding a touch of buttermilk for richness and depth.
Conclusion
Now that you’ve mastered this sponge cake recipe, get ready to impress your friends and family! Each fluffy, flavorful slice is like a little piece of heaven. Serve it with fresh fruits or a dollop of whipped cream, and it’s sure to be a hit. Roll up your sleeves and enjoy the joy of baking. Once you take that first bite, you’ll be hooked! Enjoy your sweet creation!