Quick Ice Cream Sandwiches Recipe
Imagine hosting a summer gathering where your homemade ice cream sandwiches steal the show. Crafting these treats is simple and can be customized to various tastes.
Impress your guests by mixing and matching flavors and textures. Elevate this classic with unexpected twists and enhancements.
Transform your sandwiches from ordinary to extraordinary. Let’s explore how to make these delights uniquely yours.
Recipe
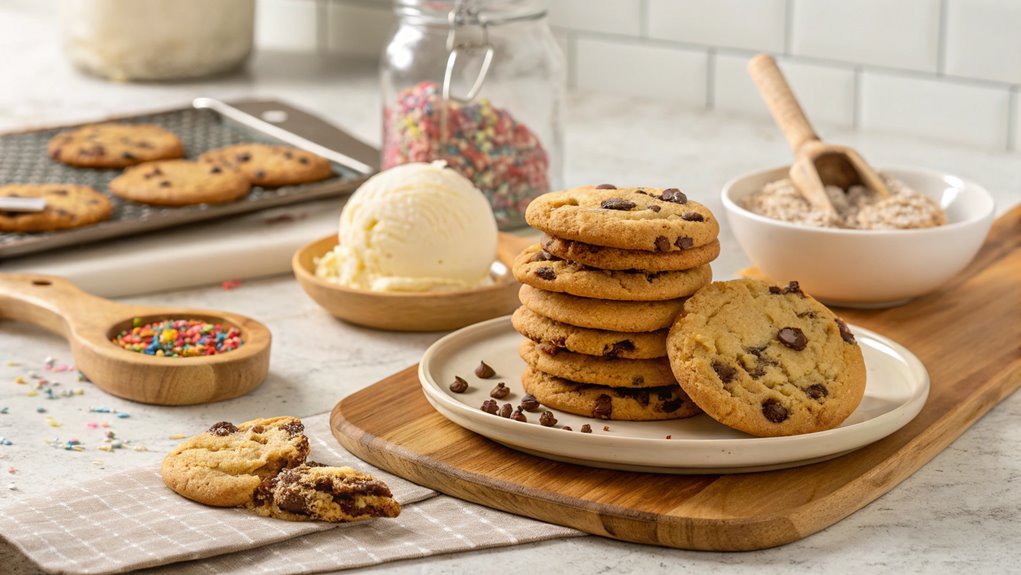
Ice cream sandwiches are a delightful treat that combines the creaminess of ice cream with the sweetness and texture of cookies. This simple yet indulgent recipe allows for endless customization, whether you prefer classic chocolate chip, chewy oatmeal, or even a funfetti cookie base.
Perfect for summer gatherings or simply a cozy night in, making ice cream sandwiches from scratch guarantees a satisfying dessert that can be tailored to your taste.
To kick off the process, you’ll want to prepare an easy cookie dough, which can be made ahead of time and refrigerated. This recipe uses classic vanilla ice cream as the filling, but feel free to experiment with different flavors or mix-ins.
Once your cookies are baked and cooled, it’s all about assembly—scooping the ice cream between two cookies and pressing gently to form your sandwich. These treats are best served immediately, but if you need to make them ahead of time, simply wrap them in plastic wrap and store them in the freezer for a treat that’s ready to enjoy at a moment’s notice.
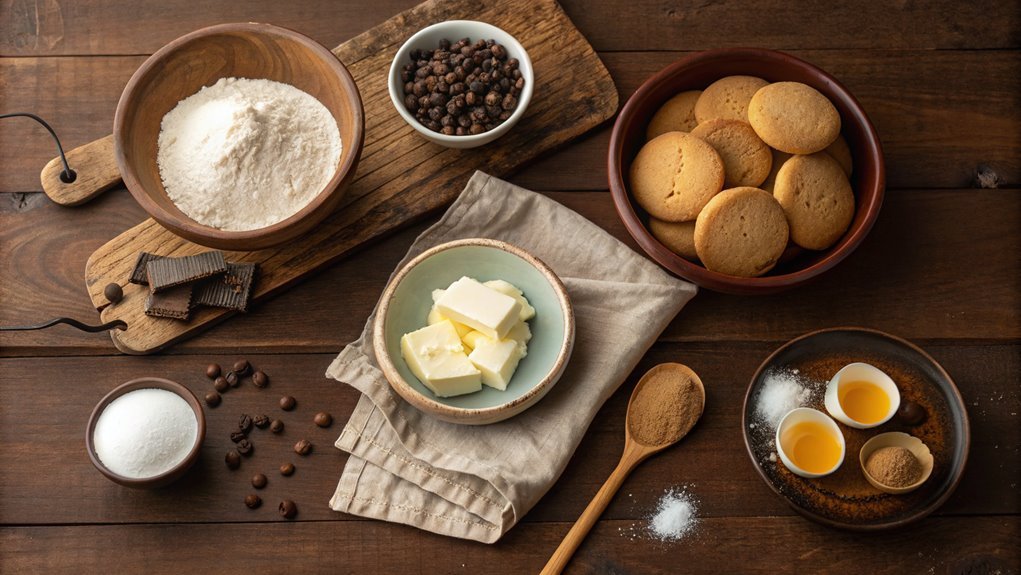
Ingredients:
- 1 cup unsalted butter, softened
- 1 cup granulated sugar
- 1 cup brown sugar, packed
- 2 large eggs
- 1 teaspoon vanilla extract
- 3 cups all-purpose flour
- 1 teaspoon baking soda
- 1/2 teaspoon salt
- 2 cups chocolate chips (or your preferred cookie mix-ins)
- 1 quart vanilla ice cream (or your preferred flavor)
Now let’s move on to the cooking steps.
Cooking Steps
Ready to create some delicious ice cream sandwiches?
Start by choosing your favorite cookies, because the right base makes all the difference.
Once you’ve got your cookies and ice cream ready, we’ll walk through the steps to whip up these tasty treats in no time!
Step 1. Choose Your Favorite Cookies
When it comes to choosing your favorite cookies for an ice cream sandwich, the options are nearly endless, and that’s part of the fun! Your choice of cookies can truly elevate the experience and add a delightful twist to each bite.
Think about what flavors and textures you enjoy most. Here are some popular cookie options to inspire you:
- Classic Chocolate Chip: A beloved favorite with gooey chocolate nestled in a soft, buttery base.
- Oreo Cookies: The classic combination of chocolate and cream brings nostalgia to your ice cream sandwich.
- Peanut Butter Cookies: Rich, nutty flavors create a perfect contrast with smooth ice cream.
- Snickerdoodles: Soft and cinnamon-spiced, these cookies add a unique warmth to your dessert.
Feel free to mix and match! Maybe you’ll discover that your favorite combination is a chocolate chip and peanut butter medley.
Get creative in the kitchen – it’s all about the experience and personal touch. Experiment with bake times, thickness, and even unique flavor additions like sprinkles or chocolate chunks.
Enjoy the process, and let your imagination run wild!
Step 2. Scoop Ice Cream Generously

Grab your favorite ice cream and a sturdy scoop — it’s time to pile it high! Start by choosing a flavor that excites your taste buds. Whether you’re a fan of rich chocolate, invigorating mint, or classic vanilla, let your cravings lead the way.
Now, take your scoop and dig right into the ice cream. You want to scoop generously, so don’t hold back! Aim for a hefty ball of ice cream, roughly the size of a golf ball. This not only gives you a glorious filling but also creates that delightful contrast with your chosen cookies.
If the ice cream’s a bit hard, let it sit for a few minutes at room temperature to soften slightly; it’ll make scooping way easier.
Once you’ve got your perfect scoop, place it right on top of one cookie. Then, grab another cookie and press it down gently on the ice cream. Remember, you want those cookies to hug that ice cream tightly!
Keep going until you’ve created a stack of delicious sandwiches that’ll have everyone coming back for more. Enjoy the process, and get ready for a delightful treat!
Step 3. Freeze Sandwiches for 30 Minutes
To guarantee your ice cream sandwiches hold their shape and deliver that perfect bite, freezing them for 30 minutes is essential. This step assures that the ice cream fills the sandwich nicely and doesn’t spill out when you take a bite. Trust me, it makes all the difference!
Here’s what to do:
- Prepare your freezer: Clear out some space so you can fit the sandwiches in easily.
- Lay them flat: Arrange your assembled sandwiches on a baking sheet or plate. This keeps them from getting squished.
- Cover them up: If you’re worried about freezer odors or freezer burn, wrap the sandwiches in plastic wrap or aluminum foil.
- Set a timer: Keep an eye on the clock to make sure you don’t forget about them while they’re chilling!
After 30 minutes, you’re ready to enjoy those delicious treats! The wait builds anticipation that makes the first bite all the sweeter.
With each sandwich perfectly set, you can now plunge into a delightfully cool and creamy experience, perfect for any occasion.
Step 4. Add Toppings of Choice
Now that your ice cream sandwiches are chilled and ready, it’s time to add a personal touch with your favorite toppings. This is where the fun really begins! You can go wild with options, so grab what you love.
Start by placing your ice cream sandwich on a clean surface, and then sprinkle on some toppings. Consider mini chocolate chips, crushed nuts, or colorful sprinkles for a festive look. You might even want to immerse yourself in a layer of crushed cookies or a drizzle of caramel sauce to take it to the next level.
To make sure the toppings stick, gently press down on your sandwich once you’ve added the goodies. Don’t be shy! Mix and match different toppings to create combinations that excite your taste buds. You can even divide the sandwiches and customize each one, making them unique for everyone.
As you play with flavors, think about what makes you smile. Toppings not only enhance the taste but also make each bite visually delightful.
Before you know it, you’ll have delicious, customized ice cream sandwiches ready to impress your friends and family. Enjoy the creative process, and happy topping!
Step 5. Wrap in Plastic Wrap
Once you’ve added your favorite toppings, wrapping each ice cream sandwich in plastic wrap guarantees they’ll stay fresh and intact in the freezer.
It’s such a simple step, but it makes all the difference! This not only preserves their deliciousness but also keeps the toppings from getting squished or falling off. Plus, it makes it super easy to grab a sandwich whenever you’re craving something sweet.
Here’s how to do it:
- Cut the Plastic: Tear off sections of plastic wrap that are large enough to fully encase each sandwich.
- Wrap Tightly: Place the sandwich in the center and fold the wrap over, pressing it down gently to eliminate air pockets for better preservation.
- Seal the Edges: Make sure the edges are sealed well to keep the ice cream from freezer burn or melting into a puddle.
- Label and Freeze: If you make several flavors, label each one with the type and date before placing them in the freezer.
Enjoy your homemade treats!
You’ve earned it for all the fun you’ve had creating these delightful ice cream sandwiches.
Happy snacking!
Final Thoughts
As you wrap up your ice cream sandwich-making adventure, it’s clear that this treat is more than just a dessert—it’s a fun way to indulge in creative flavors and share delightful moments.
With endless possibilities for cookie and ice cream combinations, you can tailor each sandwich to suit any craving or occasion. Whether you prefer classic combinations or bold flavors, you’ll find that making these treats is both simple and rewarding.
Don’t hesitate to experiment! Try adding toppings like sprinkles, crushed cookies, or even fruit to elevate your creations.
The joy of this recipe is that there are no set rules—it’s all about your personal taste. Get the kids involved, have a tasting party, or make them for friends; the smiles they bring are worth every effort.
Frequently Asked Questions
Can I Use Dairy-Free Ice Cream for This Recipe?
If you’re craving creamy dairy-free delights, you can swap in dairy-free ice cream for a delightful dessert. Just guarantee it’s the right consistency, so your sweet sandwiches stay scrumptious and satisfyingly stacked. Enjoy!
How Long Can I Store Ice Cream Sandwiches?
You can store ice cream sandwiches in the freezer for about two to three weeks. Just wrap them tightly in plastic wrap or an airtight container to keep them fresh and prevent freezer burn. Enjoy!
What Types of Cookies Work Best for Ice Cream Sandwiches?
Did you know 80% of people prefer soft cookies in ice cream sandwiches? For the best results, choose cookies like chocolate chip, snickerdoodles, or oatmeal raisin. They’re perfect for complementing your ice cream’s texture and flavor.
Can I Freeze Them Overnight for Better Texture?
Yes, you can freeze them overnight for better texture! It helps the cookies firm up and allows the ice cream to soften just enough for a perfect bite. You’ll definitely enjoy the improved consistency.
Are There Any Toppings to Enhance the Sandwiches?
You can definitely enhance your sandwiches with toppings! Try drizzling chocolate syrup, sprinkling crushed nuts, or adding colorful sprinkles. Whipped cream or fresh fruit can also elevate the experience and add delightful flavors. Enjoy experimenting!