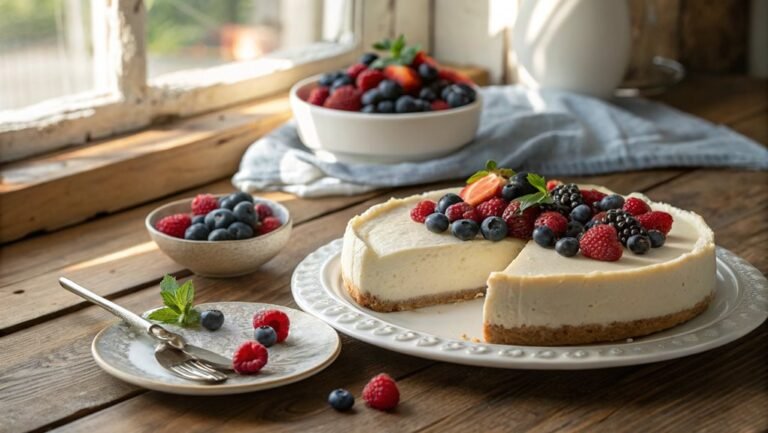
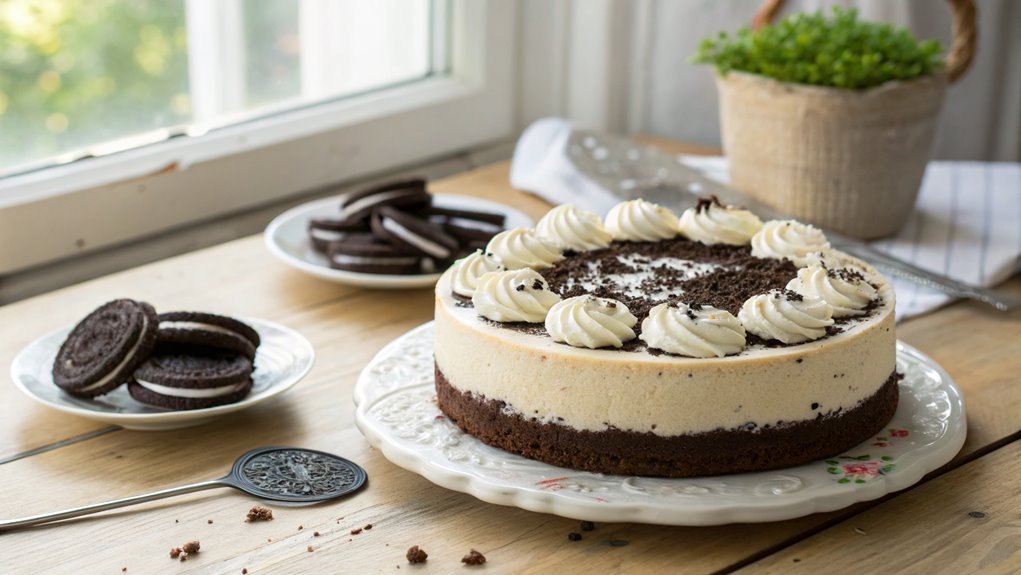
Oreo Cheesecake Recipe
Impress your guests with a simple yet indulgent Oreo cheesecake that combines a creamy filling with a crunchy crust. Customize it for various occasions with a few tweaks to elevate your dessert game effortlessly.
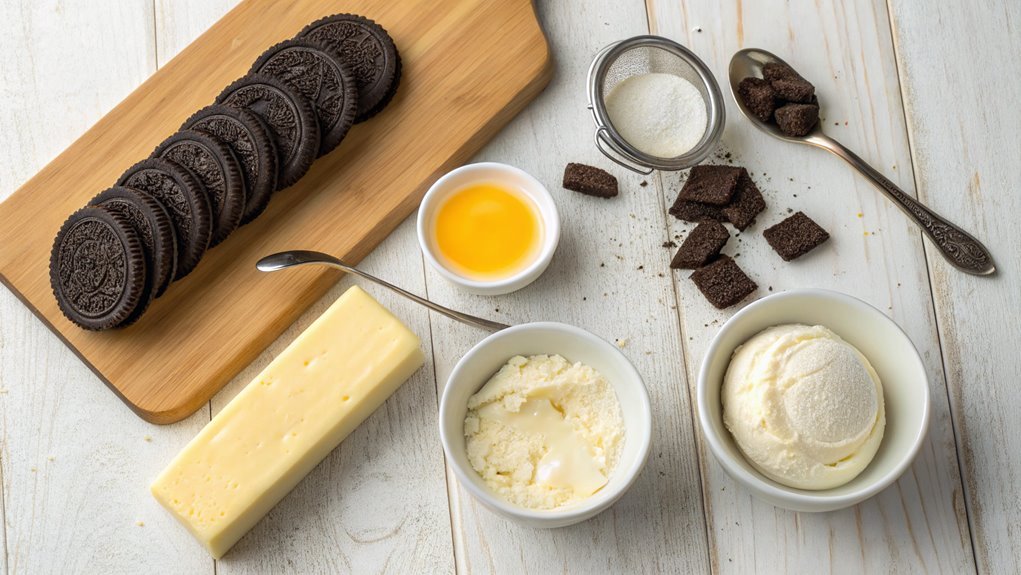
Recipe
If you’re a fan of both Oreos and cheesecake, you’re in for a treat with this Oreo Cheesecake recipe! This luscious dessert features a creamy filling made with cream cheese and whipped cream, perfectly complemented by the rich, chocolatey flavor of crushed Oreo cookies.
Easy to prepare and impressively decadent, this cheesecake is perfect for gatherings, special occasions, or simply indulging yourself.
To start, you’ll need to prepare the crust and filling separately. The crust is made from crushed Oreo cookies combined with melted butter, forming a solid base for your cheesecake.
After baking the crust to achieve the right texture, you’ll mix the cheesecake filling ingredients until smooth, folding in some crushed Oreos for an extra burst of flavor.
Once everything is assembled, simply chill the cheesecake to allow it to set, and then serve it up to delight your friends and family!
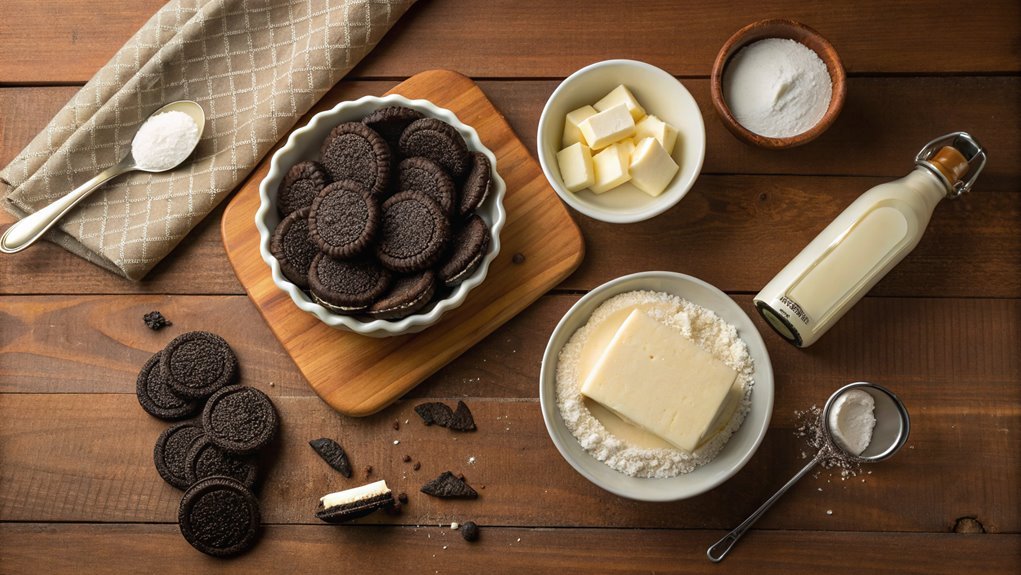
Ingredients:
- 24 Oreo cookies (for the crust)
- 5 tablespoons butter, melted (for the crust)
- 16 ounces cream cheese, softened
- 1 cup granulated sugar
- 1 teaspoon vanilla extract
- 2 cups whipped cream
- 12 Oreo cookies, crushed (for the filling)
- Additional Oreo cookies (for garnish, optional)
Now let’s move on to the cooking steps.
Cooking Steps
Get ready to whip up an amazing Oreo cheesecake that’s sure to impress!
You’ll start by crushing those delicious Oreo cookies into fine crumbs, creating the perfect base for your dessert.
Then, mix the cream cheese and sugar until smooth, adding eggs for richness, and don’t forget to fold in whipped cream for that light, fluffy texture!
Step 1. Crush Oreo Cookies Finely
To create a smooth and creamy Oreo cheesecake, you’ll want to start by crushing your Oreo cookies finely. Grab about 24 to 30 cookies, depending on how dense you want your crust. You can use a food processor for this task, which will make it super quick and easy. Just toss in the cookies and pulse until you achieve a fine crumb.
If you don’t have a food processor, don’t worry! You can put the cookies in a ziplock bag and crush them with a rolling pin, using a bit of muscle for those satisfying crumbles.
Once you’ve got your crumbs, it’s important to guarantee they’re evenly crushed, as larger chunks can lead to a lumpy crust. If you’re feeling fancy, add a pinch of salt at this stage for an extra flavor boost!
Now that your cookies are finely crushed, you can’t help but feel excited about the delicious cheesecake that’s coming together. The rich, chocolatey aroma is just irresistible!
Step 2. Mix Cream Cheese and Sugar
Start by softening the cream cheese to guarantee a smooth blend with the sugar. Take it out of the refrigerator and let it sit at room temperature for about 30 minutes. This little step makes a big difference in achieving that perfect creamy texture!
Once softened, you’re ready to mix! In a large mixing bowl, combine the softened cream cheese with granulated sugar. Use an electric mixer on medium speed, and watch as the magic happens.
Here are some tips to keep in mind:
- Use Full-Fat Cream Cheese: This provides the richest flavor and assures that lovely, creamy consistency.
- Avoid Overmixing: Too much mixing can add air into your cheesecake, creating cracks when it bakes!
- Scrape the Sides: Don’t forget to scrape down the sides of the bowl to ensure everything gets well combined.
Keep mixing until the cream cheese and sugar form a velvety mixture. You’re not just blending ingredients; you’re crafting the base for an indulgent dessert that’ll wow any crowd.
This step sets you up for success in making that unforgettable Oreo cheesecake! Enjoy every moment of this delicious journey!
Step 3. Add Eggs and Blend
Now it’s time to incorporate the eggs into your mixture, elevating your cheesecake to new heights! Start by cracking two large eggs into a separate bowl. This helps prevent any shells from sneaking into your creamy goodness.
Slowly add the eggs to your cream cheese and sugar blend, one at a time. Mixing them individually guarantees that they’re fully incorporated, giving your cheesecake that silky texture we all love.
Once you’ve added both eggs, it’s time to blend! Use an electric mixer on medium speed to combine everything. You want to beat the mixture just until everything’s well blended and smooth.
Keep an eye on it, though; overmixing can add too much air, which can affect the cheesecake’s texture.
As you blend, feel the excitement build—the aroma will start to draw you in! This step is essential to achieving that rich, velvety filling that will make your dessert indulgent.
After blending, pause for a moment and admire your creation before moving on. You’re well on your way to a delicious Oreo cheesecake, so keep that momentum going. Let’s get ready for the next step!
Step 4. Fold in Whipped Cream
Gently fold in the whipped cream to your cheesecake mixture, adding a light and airy texture that balances the rich creaminess. This step is essential, as it elevates your cheesecake to an entirely new level of indulgence! You want to guarantee that the whipped cream blends smoothly without deflating, keeping that delightful fluffiness intact.
Here are some tips to help you master this fundamental technique:
- Use a spatula: A rubber spatula is your best friend here. It allows you to fold without disturbing the air you’ve whipped into the cream.
- Be patient: Don’t rush! Folding takes a bit of time. You’ll see the mixture become beautifully uniform without losing volume.
- Keep it cold: Confirm your whipped cream and cheesecake mixture are chilled, as this helps maintain structure and boosts the overall taste.
As you fold in the whipped cream, watch the transformation unfold! Every gentle motion brings you one step closer to a luscious, creamy cheesecake that’s just begging to be devoured.
Your patience will pay off, and you’re in for a delightful treat! So, let’s make this dessert unforgettable!
Step 5. Add Oreo Crust Layer
Once you’ve folded the whipped cream into your cheesecake mixture, it’s time to create that delicious Oreo crust layer that will perfectly complement the creamy filling.
First, grab a package of Oreo cookies and crush them into fine crumbs. You can use a food processor for that perfect texture, or you can place the cookies in a resealable bag and crush them with a rolling pin—whichever works best for you!
Next, melt some unsalted butter in a small bowl. You’ll need about 5 tablespoons. Combine the melted butter with the Oreo crumbs in a mixing bowl, stirring until everything is well blended. The mixture should feel moist and pack together nicely.
Now, it’s time to press this tantalizing mix into the bottom of your springform pan. Use your fingers or a flat-bottomed measuring cup to create an even layer. Make sure to press firmly to form a solid crust; this will hold everything together beautifully once baked.
Finally, pop it in the fridge for a bit to set up while you finish the cheesecake filling. Trust me, that crispy, chocolatey layer is going to elevate your dessert to a whole new level!
Final Thoughts
As you prepare to indulge in your homemade Oreo cheesecake, remember that this dessert isn’t just a treat; it’s a celebration of flavors and textures. You’ve put in time and effort, and now it’s time to enjoy the fruits of your labor.
Whether you’re sharing this cheesecake with family or keeping it all to yourself, every bite promises creamy goodness infused with that irresistible Oreo taste.
Before you immerse yourself, consider these delightful points that make your cheesecake even more special:
- Versatility: Customize it with toppings like hot fudge, caramel, or fresh fruit!
- Perfect for Any Occasion: Birthdays, holidays, or just because—this cheesecake fits all celebrations!
- Easy to Make: You’ll impress your friends and family with minimal effort.
Take a moment to appreciate the layers you’ve crafted—the rich filling, the buttery crust, and the crunchy Oreo pieces.
Each component adds to the overall experience. Don’t hesitate to experiment and make this recipe your own! Remember, cooking isn’t just about following steps; it’s about creating memories and sharing joy.
Immerse yourself in that slice, and enjoy every delicious moment!
Frequently Asked Questions
Can I Use Different Cookies Instead of Oreos?
Yes, you can definitely use different cookies instead of Oreos. Just keep in mind that the flavor and texture might change. Experimenting with various cookie options can lead to a delightful and unique dessert!
How Long Can I Store Leftover Cheesecake?
You can store leftover cheesecake in the refrigerator for up to five days. Just make sure it’s covered tightly to keep it fresh. If you freeze it, it lasts about three months without losing quality.
Is It Possible to Make This Cheesecake Gluten-Free?
Yes, you can definitely make this cheesecake gluten-free! Just substitute regular Oreo cookies with gluten-free alternatives. Confirm other ingredients, like cream cheese and sour cream, are also gluten-free. Enjoy a delicious, safe treat!
Can I Freeze the Oreo Cheesecake?
Sure, you can freeze your cheesecake—because who wouldn’t want to eat frozen cream cheese? Just wrap it tightly to avoid freezer burn. When you thaw it, enjoy that deliciousness with minimal regret. Yum!
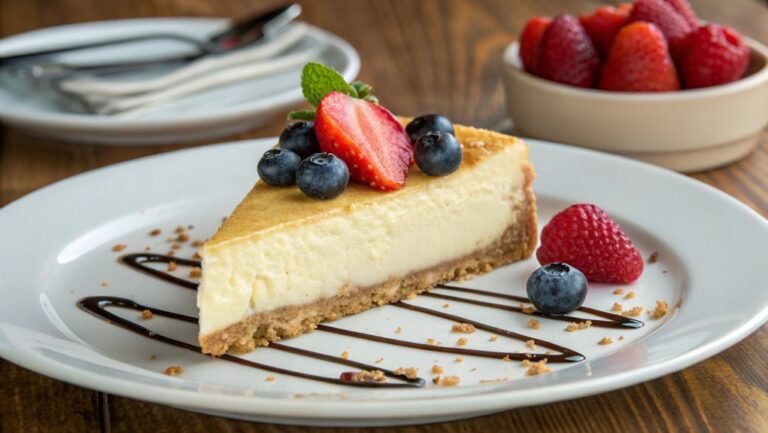
What Should I Serve With the Cheesecake?
You can serve the cheesecake with fresh berries, whipped cream, or a drizzle of chocolate sauce. A side of coffee or a scoop of vanilla ice cream pairs wonderfully too, enhancing your dessert experience even more!