Gluten-Free Berry Cheesecake Bars Recipe
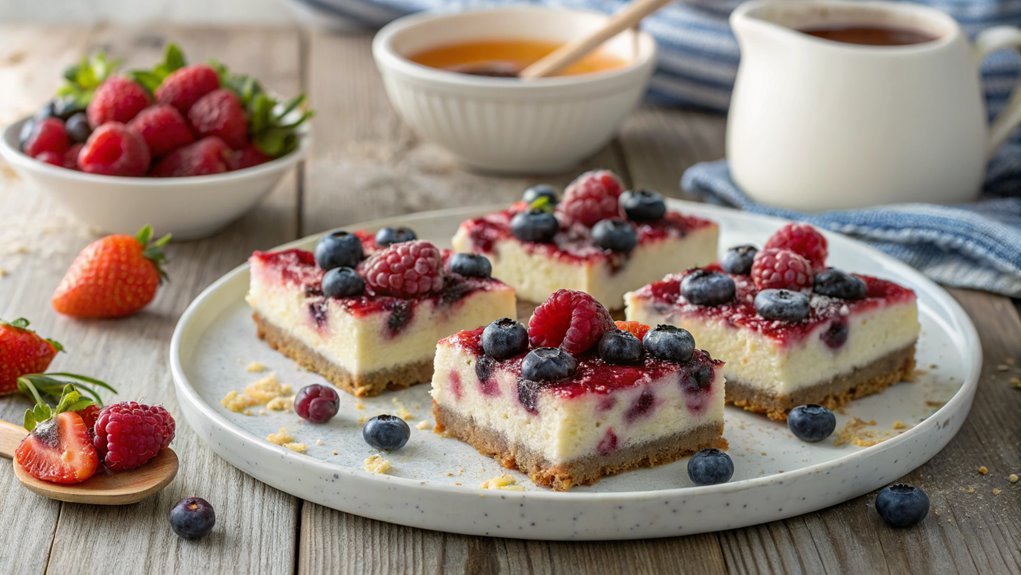
For a gluten-free treat, these Berry Cheesecake Bars offer a delightful balance of creamy cheesecake and tart berries. Customize the berry mix to your liking for an indulgent yet refreshing dessert.
The preparation is simple, but a key tip can take your bars from good to exceptional. Don’t miss out on this vital step to elevate your dessert experience.
Recipe
Indulging in a delicious dessert can sometimes feel like a challenge, especially if you’re following a gluten-free diet. Fortunately, these Gluten-Free Berry Cheesecake Bars offer a delightful solution that’s both satisfying and simple to make. Bursting with flavor from fresh berries and a creamy cheesecake filling, these bars are perfect for any occasion, whether it’s a family gathering, a picnic, or just a sweet treat to enjoy at home.
The best part about this recipe is that it combines a crumbly, gluten-free crust made from almond flour and oats, with a rich and velvety cheesecake layer topped with vibrant mixed berries. Not only are they gluten-free, but they’re also easy to prepare, requiring just a few simple steps and ingredients.
Gather your supplies and get ready to impress your friends and family with these scrumptious cheesecake bars!
Ingredients:
- 1 ½ cups almond flour
- ½ cup gluten-free rolled oats
- ¼ cup coconut oil, melted
- ¼ cup maple syrup
- 1 teaspoon vanilla extract
- 16 oz cream cheese, softened
- ½ cup sugar
- 2 large eggs
- 1 teaspoon vanilla extract (for the filling)
- 1 cup mixed berries (fresh or frozen)
- Powdered sugar (for dusting, optional)
Now let’s move on to the cooking steps.
Cooking Steps
Now that you’ve got your ingredients ready, it’s time to get cooking!
Start by preheating your oven to 350°F, so you’ll have the perfect environment for those delicious bars.
Then, mix the cream cheese and sugar until it’s smooth, and let the fun begin as you add in the eggs, vanilla, and fresh berries!
Step 1. Preheat Oven to 350°F
To kick off your gluten-free berry cheesecake bars, preheat your oven to 350°F. This vital first step sets the stage for baking those delicious treats you’re about to create. A properly preheated oven guarantees your cheesecake bars cook evenly, achieving that perfect creamy texture you crave.
While your oven warms up, take a moment to gather your ingredients and tools. You’ll want everything ready when it’s time to mix and bake. Setting the right temperature is fundamental, so don’t rush this part.
Once the oven reaches 350°F, it’s like a warm invitation for your cheesecake bars to rise and bake beautifully. You’ll find that the aroma wafting through your kitchen as they bake is simply irresistible! It heightens the excitement and makes the wait worthwhile. Your friends and family will be enthusiastic to taste what you’ve prepared.
Remember to use an oven thermometer if you’re unsure about your oven’s accuracy. This little tip can make a big difference in your baking results.
Step 2. Mix Cream Cheese and Sugar

Start by placing softened cream cheese in a mixing bowl and adding the granulated sugar. This is where the magic begins! As you scoop the cream cheese, imagine how creamy and rich your cheesecake bars will turn out.
Using an electric mixer, beat the cream cheese and sugar together on medium speed. You want to achieve a smooth, fluffy texture, so don’t rush it! Scrape down the sides of the bowl with a spatula to make sure everything blends evenly.
You’ll notice how the sugar dissolves into the cream cheese, creating a beautiful mixture that looks so inviting. This step is essential, as it sets the foundation for the creamy filling. The sweetness of the sugar perfectly balances the tanginess of the cream cheese, making your taste buds tingle with anticipation.
Mix until there are no lumps, and the mixture is silky and well combined. This should take about two to three minutes.
Once you’re done, take a moment to appreciate the lovely texture you’ve created. You’re one step closer to those delicious gluten-free berry cheesecake bars that will wow your friends and family! Enjoy the process, and get ready for the next exciting step!
Step 3. Add Eggs and Vanilla
Once you’ve achieved that smooth, fluffy cream cheese mixture, it’s time to enhance the flavor by adding the eggs and vanilla. This step is essential, as it brings richness and depth to your cheesecake bars, making them irresistibly delicious. Let’s get started!
- Crack in the eggs: Gently add two large eggs, one at a time, into your cream cheese mixture. This guarantees they blend evenly without creating lumps.
- Add the vanilla: Pour in a teaspoon of pure vanilla extract. This not only adds sweetness but also elevates the overall flavor profile of your cheesecake.
- Mix thoroughly: Beat the mixture on medium speed until everything is well combined and creamy. You want a silky texture that’s free of any lumps.
- Scrape the bowl: Don’t forget to stop and scrape down the sides of the bowl. This ensures every bit of cream cheese is incorporated and contributes to that creamy consistency you’re aiming for.
Now that your mixture is ready, you’re one step closer to those luscious cheesecake bars. Get excited, because the next phase is equally thrilling!
Step 4. Fold in Fresh Berries
Now that you’ve got that creamy mixture ready, it’s time to fold in the fresh berries for a burst of flavor and color. Choose your favorite berries—blueberries, raspberries, or strawberries all work wonderfully. Gently add them to the creamy mixture, taking care not to crush them. The goal is to keep those lovely berries intact, as they’ll burst with juicy goodness when baked.
With a spatula in hand, gently incorporate the berries into the mixture. Use a folding motion, which means you’re lifting the mixture from the bottom and turning it over the top. This method guarantees an even distribution without breaking the berries apart.
You want to see those vibrant colors swirl throughout the creamy filling, creating a stunning visual feast. As you fold, take a moment to appreciate how delicious this will be. The sweet and slightly tart berries will complement the rich cheesecake flavor perfectly.
Once you’ve evenly mixed in the berries, you’ll be ready to move on to the next step. Trust me, this is where the magic begins. Enjoy the process, and get excited; your gluten-free berry cheesecake bars are just around the corner!
Step 5. Pour Mixture Into Pan
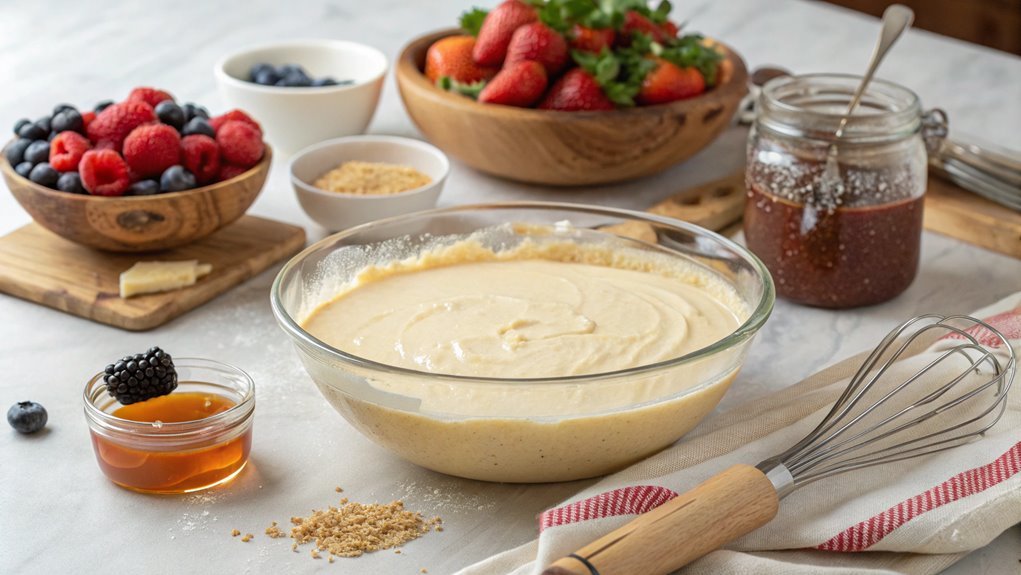
With your berry-filled mixture ready, it’s time to pour it into your prepared baking pan. This step is essential for achieving those luscious cheesecake bars you crave. Grab your pan and get excited, because you’re about to create something delicious!
- Position the pan on a clean, flat surface to prevent any spills while you pour.
- Slowly pour the berry mixture into the pan, letting it gently spread across the bottom. This helps avoid air bubbles that can affect the texture.
- Use a spatula to smooth out the top, ensuring an even layer of that beautiful berry cheesecake goodness.
- Tap the pan lightly on the counter to encourage any trapped air to escape, making sure your bars come out perfect.
Once you’ve done this, you’re ready to bake!
Just imagine the delightful aroma wafting through your kitchen as they cook. It’s hard to resist the anticipation of enjoying these gluten-free berry cheesecake bars.
Final Thoughts
As you savor the last bite of your gluten-free berry cheesecake bars, it’s clear that this recipe isn’t only a delicious treat but also a versatile option for gatherings. You can easily whip these up for birthday parties, potlucks, or just a cozy night in with friends.
The vibrant berries add a burst of flavor, while the creamy cheesecake filling offers a delightful texture that everyone will love.
Don’t forget, you can customize this recipe to suit your tastes! Swap out the berries for your favorites, or even add a dash of lemon zest for a revitalizing twist. Making these bars is a fun way to release your creativity in the kitchen.
And the best part? You’re sharing a dessert that’s gluten-free, ensuring everyone at your table can indulge without worry.
So, roll up your sleeves, gather your ingredients, and get ready to impress your family and friends with these stunning cheesecake bars. With each slice, you’ll see the joy on their faces, and that’s what baking is all about.
Enjoy every moment, and don’t hesitate to share your creations! Happy baking!
Frequently Asked Questions
Can I Use Frozen Berries Instead of Fresh Ones?
Yes, you can use frozen berries instead of fresh ones. Just remember to thaw and drain them first to avoid excess moisture. They’ll still add great flavor and texture to your dish. Enjoy!
How Long Do These Bars Last in the Fridge?
You’d be surprised how long dessert can last! These bars keep well in the fridge for about five to seven days. Just store them in an airtight container to maintain their deliciousness and freshness.
Is There a Dairy-Free Option for This Recipe?
Yes, you can make a dairy-free version! Substitute traditional cream cheese with a dairy-free alternative, like cashew cream or coconut cream. Just verify your other ingredients align with your dietary preferences for a delicious treat.
Can I Substitute the Sweetener for a Low-Calorie Option?
Sure, you can swap that sweetener for a low-calorie option! Just remember, if you’re trying to keep it sweet without the guilt, don’t expect it to taste like candy—life’s all about compromise!
What Is the Best Way to Store Leftover Cheesecake Bars?
To store leftover cheesecake bars, wrap them tightly in plastic wrap or place them in an airtight container. Keep them in the fridge for up to five days, or freeze them for longer-lasting freshness.
Conclusion
These gluten-free berry cheesecake bars are incredibly delicious, with a creamy texture and a burst of berry flavor. They’re easy to make, perfect for gatherings or a cozy night in, and will have your friends and family raving about them!
