Coffee Custard Recipe
Crafting a custard might seem daunting, but it’s actually simple and rewarding. The creamy texture paired with the rich flavor of coffee creates a sophisticated dessert perfect for impressing guests or enhancing your afternoon treat.
With a few basic ingredients and simple steps, you can elevate your coffee experience. This delightful dessert is easily customizable to suit your preferences, making it a versatile addition to your culinary repertoire.
Recipe
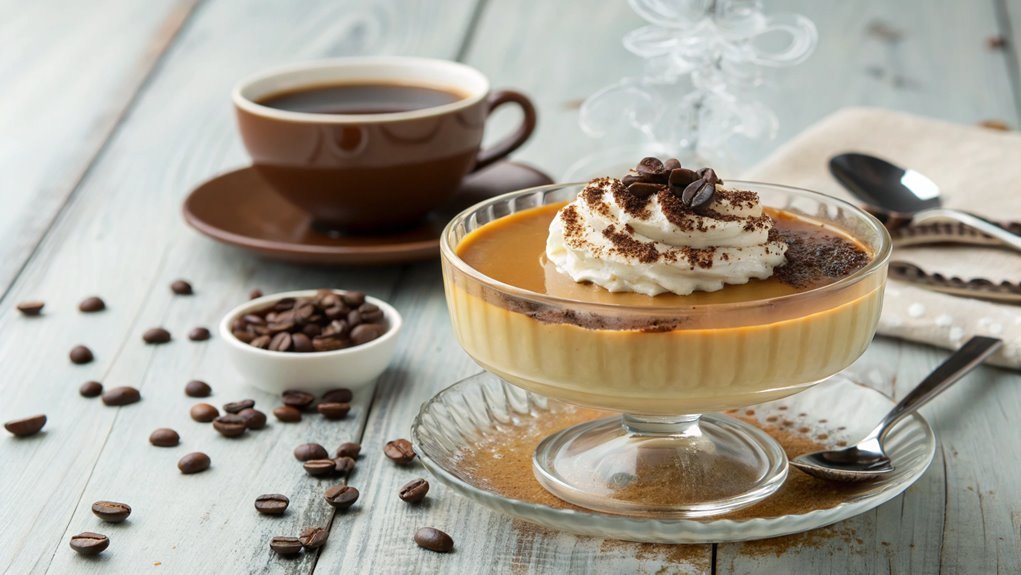
Coffee custard is a delightful dessert that combines the rich flavors of coffee and the creamy texture of custard. This dish is perfect for coffee lovers looking to indulge in a decadent treat.
With its velvety smoothness and deeply aromatic notes, coffee custard can be served on its own or as an accompaniment to other desserts. Whether you’re enjoying it at a dinner party or simply treating yourself, this dessert is sure to please.
Making coffee custard is a straightforward process that requires minimal ingredients and equipment. You’ll need to start by brewing some strong coffee to infuse your custard with deep flavors.
The key to a successful custard lies in gently heating your mixture to avoid curdling the eggs while ensuring it thickens perfectly. Once cooled, this luscious custard can be garnished with whipped cream, chocolate shavings, or a sprinkle of cocoa powder for an extra touch of elegance.
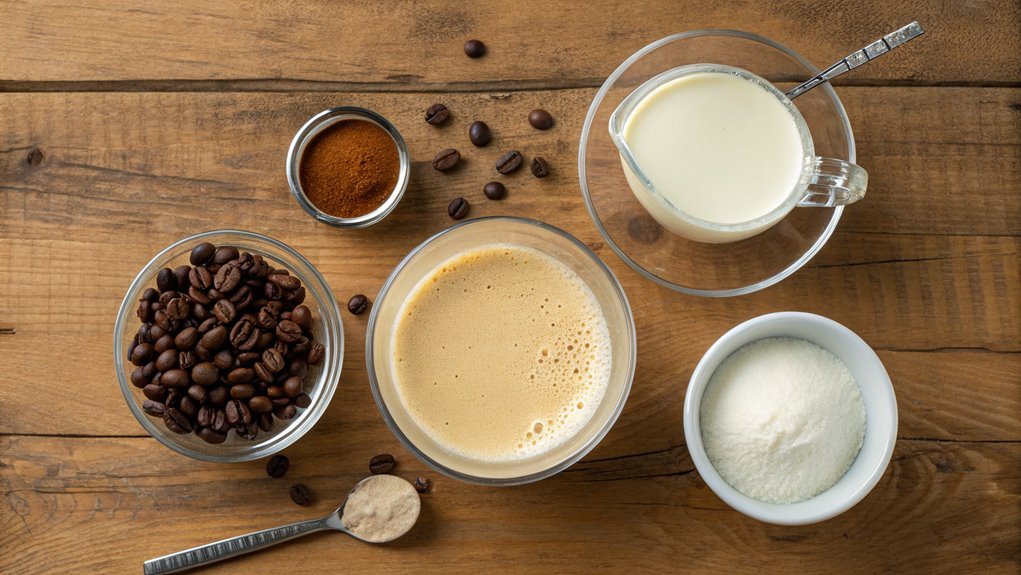
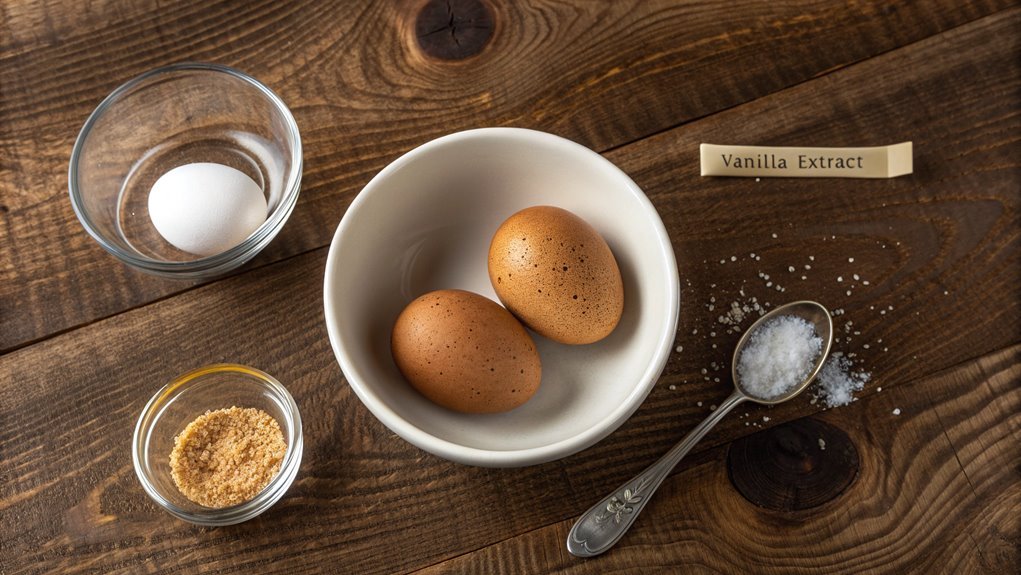
Ingredients:
- 2 cups whole milk
- 1 cup strong brewed coffee
- 3 large eggs
- ½ cup granulated sugar
- 1 teaspoon vanilla extract
- ¼ teaspoon salt
- Optional: whipped cream, chocolate shavings for garnish
Now let’s move on to the cooking steps.
Cooking Steps
Let’s get started with the cooking steps for your delicious coffee custard!
First, you’ll want to preheat your oven to 350°F, which helps create that perfect texture.
Then, you’ll mix the coffee and sugar, and incorporate the whipped cream mixture—trust me, it’s all coming together beautifully!
Step 1. Preheat the Oven to 350°F
Preheating your oven to 350°F is an essential step in making a luscious coffee custard. Doing this guarantees that your custard cooks evenly and develops that creamy texture you crave. To get started, simply set your oven and give it a few minutes to reach the perfect temperature.
Trust me; taking this step seriously will elevate your dessert!
Here are a few tips to keep in mind while preheating:
- Use an oven thermometer: Sometimes the built-in temperature gauge isn’t accurate.
- Avoid opening the door: Each time you open it, heat escapes, slowing down the preheating process.
- Prepare your baking dish in advance: Lining or greasing your dish now saves time later.
- Clear your workspace: Make sure you’ve got everything organized for streamlined cooking.
- Double-check the timer: Setting a timer for an extra reminder can help you focus on prepping your custard.
Step 2. Mix Coffee and Sugar
Once the oven is preheated, it’s time to mix the coffee with sugar for your custard base.
Begin by brewing a strong cup of your favorite coffee—espresso works wonders—or use a rich, dark roasted coffee for bold flavor. Let it cool slightly; you want it warm but not scalding.
In a separate bowl, combine the granulated sugar with the warm coffee, stirring until the sugar dissolves completely. You should see that beautiful coffee mixture turning sheer and glossy!
Next, add in the egg yolks, one at a time, blending well after each addition. The smoothness of the custard starts to take shape as the coffee melds with the sugar and yolks.
Keep mixing until it’s velvety and evenly combined. Don’t rush—this is where the magic happens! You’re creating the base that will make your custard rich and delightful.
As you work, breathe in that wonderful aroma. It’s a reminder of the delicious treat that’s on the way!
Once this mixture is ready, you’re all set for the next step in crafting your coffee custard masterpiece. Get excited; you’re nearly there!
Step 3. Incorporate Whipped Cream Mixture
As you prepare to incorporate the whipped cream mixture, make certain it’s light and airy, as this will add a delightful texture to your custard. You’ll want to gently fold the whipped cream into the coffee-sugar mixture, ensuring you preserve that fluffy consistency. This process is all about blending without deflating, so take your time and be tender.
Here’s what to keep in mind while you fold:
- Use a spatula to scoop from the bottom and fold over the top.
- Work in small batches, adding a bit of whipped cream at a time.
- Maintain a gentle touch to avoid losing air.
- Keep mixing until you see just a few ribbons of cream remaining.
- Aim for a homogenous blend that’s still airy.
As you see the creamy delight come together, you’ll feel excitement bubbling up! This is the moment when your coffee custard starts evolving into something truly magnificent.
Step 4. Pour Into Ramekins Evenly
To guarantee your coffee custard sets perfectly, you’ll want to pour the mixture into ramekins evenly. This step is essential because if the mixture isn’t distributed evenly, some portions might overcook while others remain unset.
Start by placing the ramekins on a flat surface, making sure they’re steady and won’t spill. Using a ladle or a measuring cup with a spout makes this job easier, allowing you to control the pouring process.
Slowly pour the custard mixture into each ramekin, filling them about three-quarters full. Keep an eye on the level in each ramekin; you want them to be as equal as possible! If you notice one is getting too full, you can always transfer a little from it to another.
This attention to detail will make a noticeable difference in the final presentation and texture.
Lastly, take a moment to admire your handiwork! You’ve crafted a beautiful mixture, and making sure you pour it evenly is the final touch needed to guarantee your coffee custard is as delightful as it sounds.
Now, you’re just a few steps away from a delicious dessert that everyone will love!
Step 5. Bake for 30 Minutes
With the ramekins filled evenly, it’s time to pop them into the oven. This is where the magic happens! You’ll want to bake your coffee custard for about 30 minutes. During this time, the heat transforms your mixture into a creamy, luscious dessert that will have everyone begging for seconds.
While they’re baking, keep an eye on them. The custards are ready when the edges are firm, but the centers still wobble slightly. You want that perfect creamy texture, so don’t forget to check!
Here are a few tips to guarantee your custard comes out amazing:
- Place the ramekins in a shallow baking dish filled with hot water for gentle cooking.
- Avoid opening the oven door frequently to maintain a consistent temperature.
- Rotate the baking dish halfway through for even baking.
- Check for doneness by shaking the pan gently to see if the centers jiggle slightly.
- Let them cool before refrigerating to enhance the flavors.
Once they’re done, you’ll feel a sense of accomplishment!
Just wait until you taste it—your coffee custard will impress everyone at the table. Enjoy every creamy bite!
Final Thoughts
To conclude, making coffee custard is a rewarding culinary adventure that combines rich flavor with smooth texture. You’ll find that it’s not only a treat for your taste buds but also a delightful experience in the kitchen. With just a few simple ingredients, you can create a dessert that impresses family and friends alike.
As you plunge into this recipe, remember to savor each step. From brewing the coffee to whisking the eggs, these moments are what make cooking enjoyable. The aroma of fresh coffee filling your kitchen will have everyone curious about what you’re concocting.
Just imagine the joy on their faces when they take their first spoonful.
Don’t hesitate to experiment with flavors! You can try adding a dash of vanilla or even a sprinkle of cocoa powder for a different twist. Once you’ve mastered the basics, feel free to make this recipe your own.
Ultimately, coffee custard isn’t just about dessert; it’s about creating love and warmth in your home. So, grab your ingredients, roll up your sleeves, and embark on this delicious journey. You won’t regret it! Happy cooking!
Frequently Asked Questions
Can I Use Decaf Coffee in This Custard Recipe?
About 30% of coffee drinkers prefer decaf for lower caffeine intake. Yes, you can use decaf coffee in your custard. It’ll still provide that rich flavor you love, just with less caffeine kick. Enjoy!
How Long Does Coffee Custard Last in the Refrigerator?
Coffee custard can last in the refrigerator for about three to four days. Just make sure it’s stored in an airtight container. If you notice any off smells or textures, it’s best to discard it.
Can I Substitute Dairy Milk With a Non-Dairy Alternative?
Did you know that nearly 40% of the population prefers non-dairy milk? You can absolutely substitute dairy milk with a non-dairy alternative in your recipe—it’ll still yield a deliciously creamy texture and flavor!
What Variations Can I Try With This Coffee Custard?
You can experiment with flavors by adding vanilla extract, hazelnut liqueur, or even chocolate. Try incorporating spices like cinnamon or nutmeg for warmth. Top it with whipped cream or toasted nuts for extra texture and taste.
Is There a Gluten-Free Option for This Recipe?
Absolutely, you can create a gluten-free option! Just substitute the regular flour with a gluten-free alternative like almond flour or cornstarch. Make sure to check other ingredients for any hidden gluten sources, and you’re good to go!