Chocolate Peanut Butter Pie Recipe
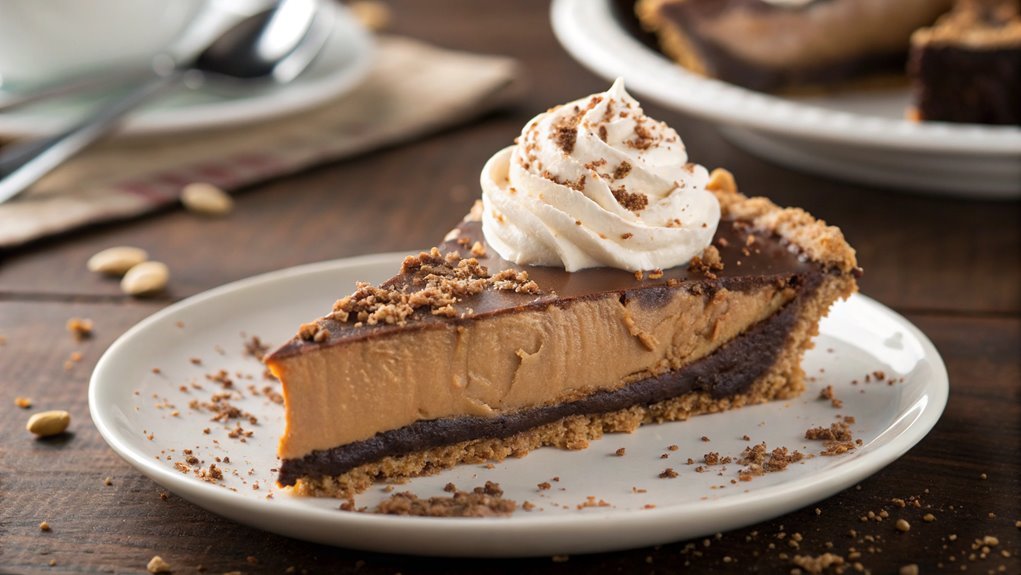
Imagine a slice of heaven where creamy peanut butter meets rich chocolate. This Chocolate Peanut Butter Pie isn’t just a dessert; it’s an experience that enhances any gathering.
While it might seem complex to make, it’s surprisingly simple with the right steps. As we explore crafting this indulgent treat together, you’ll learn to balance flavors and textures for a result that impresses.
What preparation secrets make this pie a crowd favorite?
Recipe
Chocolate Peanut Butter Pie is the perfect dessert for any chocolate and peanut butter lover. This rich and creamy pie combines the deep flavor of chocolate with the nutty goodness of peanut butter, all nestled in a delightful crust.
Whether you’re celebrating a special occasion or just craving a delicious treat, this pie will surely satisfy your sweet tooth.
The preparation for this decadent dessert is relatively simple, making it ideal for both novice and experienced bakers alike. With a few basic ingredients and a little bit of time, you can create a show-stopping pie that will impress friends and family.
Serve it chilled for a revitalizing dessert, and enjoy every luscious bite!
Ingredients:
- 1 pre-made graham cracker pie crust
- 1 cup creamy peanut butter
- 8 oz cream cheese, softened
- 1 cup powdered sugar
- 1 cup whipped topping (like Cool Whip)
- 1 cup semi-sweet chocolate chips
- 1/4 cup milk
- 1 teaspoon vanilla extract
- Extra whipped topping for garnish (optional)
- Cocoa powder or chocolate shavings for garnish (optional)
Now let’s move on to the cooking steps.
Cooking Steps
Now that you’ve got your ingredients ready, it’s time to jump into the fun part: cooking!
You’ll start by preparing your crust base, then move on to mixing that delicious chocolate and peanut butter combination.
With each step, you’ll get closer to creating a mouthwatering pie that’s perfect for any occasion!
Step 1. Prepare Your Crust Base
Before diving into the delicious filling, you’ll want to create a solid crust base that adds crunch and flavor. Start by gathering your ingredients: crushed graham crackers, melted butter, and a bit of sugar. If you’re feeling adventurous, consider adding finely chopped nuts for an extra twist!
In a large mixing bowl, combine about 1 and ½ cups of crushed graham crackers with ⅓ cup of melted butter and 2 tablespoons of sugar. Use a spatula or your hands to mix everything together until it resembles wet sand. This consistency is key—you want it moist enough to hold together but not soggy.
Now, press this mixture firmly into a 9-inch pie pan, ensuring you create an even layer across the bottom and up the sides. Don’t be shy—you can use the back of a measuring cup or your fingers to really compact it.
Once that’s done, pop the crust in the oven at 350°F for about 10 minutes, just until it’s golden and fragrant. Let it cool completely before moving on. Trust me, this crust will set the stage for an unforgettable pie experience!
Step 2. Mix Chocolate and Peanut Butter

Fusing chocolate and peanut butter is the heart of this pie, and it’s easier than you might think. Begin by melting your choice of chocolate—whether it’s semi-sweet, dark, or a mix—until it’s silky smooth. You can do this in a microwave or over a double boiler. Just be certain to stir it frequently, so it doesn’t burn.
Next, in a separate bowl, combine creamy peanut butter with some sugar and vanilla extract. Mix until everything is well blended.
Now, slowly pour in the melted chocolate. Stir gently but thoroughly to guarantee you have a rich, velvety filling. The marriage of these flavors is magical!
Here’s what you need to keep in mind:
- Use high-quality chocolate for richer flavor.
- Choose smooth peanut butter for the best texture.
- Adjust sweetness according to your taste.
- Don’t rush the melting process; it’s vital for a smooth mix.
Once you’ve mixed everything together, you’re a step closer to a delightful pie that’ll wow everyone!
Get ready to experience the ultimate indulgence as you prepare to chill your filling next!
Step 3. Chill the Pie Filling
Once you’ve achieved a smooth and creamy filling, it’s crucial to let it chill for the best texture and flavor. Placing your filling in the refrigerator allows the ingredients to meld together beautifully and enhances that rich chocolate and peanut butter taste you love.
You’ll want to cover the bowl with plastic wrap or a lid to avoid any fridge odors seeping in. Chilling the filling also thickens it, making it easier to spread into your pie crust later. Aim to let it chill for at least 30 minutes, but if you can resist the temptation, an hour or two is even better!
As it cools, set the mood—maybe turn on some music or prepare a cup of coffee. Cooking should be a joy, after all!
While the filling chills, you can take a moment to clean up your workspace. This small task not only makes the process smoother but also gives you a sense of accomplishment.
Trust us; the final product will be worth the wait. Soon enough, you’ll spread that exquisite filling into your crust, setting the stage for an unforgettable dessert experience that you’re bound to share with friends and family!
Step 4. Pour Filling Into Crust
With your filling perfectly chilled, it’s time to pour it into the prepared pie crust. This is where the magic really happens, and you’ll see your creation start to take shape. Grab a large spoon or spatula, and gently scoop the filling from the mixing bowl. As you transfer it, be careful not to deflate the mixture; you want all that airy goodness to stay intact.
Once you’ve got the filling in the crust, spread it evenly, reaching all the way to the edges for that perfect presentation. This is your chance to get creative!
Here’s what to keep in mind:
- Make sure the crust is stable and won’t crumble under pressure.
- Take your time smoothing the top to avoid lumps.
- Check for any bubbles—if you find any, pop them gently with a toothpick.
- Lift the pie slightly and tap it on the counter to settle everything down.
Now, step back and admire your work! You’re just a bit away from a delicious slice of heaven, and this filling is sure to delight the taste buds of everyone who gets a piece.
Step 5. Top With Whipped Cream
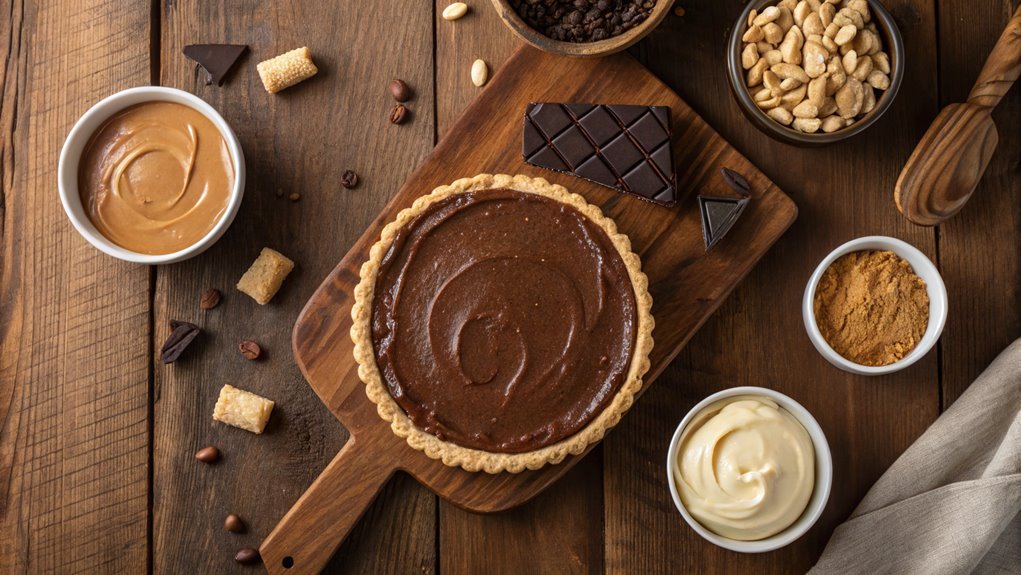
As you prepare to elevate your pie, topping it with whipped cream brings a light and fluffy finish that perfectly complements the rich chocolate and peanut butter flavors.
Start by whipping heavy cream in a chilled bowl until soft peaks form. You’ll find that it transforms beautifully, becoming light and airy.
Once you reach that perfect consistency, gently fold in some powdered sugar and vanilla extract for added sweetness and flavor. It’s the magic touch that will take your pie over the top!
Now, grab a spatula and spread the whipped cream evenly over the cooled pie filling, allowing it to fall over the edges for an enticing look.
Don’t forget to add some extra flair! Consider sprinkling chocolate shavings or crushed peanuts on top to enhance the dessert visually and texturally. You could even create decorative patterns if you’re feeling creative!
Once you’ve completed your masterpiece, let it chill for at least an hour to set. Then, slice into that delicious pie, and watch everyone dig in with glee.
Topping your chocolate peanut butter pie with whipped cream not only makes it beautiful but also adds that delightful finishing touch you’re sure to love!
Final Thoughts
While preparing a Chocolate Peanut Butter Pie can seem intimidating, the rewarding experience of creating a delightful dessert is well worth the effort.
You’ll love how this rich and creamy pie comes together, and it’s sure to impress everyone who gets to try it. With just a few ingredients and some simple steps, you can bring joy to your kitchen and your family’s taste buds!
Don’t forget the little touches that elevate your pie. Here are some tips to make your experience even better:
- Use high-quality chocolate and peanut butter for the best flavor.
- Let your pie chill thoroughly to achieve the perfect slice.
- Experiment with different toppings like crushed peanuts or chocolate shavings for added texture.
- Share your pie with friends and family to spread the love!
Now let’s move on to the cooking steps.
Frequently Asked Questions
Can I Use Almond Butter Instead of Peanut Butter?
Sure, you can switch peanut butter for almond butter. It’ll definitely taste just as indulgent, right? Just remember, almond butter might change the texture and flavor a bit, so it’s not exactly a perfect swap!
What Are Some Gluten-Free Crust Options?
If you’re looking for gluten-free crust options, try almond flour, coconut flour, or crushed gluten-free cookies. Each brings a unique flavor and texture, so experiment to find the one you like best for your dessert!
How Long Does the Pie Need to Chill?
After you’ve assembled your pie, it needs to chill for at least four hours. This helps the filling set properly, ensuring you get a perfect slice when it’s finally time to serve and enjoy!
Can I Make This Pie in Advance?
Absolutely, you can make this pie in advance! Just prepare it, chill it properly, and store it in the refrigerator. It’ll be ready to impress your guests whenever you need it. Enjoy the convenience!
What Toppings Pair Well With Chocolate Peanut Butter Pie?
Toppings for your creation can elevate it to celestial heights. Whipped cream, crushed nuts, and drizzled fudge play a symphony of flavors, while sea salt dances on your taste buds, enhancing that sweet and savory delight. Enjoy!
