Candy Coated Pretzel Rods Recipe
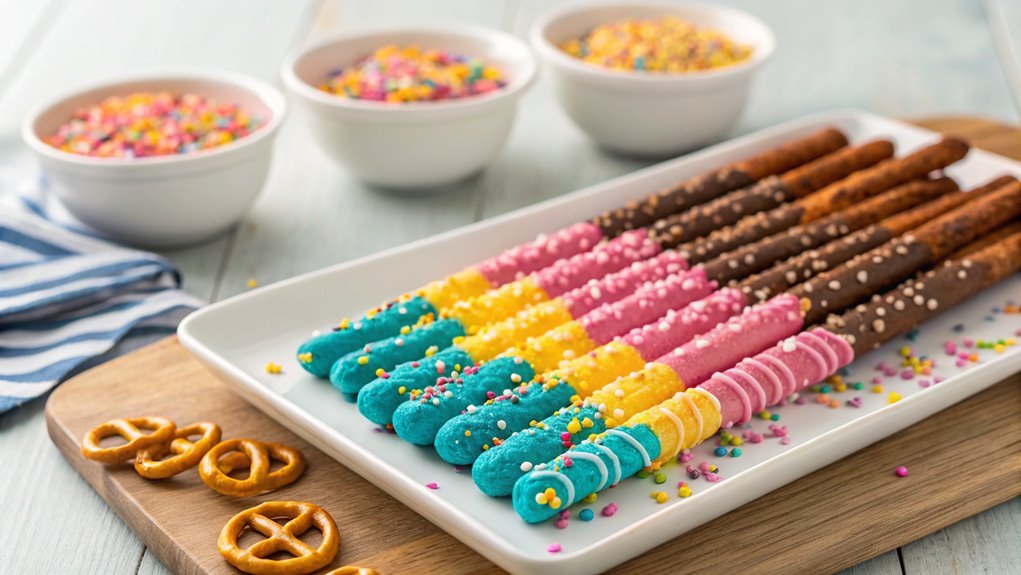
Candy Coated Pretzel Rods offer a perfect balance of salty and sweet flavors. This simple recipe is customizable with colorful toppings and provides an engaging cooking experience for all ages. Consider how you can elevate this recipe for a special occasion.
Recipe
Candy coated pretzel rods are a fun and tasty treat that brings together the perfect combination of salty and sweet.
Whether you’re preparing them for a party, a holiday gathering, or just a special snack for yourself, these pretzel rods are sure to be a hit. The process is simple and easy to follow, making it a great project for both beginners and experienced bakers alike.
Kids love helping out with this recipe, so it’s a great way to spend some quality time in the kitchen!
The beauty of candy coated pretzel rods is their versatility. You can customize them with your favorite colors and flavors by choosing different types of melting chocolate or candy melts.
After coating the pretzels, you can also add a variety of toppings, such as sprinkles, crushed nuts, or even more candy. The possibilities are endless!
Let’s get started on creating these delightful treats that are sure to be a crowd-pleaser.
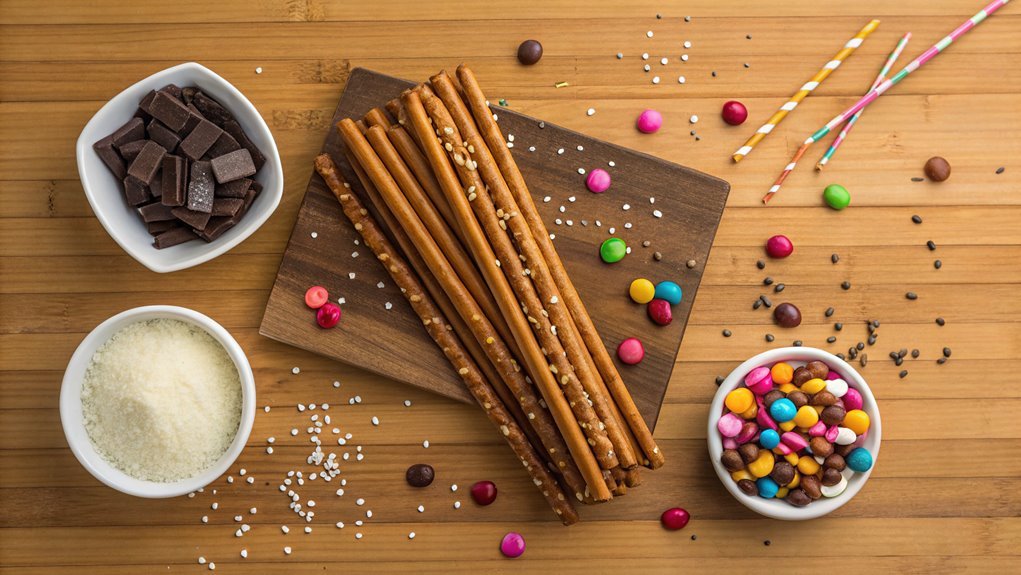
Ingredients:
- 12 pretzel rods
- 1 cup chocolate or candy melts (any color or flavor)
- 1 tablespoon coconut oil (optional, for smoother melting)
- Sprinkles or toppings of choice (crushed candies, nuts, etc.)
Now let’s move on to the cooking steps.
Cooking Steps
Get ready to whip up some amazing candy-coated pretzel rods!
You’ll start by melting chocolate in the microwave, which is super easy, then dip the rods into colorful sprinkles for that fun look.
Once you’ve chilled them to set the chocolate and added a drizzle of white chocolate, you’ll have a delightful treat perfect for gifting!
Step 1. Melt Chocolate in Microwave
To melt chocolate in the microwave, start by breaking it into small, even pieces to guarantee it melts uniformly. Use high-quality chocolate for the best flavor and texture.
Place those pieces in a microwave-safe bowl and set your microwave to medium power, usually around 50%. This helps prevent overheating, which could ruin your chocolate.
Microwave it for 30 seconds, then take it out and stir, even if it doesn’t look melted yet. The stirring is essential, as it helps distribute the heat evenly.
Return it to the microwave and continue to heat in 15-second intervals, stirring in between. Keep a close eye on it—you want it to be smooth and shiny, but not too hot.
When the chocolate reaches that perfect melting point, remove it from the microwave. You should have a silky-smooth texture ready for your pretzel rods.
This process not only makes your candy coating deliciously irresistible, but it’s also incredibly easy! You’re just moments away from creating a fun, sweet treat that everyone will adore.
Step 2. Dip in Colorful Sprinkles

Once your chocolate is melted and has reached a smooth consistency, it’s time to dip your pretzel rods. Grab a pretzel rod by one end and gently submerge it into the melted chocolate, making sure to coat it evenly. Don’t be afraid to give it a little twist while pulling it back up; this helps excess chocolate drip away, leaving a nice layer on your pretzel.
Now comes the fun part! While the chocolate is still wet, immediately roll or sprinkle colorful sprinkles over the coated section. You can use a plate to catch any sprinkles that fall, making cleanup a breeze. Get creative with your sprinkle choices! Use a mix of colors or even themed sprinkles for special occasions.
As you dip each rod, lay them out on a parchment-lined baking sheet. Keep dipping and decorating until all your pretzels are beautifully coated.
Watching those vibrant sprinkles stick to the chocolate is so satisfying, and they’ll add a festive touch! This step is where your pretzel rods really start to shine, transforming into eye-catching treats that’ll delight everyone.
Enjoy the process—you’re creating something sweet and delicious!
Step 3. Chill to Set Chocolate
After you’ve dipped your pretzel rods in colorful sprinkles, it’s vital to chill them so the chocolate can set properly. This step is fundamental to achieve that perfect, delectable finish.
You’ve put in the hard work, and now it’s time for the chocolate to firm up and adhere beautifully to the pretzels.
Place your fully decorated pretzel rods on a baking sheet lined with parchment paper. This guarantees they won’t stick and makes for easy cleanup later on.
Next, carefully slide the baking sheet into the refrigerator. Aim for at least 30 minutes of chill time; longer won’t hurt, either! During this time, the cold will help the chocolate reach the right consistency, turning it from gooey to delightfully solid.
When you finally pull those rods out, you’ll be greeted with a lovely sight: crunchy, colorful, and ready for snacking!
Just imagine the satisfying texture of the crunch, accompanied by a sweet chocolate exterior and a sprinkle finish. Trust me, this moment is worth the wait, and soon you’ll be enjoying your delicious, candy-coated pretzel rods! Happy chilling!
Step 4. Add Drizzle of White Chocolate
While the chocolate on your pretzel rods is setting, you can prepare to add a drizzle of white chocolate for that extra touch of sweetness and elegance.
Start by melting about half a cup of white chocolate chips in a microwave-safe bowl. Heat them in 30-second intervals, stirring after each one, until the chocolate is completely smooth. Be careful not to overheat it, as burnt chocolate can ruin your drizzle.
Next, let’s get creative! You can use a piping bag, a zip-top bag with a corner snipped off, or even a fork to drizzle the melted chocolate over your pretzel rods. Choose a method that feels comfortable for you.
Hold your drizzling tool above the rods and gently squeeze or flick to create beautiful, thin lines. The contrast of the white chocolate against the colorful candy coating will make your treats even more eye-catching!
Once you’ve drizzled all the rods, allow the white chocolate to set for just a few minutes. You’ll love the final touch it adds!
Enjoy the wonderful combination of flavors as you continue to make these delightful snacks. They’re bound to impress friends and family alike!
Step 5. Package for Gifting
Now that your candy-coated pretzel rods are ready, it’s time to package them for gifting in a way that not only looks great but also keeps them fresh.
First, gather some clear cello bags or decorative boxes. Cello bags are perfect for showcasing those colorful pretzel rods, while boxes add a touch of elegance.
Carefully arrange your pretzel rods in the bags, ensuring they don’t touch too much to avoid smudging the chocolate coating. Fill each bag with two to four rods, depending on their length and your personal preference.
Next, tie the tops with festive ribbons or twine for a charming presentation. If you’re using boxes, consider lining them with tissue paper to add a pop of color and cushioning.
For added flair, add a gift tag with a sweet message or a description of your delicious creation.
If you’re making these treats in advance, store them in a cool, dry place, ideally in an airtight container or tightly sealed bags, to keep them crunchy.
When it comes time to gift them, just watch the smiles light up as everyone enjoys your tasty creations! Happy gifting!
Final Thoughts
As you wrap up your candy-coated pretzel rod adventure, remember that these tasty treats aren’t just fun to make; they’re a delightful blend of sweet and salty that’s perfect for any occasion.
Whether you’re celebrating a birthday, hosting a party, or just indulging your sweet tooth, these pretzel rods will surely impress!
The best part? You can customize your candy coating and toppings to suit your taste. Experiment with different chocolates, sprinkles, or even nuts, and make each batch uniquely yours.
Plus, they’re incredibly easy to prepare, so you won’t be spending hours in the kitchen. You’ll find joy in creating something that not only looks beautiful but also tastes amazing!
Don’t forget to invite friends or family to join in the fun. It’s a fantastic way to bond while crafting these delicious snacks together, and you might even inspire someone else to release their culinary creativity.
Once you’ve got the hang of it, the options are truly endless! So grab your ingredients, put on your apron, and get ready to plunge into the sweet and salty world of candy-coated pretzel rods.
Enjoy every crunchy, flavorful bite!
Frequently Asked Questions
Can I Use White Chocolate Instead of Regular Chocolate?
Absolutely, you can swap white chocolate for regular chocolate! It’ll give your pretzel rods a unique flavor and a brighter look—perfect for impressing your friends. Just melt, dip, and enjoy the sweet results!
How Do I Store Leftover Pretzel Rods?
To store leftover pretzel rods, place them in an airtight container at room temperature. Keep them away from moisture and direct sunlight to maintain their crispiness and flavor. Enjoy them within a week for best taste!
What Can I Substitute for Sprinkles?
If you think sprinkles are the only way to dazzle your treats, think again! You can use crushed nuts, coconut, or even crushed candy bars. Anything’s fair game when you’re aiming for a dazzling finish!
How Long Do These Rods Last?
The rod’s shelf life mainly depends on storage conditions. If you keep ’em in an airtight container at room temperature, they’ll last about one to two weeks. Refrigerating can extend freshness, but might alter texture.
Are These Pretzel Rods Gluten-Free?
If you’re craving something crunchy yet accommodating, you’ll be pleased to know many pretzel rods can be gluten-free. Just check the labels to guarantee they fit into your dietary needs, and enjoy guilt-free snacking!