Rocky Road Ice Cream Recipe
Making Rocky Road ice cream involves crafting a blend of creamy chocolate, crunchy nuts, and soft marshmallows. Perfect each step, from preparing the base to adding your favorite mix-ins. Consider how the type of nuts or the way chocolate is melted can alter the final taste.
Recipe
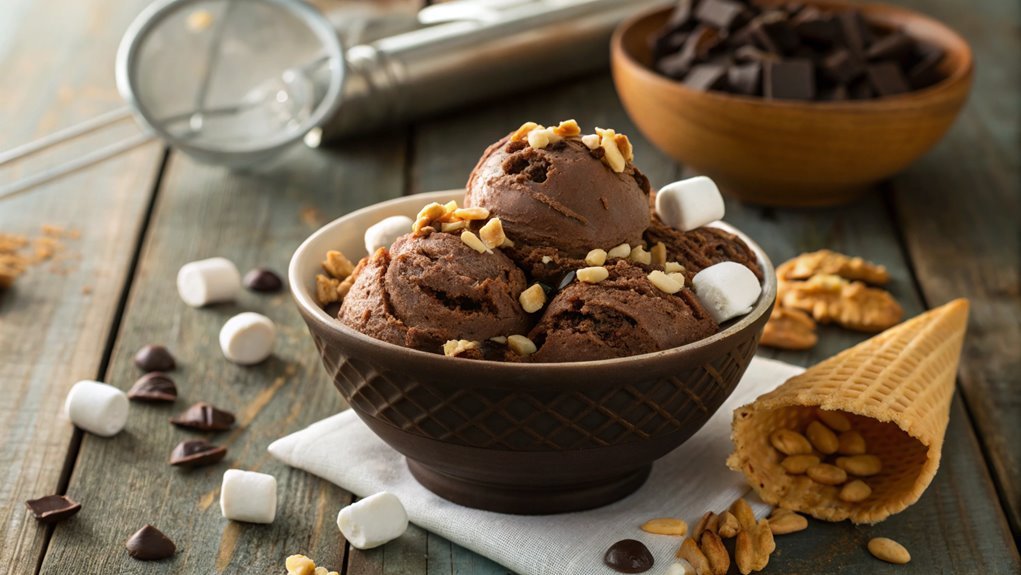
Rocky Road ice cream is a delightful treat that’s perfect for warm summer days or as a comforting dessert any time of year. With its rich chocolate base, crunchy nuts, and soft marshmallow bits, this classic flavor combines textures that will satisfy any ice cream lover’s cravings.
Making your own rocky road ice cream at home allows you to customize ingredients and guarantee a fresh taste that’s simply unbeatable compared to store-bought options.
This recipe will guide you through the process of creating creamy, dreamy rocky road ice cream. You’ll start by preparing a chocolate ice cream base that’s both simple and indulgent. Then, you’ll fold in the essential mix-ins that give rocky road its unique charm.
Gather your ingredients and get ready to churn out a delightful batch of homemade ice cream that will impress friends and family alike.
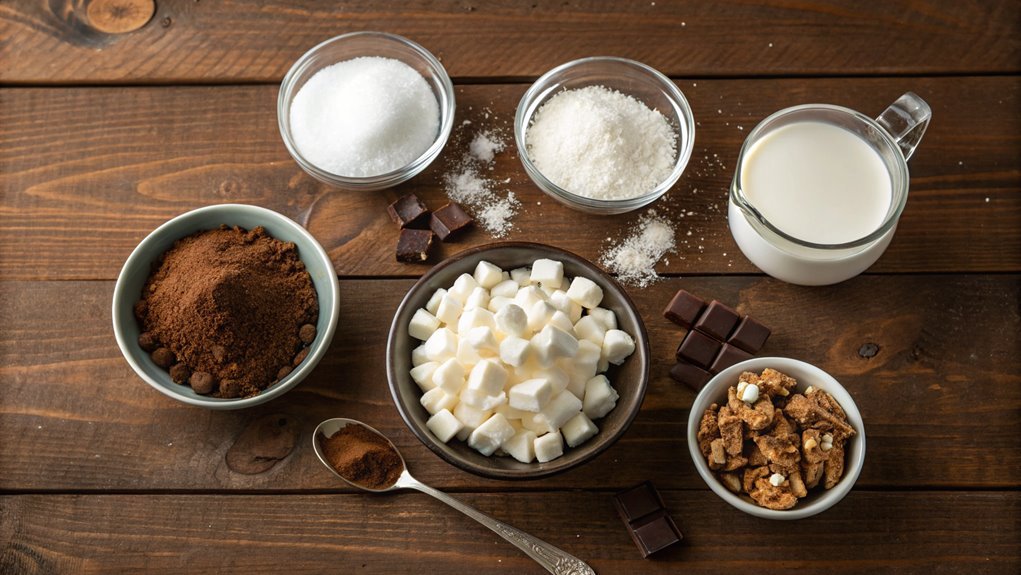
Ingredients:
- 2 cups heavy cream
- 1 cup whole milk
- ¾ cup granulated sugar
- ⅔ cup unsweetened cocoa powder
- 1 teaspoon vanilla extract
- ½ cup mini marshmallows
- ½ cup chopped walnuts or almonds
- ½ cup chocolate chips (optional)
Now let’s move on to the cooking steps.
Cooking Steps
Get ready to whip up something delicious as we plunge into the cooking steps for your Rocky Road ice cream!
You’ll be starting with a rich chocolate base, then adding toasted almonds for that perfect crunch.
Finally, you’ll fold in marshmallow swirls and chocolate chunks, getting closer to enjoying your homemade treat!
Step 1. Prepare the Chocolate Base
Before diving into the fun of adding mix-ins, you’ll want to prepare a rich and creamy chocolate base for your Rocky Road ice cream. Start by combining the cocoa powder, sugar, and a pinch of salt in a medium saucepan. This mixture will be the foundation of your delightfully chocolatey flavor!
Gradually whisk in whole milk and heavy cream. Over medium heat, stir continuously until the sugar dissolves completely and the mixture starts to steam, but don’t let it boil.
Next, remove the saucepan from the heat. Add a splash of vanilla extract for that extra depth of flavor. For an even more intense chocolate experience, consider melting in some chocolate chips or chopped chocolate—you’ll be amazed by the difference!
Once it’s well combined, let the mixture cool slightly before transferring it to your ice cream maker. Chill the chocolate base in the refrigerator for at least an hour if you can wait that long. This step will enhance the flavors and create a smoother consistency.
With your chocolate base ready, you’re all set for the next delicious steps to create the ultimate Rocky Road ice cream! Get excited; you’re almost there!
Step 2. Add Toasted Almonds

As you prepare to bring your Rocky Road ice cream to life, adding toasted almonds will elevate its texture and flavor. The crunch of the almonds complements the creamy ice cream wonderfully, making your dessert even more delightful.
Plus, toasting the almonds enhances their nutty flavor, creating a full-bodied taste that you’ll love.
Here’s how to toast your almonds:
- Choose your nuts: Opt for slivered or chopped almonds for a great texture.
- Heat them up: Place the almonds in a dry skillet over medium heat. Stir frequently to avoid burning.
- Watch for golden brown: Once they turn golden brown and smell fragrant (usually 3-5 minutes), remove them from the heat immediately. Let them cool before adding!
Once you’ve got those beautifully toasted almonds ready, you’re well on your way to creating a masterpiece.
Sprinkle them into your chocolate base, and watch as they blend beautifully. Each bite will give a satisfying crunch, making your homemade Rocky Road ice cream an instant favorite.
Enjoy this fun and rewarding process—your taste buds are in for a treat!
Step 3. Fold in Marshmallow Swirl
To create that signature Rocky Road flavor, you’ll need to fold in the marshmallow swirl at just the right moment. Once your base ice cream mixture is ready and churned to a creamy perfection, it’s time for this sweet addition.
Start by ensuring your marshmallow fluff is soft and spreadable—let it sit at room temperature if necessary.
Scoop a dollop of marshmallow fluff into the churned ice cream and use a spatula to gently fold it in. Be careful not to stir too vigorously; you want to create lovely swirls, not fully incorporate the marshmallow. The aim is to have beautiful streaks of white against the chocolaty base.
As you fold, take a moment to appreciate the rich aroma and the anticipation building. This step adds a delightful gooey sweetness that perfectly complements the rich chocolate and toasted almonds.
Once you’ve got that beautiful swirl, stop folding—it’s important to preserve those eye-catching patterns. Now, you’re just moments away from your delicious Rocky Road ice cream!
Pour the mixture into your container, and get ready for the chocolate chunk paradise in the next step. This ice cream is going to be a crowd-pleaser!
Step 4. Incorporate Chocolate Chunks
With those gorgeous marshmallow swirls ready, it’s time to give your Rocky Road ice cream its signature chocolatey goodness. The next step is to incorporate those rich chocolate chunks. You’ll be amazed at how these bits enhance your ice cream experience!
Start by chopping your favorite chocolate bar into deliciously chunky pieces. You want a mix of sizes so that each scoop brings a delightful surprise. As you fold these chunks into your ice cream mixture, make sure they’re evenly distributed. This way, everyone will get a taste of that rich chocolate, no matter how big or small their scoop is!
Here’s what you might want to contemplate when adding chocolate chunks:
- Type of Chocolate: Use milk chocolate for a creamy sweetness or dark chocolate for a richer taste.
- Size Matters: Aim for a mix of small and large chunks. It adds a fun texture!
- More Is More: Don’t be shy! The more chocolate, the better.
Take a moment to appreciate the combination of textures, flavors, and colors in your mixture. You’re almost there, and soon you’ll be enjoying a bowl of homemade Rocky Road ice cream!
Step 5. Pour Into Storage Container
Now that your delicious Rocky Road mixture is ready, it’s time to pour it into a storage container.
Grab a sturdy container with a tight-fitting lid—this will help keep your ice cream fresh and creamy. Choose one that can hold at least a quart, giving your delightful creation plenty of room to expand as it freezes.
Using a spatula or a sturdy spoon, gently scoop out the mixture from your bowl. As you pour it into the container, take a moment to admire those beautiful chunks of chocolate, marshmallows, and nuts fully incorporated into your creamy delight.
Make sure to scrape all the mixture out of the bowl, leaving nothing behind!
Once it’s all in, give it a gentle shake to level the mixture and remove any air bubbles. This helps make your ice cream even smoother.
Now, smooth out the top with your spatula for a nice finish. Finally, seal the container tightly and label it if you’d like—though it’ll likely vanish quickly!
Pop it into the freezer, and get ready to savor the flavors of your homemade Rocky Road ice cream. You’re just a few hours away from a frozen treat that will wow everyone!
Final Thoughts
Creating your own Rocky Road ice cream is a delightful journey into the world of flavors and textures. You’ll be amazed at how simple ingredients come together to create a truly indulgent treat. Not only is it incredibly satisfying to make, but it also allows you to customize every scoop to your liking.
As you savor each creamy bite, consider these fun reasons to whip up your own batch:
- You can control the sweetness and richness, making it just right for you.
- It’s a fantastic way to incorporate your favorite add-ins, like nuts or marshmallows.
- Sharing it with friends or family makes for a memorable experience, perfect for gatherings.
This recipe isn’t just about enjoying a tasty dessert; it’s about crafting something special that brings joy to you and your loved ones.
Frequently Asked Questions
Can I Use Non-Dairy Alternatives for This Rocky Road Recipe?
You can use non-dairy alternatives like almond or coconut milk. Just make sure the other ingredients are also dairy-free, and your dessert will still deliver that delicious, creamy satisfaction everyone loves. Enjoy!
How Long Does Homemade Rocky Road Ice Cream Last in the Freezer?
Homemade ice cream generally lasts about two to three weeks in the freezer. Make sure it’s stored in an airtight container to keep it fresh. Enjoy your delicious treat while it’s still at its best!
What Are the Best Toppings for Rocky Road Ice Cream?
When you plunge into an ocean of flavors, consider drizzling chocolate syrup, tossing crushed nuts, and sprinkling marshmallows on top. Each bite bursts with texture, turning ordinary ice cream into a delightful adventure for your taste buds.
Can I Add Different Nuts or Fruits to the Recipe?
Absolutely, you can mix in different nuts or fruits to personalize your dessert! Try adding walnuts, pecans, or even tropical fruits like mangos. Experimenting adds a unique twist that’ll make your treat even more delightful!
Is It Possible to Make Rocky Road Ice Cream Without an Ice Cream Maker?
Making ice cream traditionally requires a machine, but you can definitely create it without one. Just freeze your mixture in a container, stirring every 30 minutes until it reaches the creamy consistency you’re aiming for.