Raspberry Thumbprint Cookie Recipe
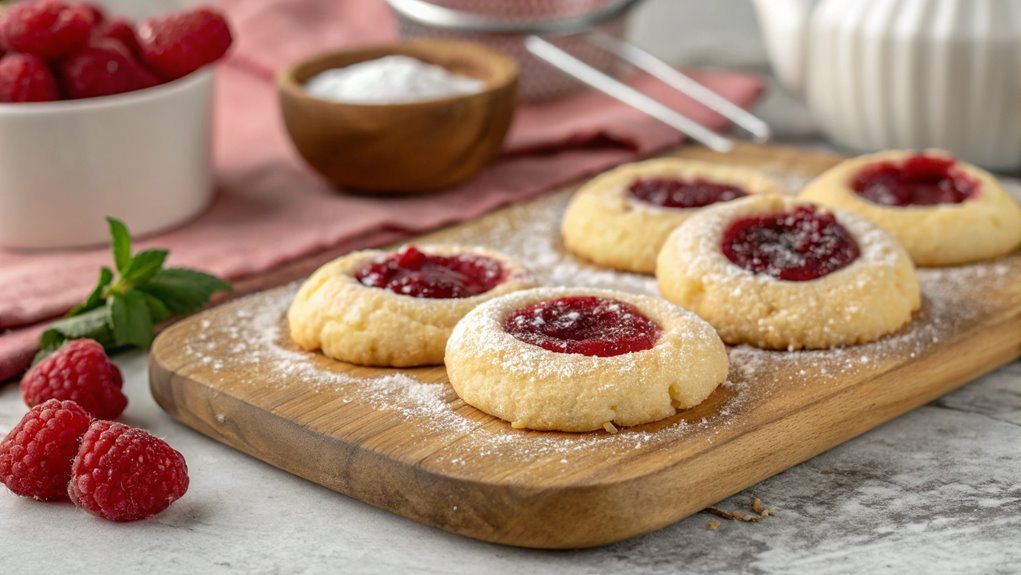
Raspberry thumbprint cookies are a delightful blend of sweetness and tartness. They’re easy to make with a few staple ingredients and straightforward techniques. As you prepare the dough and create the signature thumbprints, consider the best occasions to enjoy or share them. These cookies make an ideal choice for gatherings or as a special gift.
Recipe
Raspberry thumbprint cookies are a delightful treat that showcases the perfect balance of buttery sweetness and tart raspberry flavor. These cookies aren’t only easy to make but also perfect for any occasion, whether you’re hosting a gathering, enjoying a quiet afternoon, or simply satisfying your sweet tooth.
The unique thumbprint indentation, filled with a vibrant raspberry jam, adds both visual appeal and a burst of berry goodness with every bite.
To get started on these delectable cookies, gather your ingredients and prepare your baking tools. The dough comes together quickly, making this a great recipe for beginner bakers and experienced ones alike.
Once baked, these cookies will have a soft, chewy texture with a slightly crisp edge, making them utterly irresistible. Let’s plunge into the recipe!
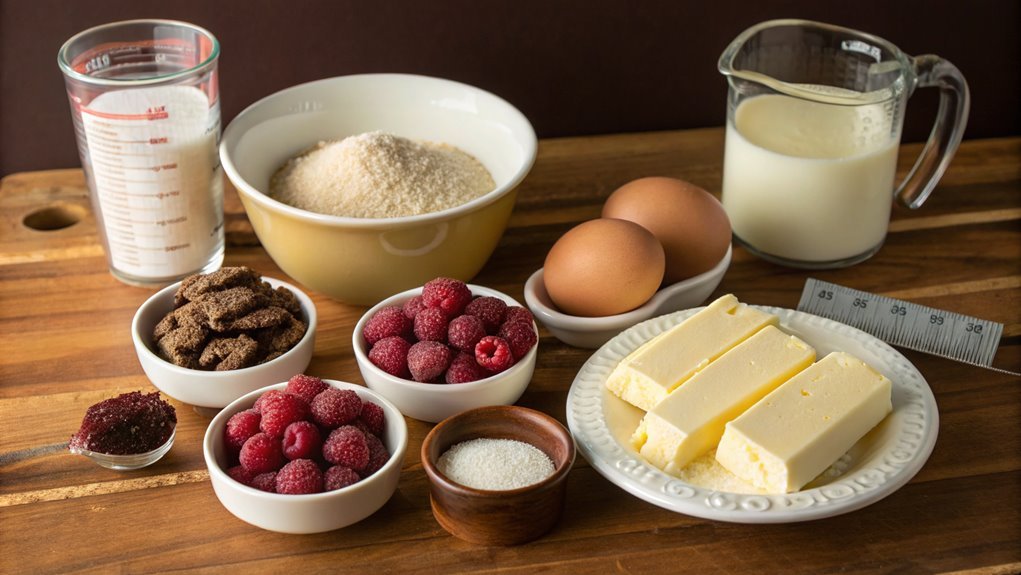
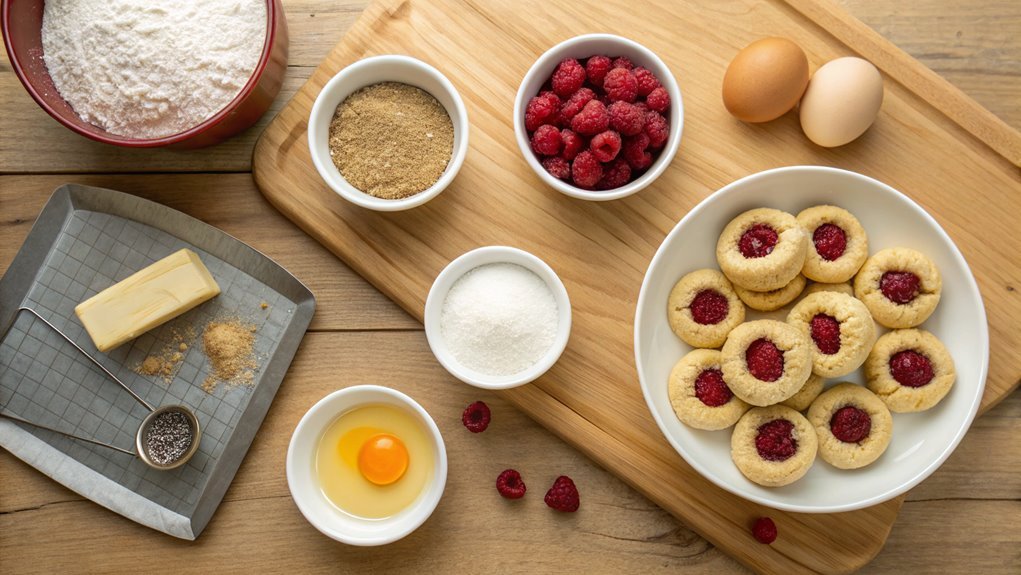
Ingredients:
- 1 cup unsalted butter, softened
- 3/4 cup granulated sugar
- 1/4 cup packed brown sugar
- 1 large egg
- 1 teaspoon vanilla extract
- 2 1/4 cups all-purpose flour
- 1 teaspoon baking powder
- 1/2 teaspoon salt
- 1/2 cup raspberry jam
- Powdered sugar for dusting (optional)
Now let’s move on to the cooking steps.
Cooking Steps
Get ready to bring your kitchen to life as you start the cooking steps for these delightful raspberry thumbprint cookies!
You’ll begin by preheating your oven to the perfect temperature, then rolling your dough into tasty little balls, and finally adding that sweet raspberry filling.
It’s an enjoyable process that’ll fill your home with mouthwatering aromas—let’s get baking!
Step 1. Preheat Oven to 350°F
Before diving into the delightful process of making raspberry thumbprint cookies, you’ll need to preheat your oven to 350°F. This step is essential because it guarantees that your cookies bake evenly and come out soft and delicious.
Start by turning your oven’s dial or pressing the button to set the temperature. It might take a few minutes for the oven to reach the right heat, so don’t rush this step. It’s a great time to gather all your ingredients and tools while the oven warms up, creating excitement for what’s to come!
As the oven is preheating, take a moment to envision the tasty cookies you’re about to create. The scent of buttery dough mingling with sweet raspberry preserves will fill your kitchen and make it feel inviting.
Once the temperature indicator shows that your oven is preheated, you’ll be ready to roll out the dough and shape your cookies.
Getting your oven up to temperature is the first leap into a fun baking adventure, yielding a treat that’s sure to please everyone who gets a taste.
Step 2. Make Dough Balls
Once your oven is preheated, it’s time to make the dough balls for your raspberry thumbprint cookies. Grab a mixing bowl, and combine those buttery goodness and sugar until it’s nice and creamy.
You’ll want to blend in an egg and a splash of vanilla extract, which adds a lovely aroma to your dough.
Next, gently fold in your dry ingredients—flour, baking powder, and a little pinch of salt. Mix until everything is just combined. Don’t overdo it! You want a soft, smooth dough that’s easy to work with.
Now, scoop out tablespoon-sized portions of your delightful dough, and roll them into balls. Your palms will get a little messy, but that’s part of the fun! As you roll, feel free to pop a little taste of the dough—it’s so delicious.
Place the dough balls on a lined baking sheet, leaving enough space between them to allow for spreading. Continue this process until you’ve shaped all your dough.
You’re already making a treat that’ll impress anyone who gets a taste. Get ready, because next you’ll create those iconic thumbprints they’re known for!
Step 3. Add Raspberry Filling
Now that your dough balls are ready, it’s time to add that luscious raspberry filling. This is where the magic happens! First, take your chilled raspberry filling, which you can either prepare yourself or buy from the store.
You’ll want to gently press your thumb into the center of each dough ball to create a little well. Don’t be afraid to make it deep enough—you want to hold all that delicious filling!
Next, scoop about half a teaspoon of raspberry filling and carefully place it into each thumbprint. This part is so satisfying, watching those vibrant red dollops settle right into the dough, promising a burst of flavor in every bite.
Make sure to keep some distance between the cookies; they’ll spread a little while baking, and you don’t want them hugging too tightly!
Try to evenly distribute the filling, so each cookie gets a fair share of that sweet and tangy goodness. Feel free to taste-test a bit of the filling (we won’t tell!).
Once you’ve filled all your cookies, take a moment to admire your handiwork before moving on. You’re already so close to cookie perfection!
Step 4. Bake for 12-15 Minutes
It’s time to bake those cookies to perfection! Preheat your oven to 350°F (175°C) if you haven’t done so already.
With your beautiful raspberry-filled cookies lined on the baking sheet, it’s time for the magical part—the baking! Place the cookie sheet in the oven and set your timer for 12 minutes.
While you wait, take a moment to relish the sweet anticipation. The aroma of baking will fill your kitchen, making it feel warm and inviting.
Check on the cookies around the 12-minute mark. You want them to be lightly golden around the edges, and the raspberry filling should be bubbling just a little. If they’re not quite there yet, give them a few more minutes.
Remember, every oven is different, and that’s part of the fun! Baking for a total of 12-15 minutes will guarantee you get that perfect balance of crispiness on the outside and chewy goodness on the inside.
Once they’re done, you’ll have a tray full of delightful raspberry thumbprint cookies that are just waiting to be enjoyed. The hard work is paying off, so get ready to savor every bite!
Step 5. Cool on Wire Rack
Transfer the freshly baked cookies to a wire rack to cool. This step is super important because cooling them properly helps maintain their shape and texture.
As the cookies sit on the rack, you’ll notice the delightful raspberry filling slightly set and firm up. This isn’t just about letting them rest; it’s a vital moment that allows the flavors to meld and intensify.
While you’re waiting, take a moment to enjoy the aroma wafting through your kitchen. There’s something magical about that sweet, fruity scent that means you’re one step closer to indulging in these delectable treats.
After about 15 to 20 minutes, your cookies should be cool enough to handle but still warm, making them absolutely irresistible.
Once they’ve cooled down completely, you can get creative with how to serve them! Whether you enjoy them with a cup of tea or share them at a gathering, these raspberry thumbprint cookies are bound to impress.
Final Thoughts
As you savor the delightful taste of your homemade raspberry thumbprint cookies, it’s clear that this recipe is both simple and rewarding. The rich buttery flavor combined with the tartness of raspberry creates a harmonious balance that’s hard to resist.
You’ve put your heart into these cookies, and it shows!
Let’s not forget how versatile these cookies can be. You can experiment with different jams or even add some chocolate chips for a unique twist. It’s a great way to express your creativity in the kitchen.
Plus, they make for a perfect treat for sharing.
Whether you’re hosting friends, gifting to loved ones, or simply indulging yourself, these cookies are sure to impress. Remember the joy of baking, the aromas filling your home, and the smile on everyone’s faces when they take a bite.
Frequently Asked Questions
Can I Substitute Raspberry Jam With Other Types of Jam?
Yes, you can definitely substitute raspberry jam with other types of jam! Try using strawberry, apricot, or even blueberry jam. Each will give your dish a unique flavor while still adding that delightful sweetness. Enjoy experimenting!
How Long Do These Cookies Stay Fresh?
These cookies stay fresh for about a week when stored in an airtight container at room temperature. If you refrigerate them, they can last up to two weeks. Just make sure they’re well-sealed!
Can I Freeze the Cookies After Baking?
Like capturing summer sunlight, you can definitely freeze those cookies after baking. Just let ’em cool, then seal in an airtight container. They’ll stay delicious for up to three months, ready to brighten your day!
What Can I Use Instead of Flour for Gluten-Free?
If you’re looking for gluten-free options, you can try almond flour, coconut flour, or a gluten-free all-purpose blend. Each option brings a different texture and flavor, so experiment to find what you like best!
Is There a Dairy-Free Alternative for the Butter?
Yes, you can use coconut oil, vegan butter, or applesauce as dairy-free alternatives for butter. These options provide moisture and flavor while keeping your recipe dairy-free, so you won’t miss the traditional butter at all.