Layered Fruit Salad Recipe
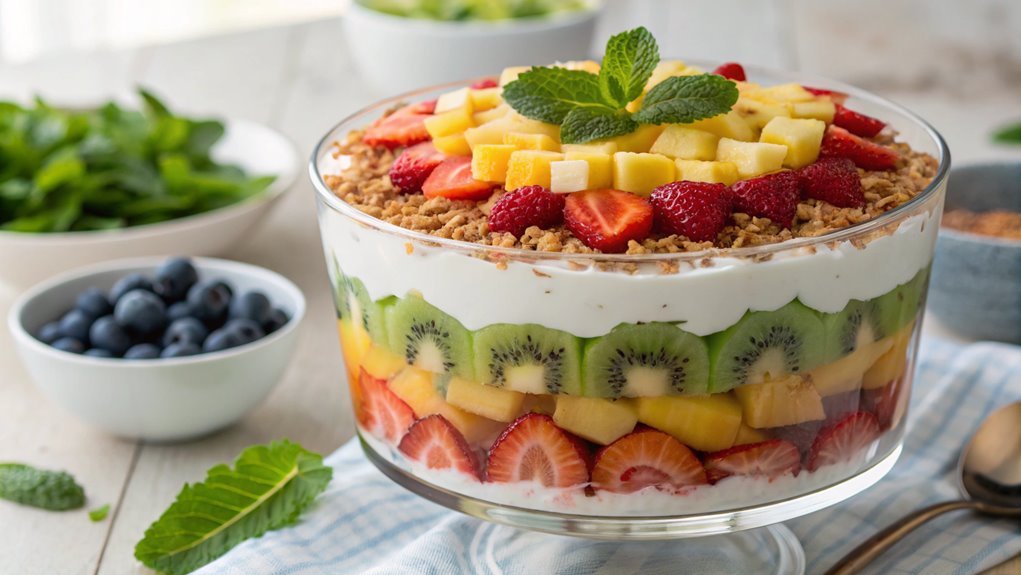
Layered fruit salads are visually appealing and an easy way to add nutrients to your diet. This dish is perfect for any occasion and requires only a few simple steps to transform ordinary ingredients into something extraordinary.
Choosing the right fruits and layering them properly is key to the best presentation. Let’s explore how to achieve the perfect balance of flavor and texture.
Recipe
Layered fruit salad is a delightful and visually appealing dish that not only tastes invigorating but is also simple to prepare. Perfect for any occasion, whether it’s a summer picnic, a brunch gathering, or just a healthy snack at home, this fruit salad can be customized with your favorite fruits.
The combination of colors and textures adds to its aesthetic charm, making it a hit with both kids and adults alike. This layered salad features a mix of seasonal fruits, yogurt, and a sprinkle of granola or nuts for crunch.
You can easily adjust the ingredients based on what you have on hand or what’s in season to create a deliciously fresh treat. Follow this recipe to create a stunning layered fruit salad that will impress your guests and satisfy your taste buds!
Ingredients:
- 2 cups diced strawberries
- 2 cups diced kiwi
- 2 cups diced mango
- 2 cups blueberries
- 2 cups diced pineapple
- 2 cups vanilla yogurt
- 1 cup granola (optional)
- Mint leaves for garnish (optional)
Now let’s move on to the cooking steps.
Cooking Steps
Let’s get started on creating that colorful layered fruit salad!
First, you’ll want to gather an array of fresh, vibrant fruits that catch your eye and cut them into bite-sized pieces.
Once you’ve done that, it’s time to layer those beautiful fruits in a glass dish, adding a touch of yogurt or whipped cream for extra flavor, and finish it all off with some fresh mint leaves!
Step 1. Gather Fresh, Colorful Fruits
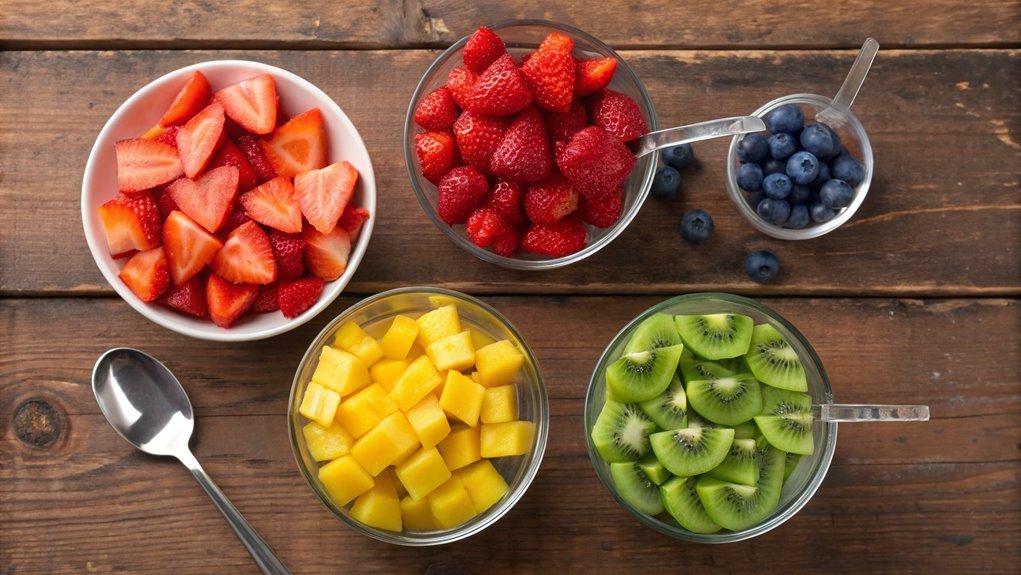
To create a vibrant layered fruit salad, start by gathering an assortment of fresh, colorful fruits. Head to your local grocery store or farmers market and pick up a variety of seasonal favorites. Think bright strawberries, juicy mangoes, crisp apples, sweet blueberries, and tart kiwi.
Don’t shy away from experimenting! You can also include tropical fruits like pineapple or papaya for an exotic twist. The more colors you can incorporate, the more visually appealing your salad will be. Each fruit adds its unique flavor and texture, creating a delightful experience with every bite.
Imagine the deep red of ripe strawberries blending with sunny orange mangoes, while the green of kiwi brings a rejuvenating touch. As you shop, make sure the fruits are in peak condition—look for firmness, vibrant colors, and fresh aromas.
Also, remember to choose fruits that are easy to layer, as this will enhance the presentation of your salad. Trust your instincts; if it looks good to you, it’s bound to taste great! Gathering these fresh, colorful fruits is the perfect way to kick off your delicious journey into creating a layered fruit salad. Enjoy the process!
Step 2. Cut Fruits Into Bite-Sized Pieces
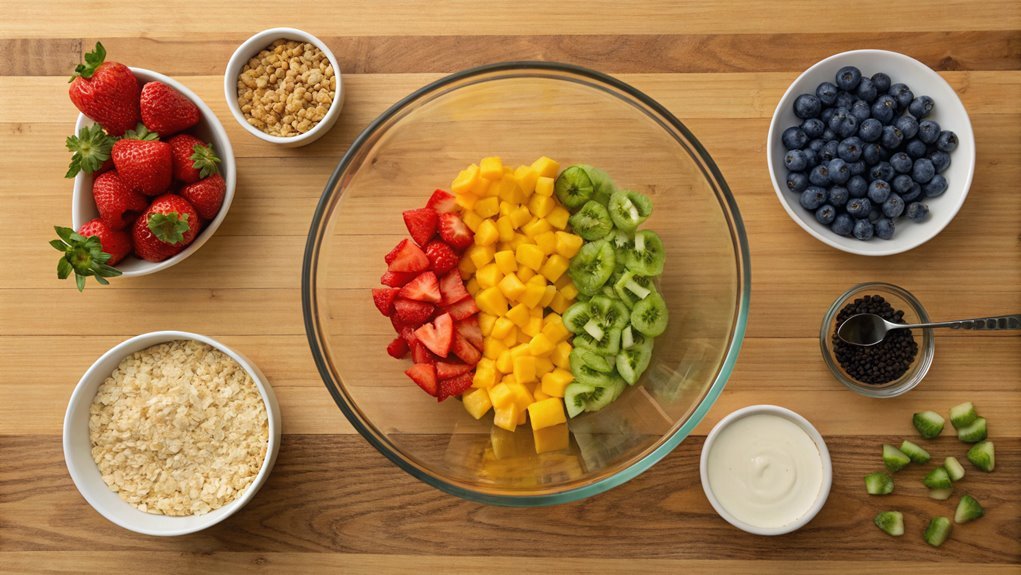
As you prepare your fresh fruits, cutting them into bite-sized pieces makes them easier to enjoy and enhances the overall presentation of your layered fruit salad. Start with your chosen fruits, like strawberries, kiwi, and bananas, letting their vibrant colors shine through as you work.
For strawberries, remove the green stems and slice them into quarters or eighths, depending on their size. Kiwis should be peeled and then cut into rounds, followed by slices to create manageable chunks. Don’t forget about bananas—just peel and slice into half-moons.
When you cut your fruits, aim for consistency in size. This not only looks appealing but also guarantees a delightful burst of flavor in every bite. You want the textures and flavors to blend seamlessly as guests dig into your salad.
Feel free to mix in some juicy grapes or tart apple pieces for extra variety!
As you chop, let the excitement build for how beautiful your layered fruit salad will look. Each color and shape adds a visual delight that everyone will love.
Step 3. Layer in a Glass Dish
Once you’ve prepared your fruits, layering them in a glass dish is the next exciting step. This is where your colorful creation truly comes to life!
Grab your favorite clear glass dish, as it’ll showcase those beautiful layers. Start with a layer of your juiciest fruits, like strawberries or mangoes, to add a vibrant base. Spread them evenly at the bottom, creating a delightful foundation.
Next, pick a contrasting fruit that adds both color and flavor. Perhaps some green kiwi or sweet blueberries will do the trick! Arrange them carefully over your first layer, making sure each fruit is visible.
Repeat this process, alternating between different fruits. You’ll want to mix textures and colors, creating a feast for the eyes! Aim for at least three or four layers to make it extra enticing.
As you layer, think about the flavors that will blend beautifully together. Don’t be afraid to experiment—it’s all about what you love!
When you finish, step back and admire your handiwork. This vibrant fruit salad isn’t just a dish; it’s a celebration of freshness that’s perfect for any occasion!
Now, let’s move on to the next step!
Step 4. Add Yogurt or Whipped Cream
Layering yogurt or whipped cream adds a luscious touch to your vibrant fruit salad. These creamy components not only enhance the flavor but also create a delightful contrast in textures.
Start by choosing your favorite yogurt—Greek, flavored, or even vanilla works beautifully. If you prefer whipped cream, consider making it from scratch for a light and airy experience.
Once your salad is layered, scoop dollops of yogurt or whipped cream over the top or in between the layers. Spread it evenly, allowing it to mingle with the fruit for maximum flavor. You can also use a piping bag to create beautiful swirls, turning your fruit salad into a stunning centerpiece for any gathering.
Don’t hesitate to experiment—mix in a little honey or maple syrup with your yogurt for added sweetness. If you’re feeling adventurous, sprinkle in some cinnamon or vanilla extract to enhance the flavor even more.
The creamy layer not only tastes amazing but also makes your fruit salad visually appealing.
Step 5. Top With Mint Leaves
Adding fresh mint leaves is a simple way to elevate your layered fruit salad. The vibrant green color and invigorating aroma of mint instantly enhance your dish, making it look and taste fabulous.
Before you get started, rinse the mint leaves under cool water to remove any dirt. Then, gently pat them dry with a clean kitchen towel.
Once your fruit salad is layered and ready, carefully pluck a few mint leaves from the stems. You don’t need a lot; just a handful will do! Chop them coarsely if you want a bolder mint flavor, or leave them whole for a more subtle touch.
Sprinkle the mint leaves over the top of your fruit salad in a decorative manner. This not only adds flavor but also brings a touch of elegance to your creation.
Don’t rush this step—take your time to arrange the mint beautifully, giving special attention to placement. The visual and aromatic invigorating quality will impress anyone enjoying your salad.
Trust me; your friends and family will adore the added touch. Now, dig in and enjoy the delightful combination of flavors! Your layered fruit salad is now complete and ready to shine at any gathering.
Final Thoughts
As you wrap up your fruit salad journey, remember that this dish is all about creativity and personal taste. You’ve got the freedom to choose your favorite fruits, colors, and textures, making each layer as vibrant as you want it to be.
This recipe isn’t just about combining flavors; it’s an opportunity to express your culinary skills and impress your friends and family.
Don’t shy away from experimenting! Mix tropical fruits with local options, or try unique combinations like spicy mangoes or tart berries. Depending on the seasons, you can adjust your ingredients, making it a year-round delight.
Feel free to play with the presentation too—layer your fruits in clear glasses for a stunning display.
And remember, sharing your creation can be just as rewarding as making it. Whether it’s a backyard barbecue or a family gathering, your layered fruit salad will be a hit.
So gather your ingredients, get creative, and enjoy the process of making this delicious dish. You’ll not only satisfy your taste buds but also leave a lasting impression with your culinary flair!
Happy cooking!
Frequently Asked Questions
Can I Use Frozen Fruits in This Recipe?
Frozen fruits can be a delightful treasure chest, bursting with flavor and convenience. You’ll find they work well in many recipes, but remember to thaw and drain excess liquid for the best results. Enjoy!
How Long Can Layered Fruit Salad Be Stored?
You can store layered fruit salad in the refrigerator for up to three days. However, for the best texture and flavor, it’s best to enjoy it within the first couple of days after preparation.
What Fruits Should I Avoid in This Salad?
When making your salad, avoid fruits that brown quickly, like bananas and apples. Also, steer clear of very juicy fruits, such as pineapple and watermelon, which can make your dish soggy and less appealing.
Is This Salad Suitable for a Vegan Diet?
Yes, this salad’s perfect for a vegan diet. Did you know over 75% of fruits are naturally vegan? You’ll find they fit seamlessly into your meals, ensuring delicious, plant-based options every time you serve them.
Can I Add a Dressing or Syrup to the Salad?
Absolutely, you can add a dressing or syrup to the salad. Just keep in mind that a light, fruity dressing or a natural syrup enhances the flavors without overpowering the fresh ingredients you’ve chosen. Enjoy!


