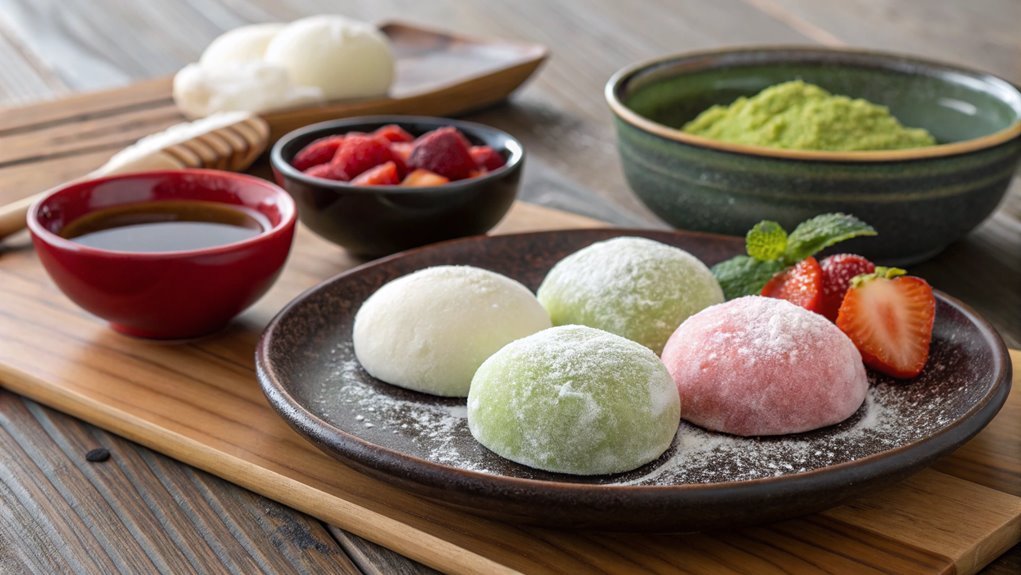
Japanese Mochi Recipe
Creating Japanese mochi is a sensory experience beyond just ingredients. Start by soaking glutinous rice and watch as it transforms into a smooth, chewy dough. When shaping the mochi, you can choose traditional sweet red bean paste or try something unconventional. Its versatility offers endless possibilities for your first batch.
Recipe
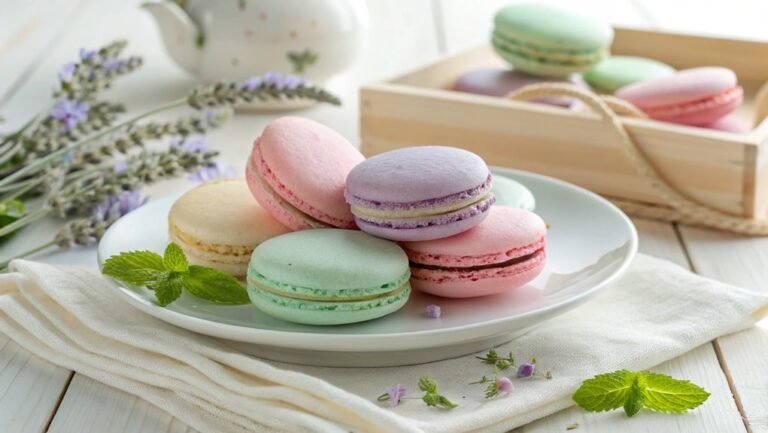
Mochi is a traditional Japanese rice cake made from glutinous rice that’s pounded into a sticky, smooth consistency. This delightful delicacy can be enjoyed on its own or with filling variations, such as sweet red bean paste, ice cream, or fresh fruit.
Making mochi at home can be a rewarding experience, allowing you to customize the flavors and fillings to your liking. Whether you’re preparing it for a special occasion or just for a tasty treat, this simple recipe will guide you through the process of creating your very own mochi from scratch.
To begin making mochi, it’s essential to select the right type of rice. Glutinous rice, also referred to as sticky rice or sweet rice, is key to achieving the desired texture. It’s often found in Asian grocery stores.
After steaming the rice to perfection, it’s pounded into a dough, after which it’s shaped into round cakes or formed around your choice of filling. This delightful treat isn’t only a versatile culinary creation but also a fun activity that can be enjoyed with family and friends.
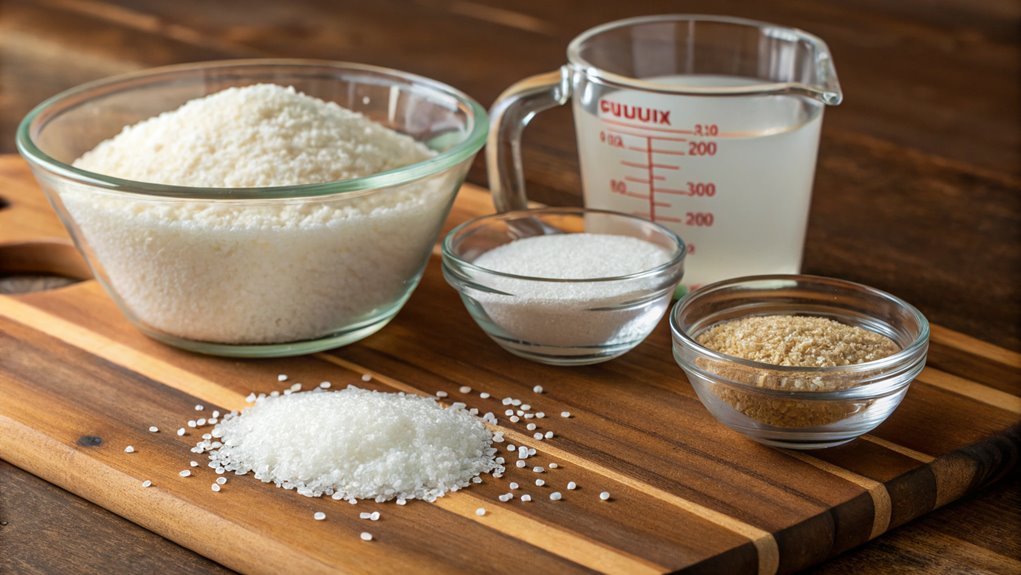
Ingredients
- 2 cups glutinous rice
- 2 1/2 cups water
- Cornstarch or potato starch (for dusting)
- Optional fillings: sweet red bean paste, matcha powder, ice cream, fruit, or sesame seeds
Now let’s move on to the cooking steps.
Cooking Steps
Now it’s time to roll up your sleeves and get cooking!
You’ll start by preparing sweet rice flour, gradually adding water to achieve the perfect dough consistency.
Let’s transform that dough through steaming and shaping, turning it into delightful mochi balls that’ll impress everyone!
Step 1. Prepare Sweet Rice Flour
To prepare sweet rice flour, start by measuring out the appropriate amount needed for your mochi recipe—typically, one cup will suffice. Sweet rice flour, also known as glutinous rice flour, is crucial for creating that delightfully chewy texture you crave in mochi.
Once you have your cup measured, feel free to take a moment and admire its fine, powdery consistency. It’s like a blank canvas waiting for your culinary touch!
If you’re feeling adventurous, consider sifting the flour to verify there are no lumps—this step helps your mochi turn out smooth and beautiful. Just gently pour the flour into a fine-mesh sieve and shake it with a little enthusiasm. You want those clumps gone so your mochi can shine!
Now, it’s time to prepare for the next steps of your recipe. Keep your sweet rice flour nearby, as it’s a key player in crafting delicious mochi balls.
It’s such an exciting process to transform this simple ingredient into a delightful treat that you—and others—can enjoy. So let that passion for cooking guide you and get ready for the delicious adventure ahead!
Step 2. Add Water Gradually
As you immerse yourself in the next step, it’s essential to add water gradually to your sweet rice flour mixture.
Start by pouring a small amount of water into the bowl. You want to guarantee the flour absorbs the moisture evenly, so don’t rush! Stir the mixture gently but consistently, watching as it begins to clump together. This is where the magic happens!
Continue adding water little by little, mixing thoroughly after each addition. Feel free to adjust the amount based on the consistency you desire; it should be sticky but manageable.
Keep an eye on how the texture changes; it’s a great way to gauge your progress and develop a feel for the dough. Trust your instincts, and don’t be afraid to experiment!
Step 3. Knead the Dough Thoroughly
Once you’ve got your dough at the right consistency, it’s time to knead it thoroughly for the best results. Kneading is a vital step, as it helps develop that wonderful chewy texture you crave in mochi.
Start by generously dusting your work surface with potato starch to prevent sticking. Then, place your dough on the surface, and use the palms of your hands to push and fold the dough. Don’t be afraid to get a little elbow grease into it!
You’ll want to knead for about 5 to 10 minutes. As you work the dough, you’ll notice it becoming smoother and more elastic. This is what you’re aiming for! If it feels too sticky, sprinkle a bit more potato starch to help manage the texture.
Pay attention to how the dough reacts; it should feel soft but not overly wet. The more you knead, the better your mochi will be. This step isn’t just about physical effort; it’s about releasing your passion into the dough.
When you’re finally happy with the texture, you’ll be one step closer to enjoying delicious mochi! So roll up your sleeves and let’s get kneading!
Step 4. Steam the Dough Mixture
Ready your steamer because it’s time to cook that dough mixture! First, get a pot and fill it with a couple of inches of water. Place your steamer basket on top, ensuring it doesn’t touch the water. Bring the water to a rolling boil.
While you wait, scoop that kneaded dough into a heatproof dish that fits nicely into your steamer. Flatten it out evenly to promote even cooking.
Once the water’s boiling, carefully place the dish in the steamer. You don’t want to scald yourself, so use tongs or oven mitts! Cover it tightly with a lid and set a timer for 20 minutes. As it steams, the dough will transform, becoming soft, sticky, and just perfect for molding later.
After 20 minutes, check to see if it’s fully cooked; you can poke it with a fork—it should be slightly springy. If it’s not done, let it steam for an extra 5 minutes.
When you’re satisfied, carefully remove the dish from the steamer. Let it cool for a few minutes before you jump into the next exciting step of shaping those delicious mochi balls! Enjoy the wonderful aroma; it’s all part of the experience!
Step 5. Shape Into Mochi Balls
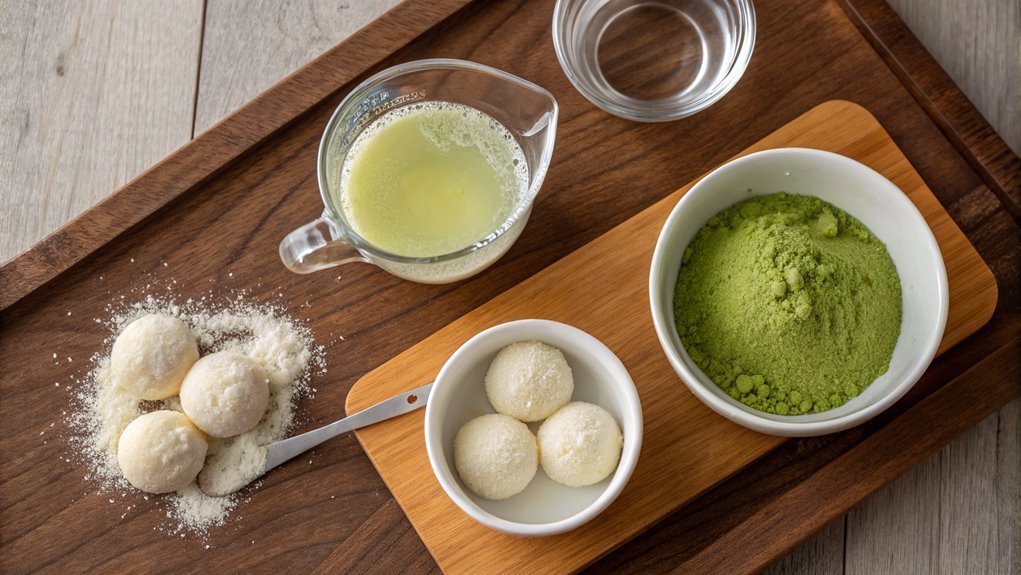
With the steamed dough cooled slightly, you’re all set to shape your mochi balls! First, sprinkle a clean surface with cornstarch or potato starch to prevent sticking.
Then, take a piece of dough and roll it into a ball, about the size of a golf ball. Don’t worry if it feels a bit sticky; that’s totally normal! Keep your hands dusted with some starch to make it easier.
As you shape each ball, think about adding a filling. You can use your favorite ingredients, like sweet red bean paste or fruity fillings. Just flatten the ball slightly, place a small amount of filling in the center, and fold the edges over to seal it. Gently roll it back into a ball shape.
Repeat this process until you’ve shaped all your dough. It’s so satisfying to see each mochi ball come to life!
Arrange them neatly on a tray, and remember to dust off any excess starch. Now, you’ve created delicious little treats that are perfect for sharing—or enjoying all on your own! Enjoy every bite.
The experience of creating homemade mochi is truly special and rewarding!
Final Thoughts
As you reflect on your journey of making Japanese mochi, you’ll find that the process is as rewarding as the sweet treat itself. Creating mochi isn’t just about enjoying delicious food; it’s also about the memories you’ll make along the way.
You’ve learned to transform simple ingredients into something special. Whether you’re experimenting with flavors or perfecting your technique, each step invites you to embrace your creativity.
Don’t hesitate to customize your mochi! You can fill them with a variety of sweet pastes, fruits, or even ice cream. The possibilities are endless, and the joy of sharing your creations with friends and family makes it all worthwhile.
Remember, mochi can be a delightful addition to gatherings or a fun cooking project on a cozy weekend.
So, gather your ingredients and dive back into this delightful journey.
With every batch, you’ll grow more confident and skilled. Don’t worry about achieving perfection; instead, savor the experience and enjoy the delicious outcome.
You’re not just making mochi; you’re discovering a beautiful aspect of Japanese culture, and every treat is a celebration! Happy cooking!
Frequently Asked Questions
Is Mochi Gluten-Free?
If you’re wondering about gluten-free options, mochi often fits the bill since it’s made from glutinous rice, which doesn’t contain gluten. Just make sure to avoid varieties filled with wheat-based ingredients or sauces.
Can I Use Sweet Rice Flour Instead of Regular Flour?
You can definitely use sweet rice flour instead of regular flour. It’s perfect for achieving that chewy texture you’re after. Just remember, sweet rice flour is gluten-free, so it won’t behave exactly the same way.
How Long Does Homemade Mochi Last?
If you think homemade treats last forever, you’re in for a treat! Typically, they last about two to three days at room temperature. After that, you might want to reconsider your delightful creation’s future.
What Type of Fillings Can I Use for Mochi?
You can use a variety of fillings for mochi, including sweet red bean paste, fresh fruit, ice cream, or even savory options like minced meat. Get creative and customize your mochi to suit your taste!
Can I Freeze Mochi for Later Use?
Absolutely, you can freeze mochi for later use! Picture stashing delightful treasures in your freezer, ready to warm your heart when cravings hit. Just wrap it well to keep that chewy goodness intact!