Cookies and Cream Ice Cream Recipe
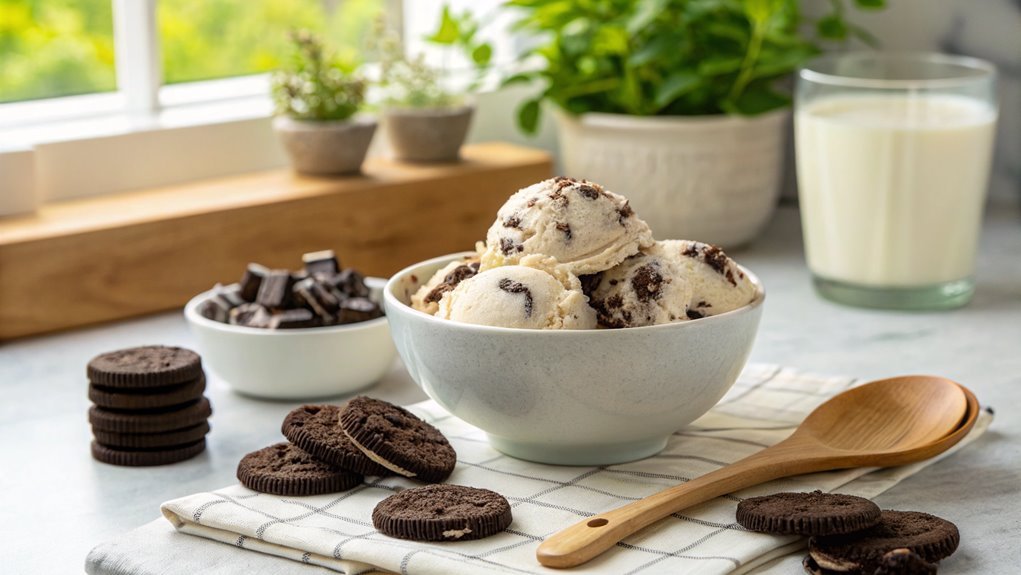
Making cookies and cream ice cream at home is a satisfying experience that allows you to customize flavor and texture. Despite seeming complicated, it’s surprisingly easy and rewarding once you gather your ingredients.
Recipe
Cookies and cream ice cream is a delightful and creamy dessert that combines the rich flavor of chocolate cookies with velvety vanilla ice cream. It’s a favorite treat for both children and adults, making it the perfect addition to any gathering or a simple indulgence on a warm day.
Making cookies and cream ice cream at home allows you to control the ingredients and customize the texture to your liking. This homemade version captures the nostalgic flavors we all love, without the preservatives often found in store-bought varieties.
To begin your ice cream-making adventure, you’ll need to prepare the base, which consists of a rich and creamy mixture of heavy cream, milk, sugar, and vanilla extract. By gently heating the mixture, the sugar dissolves while infusing all the flavors together.
Once the base is chilled, crushed chocolate sandwich cookies are folded in for that iconic cookies and cream experience. The result is a delectable frozen treat that will leave everyone craving more!
Ingredients:
- 2 cups heavy cream
- 1 cup whole milk
- 3/4 cup granulated sugar
- 1 teaspoon vanilla extract
- 1 cup chocolate sandwich cookies, crushed (like Oreos)
Now let’s move on to the cooking steps.
Cooking Steps
Let’s get started making your delicious cookies and cream ice cream!
First, you’ll crush those chocolate sandwich cookies until they’re nice and crumbly, setting the stage for that classic flavor.
Then, mix the cream and sugar together, fold in your cookie pieces, and chill the mixture in the freezer before you proudly serve and enjoy your scoops!
Step 1. Crush Chocolate Sandwich Cookies
Start by gathering your chocolate sandwich cookies, as they’ll provide the delicious crunch and rich flavor your ice cream needs. You’ll want to use about 20 to 24 cookies for a balanced taste.
Once you’ve got your cookies, get ready to crush them! You can place them in a sturdy zip-top bag, seal it well, and use a rolling pin to break them into smaller pieces. It’ll be satisfying to hear that crunching sound, and you’ll love seeing the cookie bits coming together.
Alternatively, if you prefer a quicker method, you can pulse the cookies in a food processor. Just be careful not to overdo it; you want some chunks left for that delightful texture in your ice cream. Aim for a mix of fine crumbs and larger pieces to keep it interesting.
As you crush the cookies, the aroma will fill your kitchen, making it hard to resist sneaking a taste. Remember, a little nibble won’t hurt!
Once you’re done, set your crushed cookies aside, as they’ll soon add that iconic cookies and cream flavor to your homemade ice cream. Enjoy the process, and get ready for the next delicious step!
Step 2. Mix Cream and Sugar
Combine the cream and sugar in a mixing bowl to create a rich and flavorful base for your ice cream. This step is essential, as it sets the foundation for the velvety texture and sweetness that you’ll soon enjoy.
Start by measuring out your heavy cream and granulated sugar, then pour them into the bowl.
Now, it’s time to whip things up! Use an electric mixer or a whisk to blend the ingredients thoroughly until the sugar dissolves completely. Make sure to mix it until it’s smooth and creamy, with a slight fluffiness.
Here are some tips to help you succeed:
- Use cold cream for a quicker and easier mixing process.
- Adjust the sugar amount based on your preferred sweetness level.
- Whip until smooth, avoiding over-mixing, which can change the texture.
- Taste it! A quick taste can help you decide if it needs more sweetness.
- Keep everything chilled to maintain the creamy consistency.
Once you’ve achieved a delightful mixture, you’re one step closer to creating delicious cookies and cream ice cream.
Enjoy this process—your homemade treat awaits!
Step 3. Fold in Cookie Pieces
Gently fold in the cookie pieces to your cream mixture, ensuring they’re evenly distributed throughout. This step is essential for achieving that classic cookies and cream flavor you love!
Grab a spatula and use a gentle motion to lift and turn the mixture. You want to incorporate the cookie chunks without breaking them too much—those delightful bites of cookie will add an incredible texture to your ice cream.
As you fold, the creamy base will start to take on an enticing speckled appearance, blending the colors of the white cream with the rich black of the cookie bits.
Make sure each spoonful of ice cream will have those irresistible cookie pieces waiting for you. Feel free to adjust the amount of cookies according to your taste; some folks love a lot, while others prefer just a hint.
Step 4. Chill Mixture in Freezer
After incorporating the cookie pieces into your cream mixture, it’s time to chill everything in the freezer. This essential step not only firms up your ice cream but enhances the flavors, making every scoop an indulgent delight.
Pour your heavenly mixture into an airtight container, ensuring it’s tightly sealed to prevent ice crystals from forming.
Pop that container into the freezer and let it chill for about 4 to 6 hours, or until it’s firm to your liking.
While you wait, here are a few tips to make the most of your chilling time:
- Clean Up: Tackle the mess in the kitchen. A tidier space makes the waiting more enjoyable!
- Plan a Movie Night: Gather some friends and pick your favorite flick to enjoy when the ice cream’s ready.
- Prepare Toppings: Think about what toppings you might want—drizzles, nuts, or extra cookie crumbles?
- Set the Mood: Create a cozy atmosphere for when it’s time to savor your homemade treat.
- Snap a Photo: Trust me, you’ll want to share your delicious creation on social media!
Soon enough, you’ll be ready to indulge in the fruits of your labor!
Step 5. Serve and Enjoy Scoops
Once your ice cream has reached the perfect firmness, it’s time to scoop and savor every bite. Grab your favorite ice cream scooper, and make sure it’s warmed up a bit under hot water for easier scooping. This little trick will help you create those beautiful, round scoops that everyone loves.
Start by generously filling your bowls or cones. Don’t be shy! Cookies and cream ice cream is all about indulgence. Each scoop should reveal chunks of crunchy cookies mixed with that rich, creamy ice cream.
As you serve, consider adding a drizzle of chocolate or fudge sauce for an extra touch of sweetness. Feel free to garnish each serving with crushed cookies on top. This not only looks fabulous but also adds a delightful crunch.
If you’re feeling adventurous, a dollop of whipped cream elevates the experience to another level.
Once served, invite your friends or family to join you in this tasty celebration! Ice cream is best enjoyed in good company, so share the joy of homemade cookies and cream.
With every delightful bite, you’ll appreciate the effort you put into crafting this delicious treat. Enjoy each scoop to the fullest!
Final Thoughts
As you savor each creamy bite of your homemade cookies and cream ice cream, you’ll realize how rewarding it’s to create a treat that rivals store-bought versions. This delightful recipe not only satisfies your sweet tooth but also gives you a chance to impress your friends and family.
You’ll love every moment spent making it, from crumbling the cookies to blending the creamy mixture.
To fully enjoy your cookies and cream adventure, consider these tips:
- Experiment with different cookies: Use various flavors like mint or peanut butter for a unique twist.
- Pair it with other desserts: Drizzle chocolate sauce or serve it with warm brownies.
- Make it a family affair: Get everyone involved in the mixing and scooping process.
- Store leftovers properly: Keep your ice cream in an airtight container to maintain its creamy texture.
- Create fun toppings: Sprinkles, whipped cream, or more crushed cookies can elevate your treat.
The joy of making your ice cream at home is unmatched.
Frequently Asked Questions
Can I Use Store-Bought Cookies for This Recipe?
Absolutely, you can use store-bought cookies! Just crush them up and mix them into your creation. It saves time while still delivering delicious flavor. So go ahead and enjoy your treat without the hassle!
What Type of Cream Works Best for Ice Cream?
For making ice cream, you’ll want to use heavy cream or whipping cream. These types provide rich texture and flavor, ensuring your ice cream turns out creamy and delicious. Don’t skimp on quality!
How Do I Store Leftover Ice Cream Properly?
Did you know that ice cream can lose its quality after just two weeks in the freezer? To store leftovers properly, keep them in an airtight container, and make sure it’s tightly sealed to prevent freezer burn.
Can I Make This Recipe Dairy-Free?
Absolutely, you can make this recipe dairy-free! Just substitute traditional dairy ingredients with plant-based alternatives, like coconut milk or almond milk, and use dairy-free cookie options. It’ll still be delicious and creamy!
How Long Does Homemade Ice Cream Last in the Freezer?
Homemade ice cream usually lasts about two to three weeks in the freezer. After that, it may lose texture and flavor. Keep it airtight to help maintain its quality during storage. Enjoy your treat!
