Halloween Monster Cupcakes Recipe
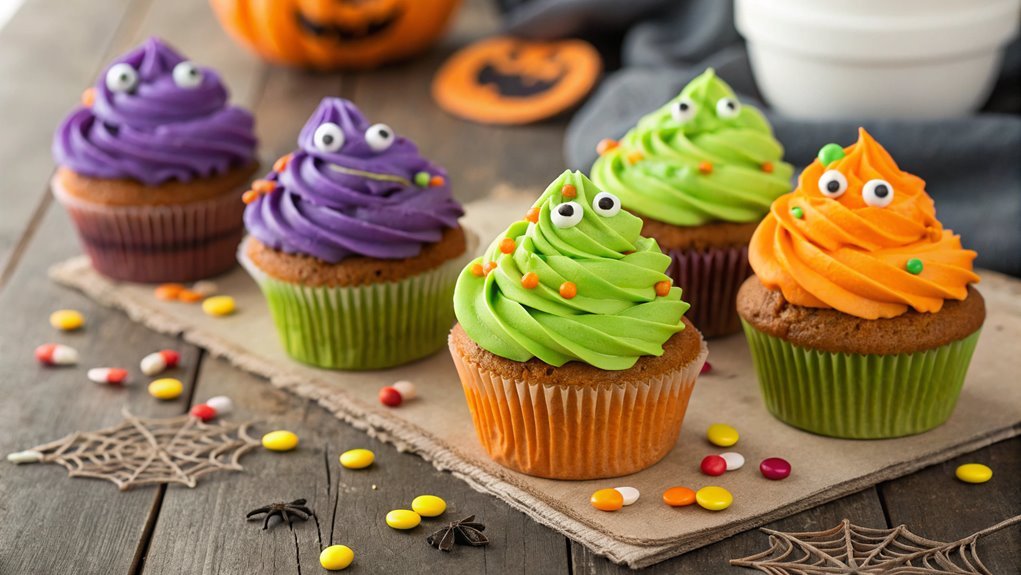
Halloween ranks as the second-largest commercial holiday in the U.S., right after Christmas, presenting numerous creative culinary opportunities. Instead of buying store-bought treats, why not make your own Halloween Monster Cupcakes? They are a fun and flavorful way to impress guests or enjoy with family. Want to turn ordinary cupcakes into festive monsters? Let’s explore the steps to create these delightful treats.
Recipe
Get ready to scare up some fun with these Halloween Monster Cupcakes! Perfectly spooky and delicious, these cupcakes aren’t only a treat for the taste buds but also a feast for the eyes.
With vibrant colors, playful decorations, and an easy-to-follow recipe, you can whip up a batch of these ghoulish delights to impress your friends and family at any Halloween gathering or festive celebration.
These cupcakes are moist and flavorful, setting the stage for a delightful monster-inspired decoration. Whether you decide to use store-bought cake mix or bake from scratch, the real magic happens when you let your creativity shine through with the frosting and toppings.
From googly eyes to colorful sprinkles, the only limit is your imagination! Gather your ingredients and get ready to create monstrous masterpieces that will be the highlight of your spooky festivities.
Ingredients:
- 1 box of chocolate or vanilla cake mix
- 3 large eggs
- 1 cup water or milk (as per package instructions)
- 1/2 cup vegetable oil
- 1 batch of buttercream frosting (store-bought or homemade)
- Green, purple, and orange food coloring
- Assorted candy eyes
- Mini marshmallows
- Colored sprinkles (optional)
- Cupcake liners
- Cupcake baking tray
Now let’s move on to the cooking steps.
Cooking Steps
Let’s get started on those spooky Halloween Monster Cupcakes!
First, you’ll want to preheat your oven to 350°F to get it nice and warm for baking.
Then, as you mix the batter with vibrant food coloring, you’ll feel the excitement building—soon, you’ll have some deliciously fun treats to decorate!
Step 1. Preheat the Oven to 350°F
Preheating your oven to 350°F is an essential step that guarantees your Halloween monster cupcakes bake evenly and achieve that perfect rise. This temperature is ideal for most cupcake recipes, allowing them to fluff up beautifully without burning.
When you start this process, set your oven to 350°F right away. It needs a few minutes to reach that sweet spot, so you’ll want to do this as the first step.
While your oven does its thing, you can gather your cupcake liners and papers, prepping the pans for those delightful treats. Just think about how amazing your kitchen will smell once those monstrous cupcakes are baking!
You’ll also want to keep an eye on the timer, as it can take a few moments for the oven to fully preheat.
Once it’s ready, the oven will signal its readiness, and you’ll know it’s time to get those delectable cupcakes in there. Trust me, that warm oven air is key to achieving a tender crumb and even cooking.
Step 2. Mix Batter With Food Coloring
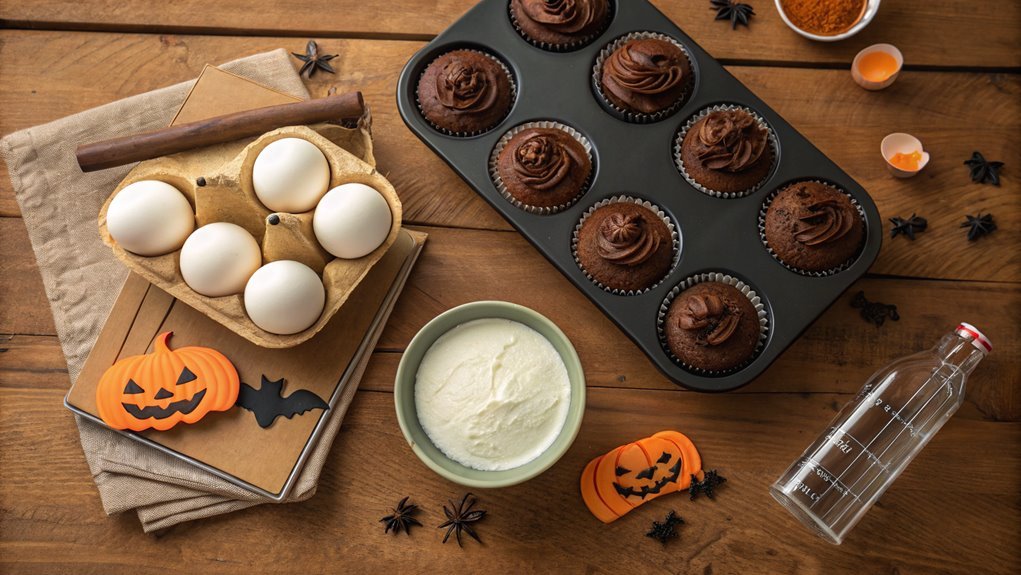
Now that your oven is preheated and ready, it’s time to mix in some fun color to your cupcake batter. Grab your mixing bowl and the prepared batter you made earlier. Depending on your monster cupcake theme, consider bright colors like green, purple, or orange. If you want a spooky twist, even deep reds can add to the effect!
Start by adding a few drops of food coloring to your batter. Remember, it’s easier to add more color than to take it away! Use a spatula to gently fold the color into the batter. As you mix, watch for the delightful transformation. Keep stirring until the color is evenly distributed. You want to see a vibrant, eye-catching hue that’ll excite your guests.
If you’re feeling adventurous, you can create swirls by not mixing the food coloring completely. This technique offers a cool, marbled effect when you bake.
Once your batter is the perfect color, it’s ready for the next steps. Just imagine how these colorful cupcakes will stand out on your Halloween table! Now, let’s get ready to top them off with some fun monster decorations!
Step 3. Add Monster Toppers Decoratively
Once your cupcakes are baked and cooled, it’s time to release your creativity with monster toppers. Begin by gathering all your supplies—fondant, candy eyes, and colorful sprinkles. These will help you craft the most whimsical monsters your guests will adore.
Start with the frosting; generously spread it on each cupcake. Try using different colors for a fun, festive look!
Next, take pieces of fondant and shape them into monster features like ears, horns, or even tentacles. Mold them to your liking and place them directly onto the frosted surface. If you’re feeling adventurous, you can create little mouths using colored icing or edible markers!
Don’t forget the eyes—they’re essential for any monster! Place candy eyes on top of your frosted creations to give them personality. For extra flair, sprinkle some colorful toppings around the base of the cupcake.
Let your imagination run wild! The more unique and colorful these toppers are, the more your cupcakes will pop! From spooky to silly, you’ll impress everyone with these monster masterpieces that are sure to be the talk of the party.
Happy decorating!
Step 4. Bake Cupcakes for 20 Minutes
After you’ve decorated your cupcakes with fun monster toppers, it’s time to focus on the baking process. Preheat your oven to 350°F (175°C) to guarantee it’s hot and ready.
Then, place your filled cupcake liners in the oven, making sure there’s enough space for the air to circulate. As the cupcakes begin to bake, the delicious aroma will start to fill your kitchen, creating a delightful atmosphere.
Set your timer for 20 minutes, and don’t forget to check on them halfway through. You can do this by gently opening the oven door. You want your cupcakes to rise beautifully and turn a lovely golden brown.
Once the timer dings, use a toothpick to test their doneness. Insert it into the center of a cupcake; if it comes out clean, they’re ready to come out. Carefully remove them from the oven and place them on the counter.
This baking step is essential for achieving light, fluffy cupcakes that perfectly complement your spooky decorations. Enjoy the process, because soon you’ll have a batch of monster cupcakes ready to impress! Happy baking!
Step 5. Cool Cupcakes on Wire Rack

To achieve the best texture for your cupcakes, cool them on a wire rack for about 10 to 15 minutes. This vital step allows the air to circulate around all sides of each cupcake, preventing them from becoming soggy on the bottom.
As soon as your timer goes off, carefully remove the cupcake tin from the oven and set it on a heat-resistant surface.
Using oven mitts, gently lift the cupcakes from the pan and place them onto the wire rack. Be careful here; they’ll be hot! Give each one a little twist to make certain they come out easily.
Let them cool completely before decorating. It’s important because warm cupcakes can melt your frosting, turning what should be fun creations into a gooey disaster.
While you wait, take a moment to admire your handiwork! You’ve put in the effort, and the smell wafting through your kitchen is incredible.
Once they’re completely cool, you get to release your creativity with icing and toppings. So grab your spookiest embellishments, and let’s transform these cupcakes into Halloween monsters that are sure to impress!
Enjoy the process, and remember, it’s all about the fun you create.
Final Thoughts
As you wrap up your journey into creating Halloween monster cupcakes, keep in mind that the fun doesn’t end with the baking.
These delightful treats are a fantastic way to bring your friends and family together to celebrate the spooky season. Once your cupcakes cool, decorating them is an adventure waiting to happen. Release your creativity! You can use colorful frosting, edible eyes, and candy pieces to turn each cupcake into a masterpiece.
Don’t forget, presentation counts! Arrange your cupcakes on a spooky platter or place them in festive liners to add to the Halloween vibe. You could even host a cupcake decorating party; it’s a fantastic way to bond with loved ones while enjoying some sweet treats.
Frequently Asked Questions
Can I Use Gluten-Free Flour for the Cupcakes?
Yes, you can use gluten-free flour for the cupcakes! Just make sure to choose a good blend and adjust the liquid ingredients if needed. You’ll end up with delicious treats everyone can enjoy!
How Long Do the Cupcakes Last After Baking?
“Time heals all wounds,” but it won’t preserve your cupcakes forever. After baking, they last about three days at room temperature or a week in the fridge. Just make sure to store them in an airtight container!
Is There a Vegan Option for These Cupcakes?
Yes, you can definitely make vegan cupcakes! Substitute dairy ingredients with plant-based alternatives, like almond milk or coconut oil, and use flaxseed or applesauce instead of eggs. You’ll still enjoy deliciously moist cupcakes!
Can I Freeze the Cupcakes for Later Use?
Like little treasures waiting to be uncovered, you can absolutely freeze those cupcakes for later. Just wrap each one tightly to avoid freezer burn, and they’ll be ready whenever you’re craving a sweet treat.
What Can I Substitute for Food Coloring?
If you’re looking for food coloring substitutes, try using natural options like beet juice for red, turmeric for yellow, or spinach puree for green. These alternatives can still give your treats a vibrant touch!
