Sugar-Free Apple Crisp Recipe

For a dessert that satisfies your sweet tooth without added sugar, try a sugar-free apple crisp. This dish combines the tartness of fresh apples with a crunchy oat topping, perfect for any occasion.
Incorporate spices like cinnamon to enhance flavor without affecting health. Customize the recipe to suit personal tastes or dietary needs and explore the surprising combination of ingredients.
Recipe
Indulging in a delicious dessert doesn’t have to mean compromising your health, and this sugar-free apple crisp recipe is proof of that! Combining the natural sweetness of apples with a crunchy, oat-based topping, this dessert is perfect for satisfying your sweet tooth without added sugars.
The use of spices like cinnamon and nutmeg elevates the flavor, making it a comforting dessert that warms the heart and tantalizes the taste buds.
This apple crisp isn’t only simple to make but also customizable to suit your taste preferences. You can use various apples for different flavor profiles and textures. Whether you’re enjoying it on a chilly autumn evening or serving it to guests at a gathering, this sugar-free version doesn’t skimp on taste or satisfaction.
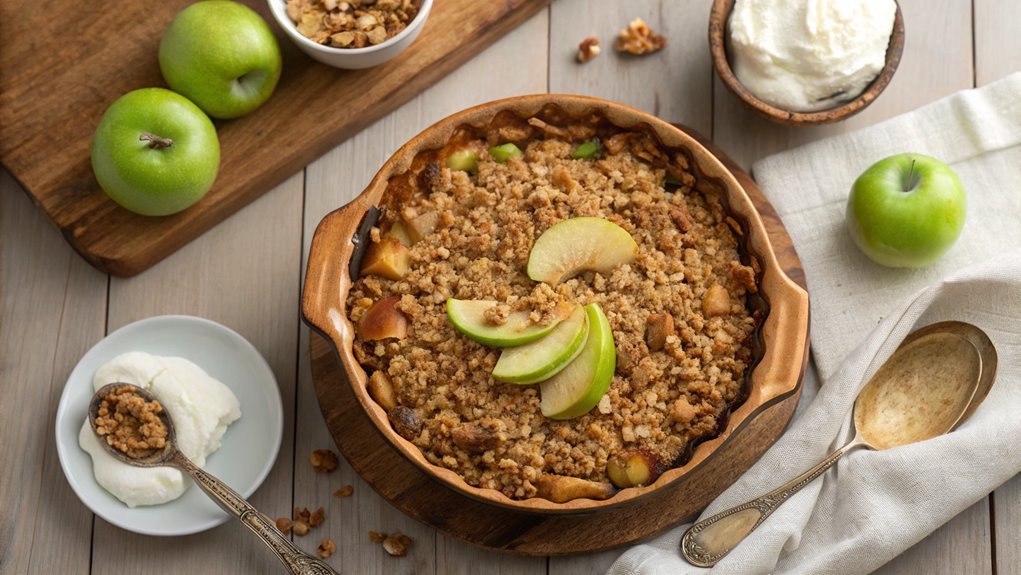
Serve it warm, ideally with a scoop of sugar-free ice cream or a dollop of whipped cream for that extra indulgence!
Ingredients:
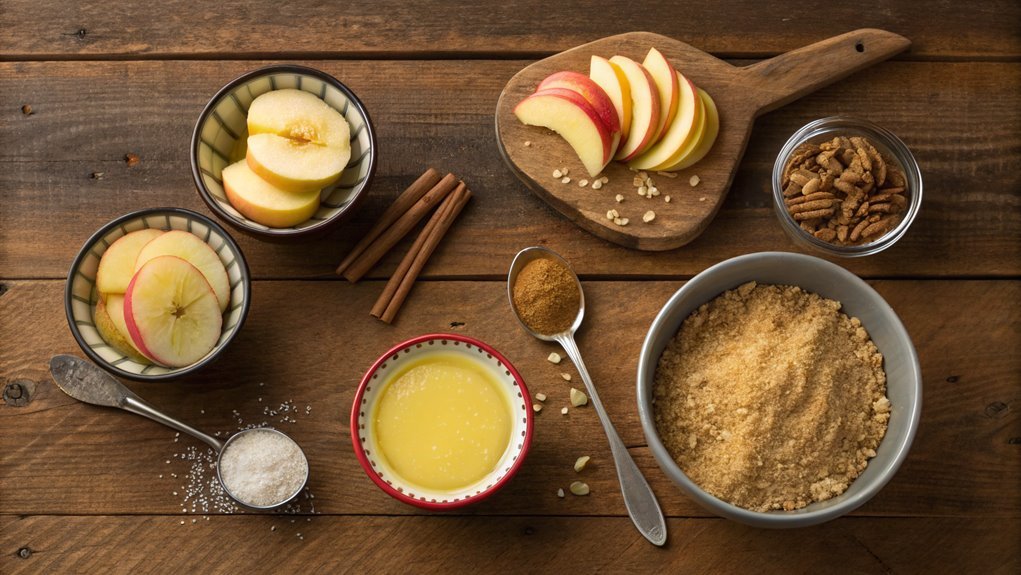
- 4 cups of peeled and sliced apples (such as Granny Smith or Honeycrisp)
- 1 teaspoon of cinnamon
- 1/2 teaspoon of nutmeg
- 1 tablespoon of lemon juice
- 1 cup of rolled oats
- 1/2 cup of almond flour
- 1/4 cup of melted coconut oil or unsalted butter
- 1/4 cup of sugar-free sweetener (like erythritol or stevia)
- 1/4 teaspoon of salt
- Optional: chopped nuts (such as walnuts or pecans) for topping
Now let’s move on to the cooking steps.
Cooking Steps
Get ready to whip up something delightful as we jump into the cooking steps for your sugar-free apple crisp!
First, you’ll preheat your oven to 350°F, setting the stage for that warm, cozy aroma to fill your kitchen.
Next, mix those tart apples with cinnamon, and we’ll add oats and nuts to create a delicious topping that’s sure to impress!
Step 1. Preheat Oven to 350°F
Before you plunge into making your delicious sugar-free apple crisp, it’s vital to preheat your oven to 350°F. This step might seem simple, but it’s essential for ensuring your dessert bakes evenly and becomes the warm, gooey delight you’re craving.
By preheating the oven now, you’ll save time later, letting your apple crisp bake to perfection right when you’re ready to pop it in.
To preheat, just turn your oven dial to 350°F. If you have a digital option, simply press the buttons, and the oven will beep once it reaches the desired temperature.
It usually takes around 10-15 minutes, so feel free to prepare your ingredients while you wait. This is a perfect time to gather your apples, oats, and spices, getting everything organized and at your fingertips.
There’s nothing quite like the anticipation of smelling that warm, cinnamon-scented goodness as it bakes.
Step 2. Mix Apples With Cinnamon

Start by peeling, coring, and slicing your apples into thin wedges. Choosing a nice mix of tart and sweet apples can really elevate the flavor of your crisp.
Once you’ve got your apples ready, toss them in a large mixing bowl. Add a generous sprinkle of cinnamon to the apples; it’s the magic ingredient that brings warmth and comfort to this dish! For an extra hint of sweetness without the sugar, you can add a touch of vanilla extract or some sugar-free sweetener.
Gently mix everything together, ensuring that each apple slice is coated with that glorious cinnamon. As you do this, take a moment to inhale the delicious aroma of the cinnamon blending with the fresh apple scent. It’s truly incredible!
If you’d like, you can also add a squeeze of lemon juice to brighten the flavors, enhancing the overall taste.
Once everything is well mixed, let the apples sit for a few minutes. This allows the spices to soak in, making your apple crisp even more delectable. You’re just a step away from creating a truly mouthwatering dessert that everyone will love!
Step 3. Add Oats and Nuts
As you finish mixing your apples, adding oats and nuts will create that perfect crunchy topping for your apple crisp. Start by measuring about a cup of rolled oats. These not only provide a delightful texture but also help to absorb moisture from the apples, making your crisp even better.
Next, grab your favorite nuts—walnuts, pecans, or almonds work wonderfully. Chop them into small pieces, so they blend well with the oats. About half a cup should do the trick!
In a separate bowl, combine your oats and nuts with a sprinkle of cinnamon and a bit of melted coconut oil or butter. This will give your topping a delicious flavor and help it crisp up beautifully.
Mix everything together until the oats and nuts are coated well. You’ll love the aroma wafting through your kitchen!
Now it’s time for the fun part! Layer this scrumptious oat-nut mixture over your apple filling. The combination of the sweet, cinnamon-flavored apples and the rich, crunchy topping will make your taste buds dance.
Trust me, this step is what turns a simple apple dish into a mouthwatering dessert masterpiece!
Step 4. Sprinkle Topping Evenly Over Apples
Evenly sprinkling the oat-nut topping over your apples is essential for achieving a perfectly baked crisp. This step guarantees every bite bursts with flavor and that delightful crunch we all crave.
Start by taking a handful of the mixture and gently spreading it over the apples. You want to cover the surface well, so it’s worth taking your time here.
As you sprinkle, think about creating a nice, even layer that will bake beautifully. Tilt the bowl if necessary, allowing the topping to fall in a light, airy manner. It’s tempting to dump it all in one spot, but resist that urge! Instead, let it cascade over the apples, filling any gaps. This way, you’ll avoid dry spots that won’t get that delicious golden finish.
Once you’ve covered the apples evenly, take a moment to admire your handiwork. You’re just a few steps away from a warm, comforting dessert that fills your kitchen with heavenly aromas.
With your topping in place, you’re well on your way to impressing family and friends. Get excited! You’re creating something special that everyone will love. Just wait until you see the results!
Step 5. Bake for 30 Minutes

After you’ve sprinkled the topping over the apples, it’s time to pop your dish into the oven and bake for 30 minutes. Set your oven to 350°F (175°C) if you haven’t already. This step is essential, as it allows the apples to soften beautifully while the topping gets that delightful golden-brown crispness you’re aiming for.
As the dish bakes, savory aromas will start to fill your kitchen, making it hard to resist sneaking a taste! Keep an eye on it near the end of the baking time. You want the topping to be just right—not too soft but deliciously crunchy. The smell alone will have your family gathering in the kitchen, excitedly awaiting dessert.
When the timer goes off, carefully remove your dish from the oven. Let it cool for a few minutes before you serve it. This won’t only help set the filling but also keep you from burning your mouth on the steamy goodness.
Once it’s slightly cooled, scoop generous portions into bowls and enjoy this healthy, sugar-free treat. You’ve earned it, and your taste buds will thank you! Happy baking!
Final Thoughts
Though you might be looking for a healthier dessert option, this sugar-free apple crisp proves that indulgence doesn’t have to mean sacrificing flavor. With its sweet, tender apples and crumbly topping, this delectable treat satisfies your cravings while keeping your sugar intake in check.
You’ll love how easy it’s to make—just slice some apples, mix in a few simple ingredients, and pop it in the oven. This recipe is perfect for gatherings or simply for a cozy night at home.
Each bite offers the comforting flavors of cinnamon, nutmeg, and warm apples, making it a fantastic dessert for any occasion. What’s great is that you can customize it to suit your taste—add in your favorite nuts or swap out apples for pears if you’d like!
You’ll impress family and friends with your cooking skills, all while offering them a guilt-free dessert they’ll adore. So, roll up your sleeves, grab those apples, and plunge into creating this delightful dish.
You won’t regret it! The satisfaction of making something wholesome and delicious will inspire you to keep exploring healthy dessert options. Enjoy the journey—happy cooking!
Frequently Asked Questions
Can I Substitute Apples With Other Fruits in This Recipe?
You can substitute apples with other fruits like pears, peaches, or berries. Just keep in mind that different fruits might alter the flavor and texture, so adjust baking time as needed for best results.
How Can I Make This Recipe Gluten-Free?
Transforming your recipe into a gluten-free delight is easy! Swap out regular flour for almond or oat flour, and guarantee any added ingredients are certified gluten-free. Enjoy every bite without compromising taste or texture!
What Is the Best Way to Store Leftovers?
To store leftovers effectively, you’ll want to let them cool completely, then transfer them to an airtight container. Keep them in the fridge for up to five days, or freeze for longer storage.
Can I Freeze Sugar-Free Apple Crisp?
Yes, you can freeze it. Just let it cool completely, then cover it tightly in an airtight container or freezer bag. When you’re ready to enjoy, simply thaw and reheat as needed.
How Long Will It Last in the Refrigerator?
It’ll last about 3 to 5 days in your refrigerator. Make sure you store it in an airtight container to keep it fresh. Enjoy your dessert while it’s at its best flavor!


